RQT5414-B
Note:
"EB" on the packaging indicates the United Kingdom.
Before connecting, operating or adjusting this prod-
uct, please read these instructions completely.
Please keep this manual for future reference.
Model No.
SL-PS7
Compact Disc Player
Operating Instructions
EB
RQT5414
2
Dear customer
Thank you for purchasing this product.
For optimum performance and safety, please read these instructions
carefully.
Table of contents
Caution for AC mains lead . . . . . . . . . . . . . . . . . . . . . . . . .
3
Suggestions for safety . . . . . . . . . . . . . . . . . . . . . . . . . . . .
4
Connections . . . . . . . . . . . . . . . . . . . . . . . . . . . . . . . . . . . . . .
5
Concerning the remote control . . . . . . . . . . . . . . . . . . .
5
Controls . . . . . . . . . . . . . . . . . . . . . . . . . . . . . . . . . . . . . . . . . .
6
Sequential play
. . . . . . . . . . . . . . . . . . . . . . . . . . .
7
Direct access play . . . . . . . . . . . . . . . . . . . . . . . . . . . . . . . . .
8
Random play . . . . . . . . . . . . . . . . . . . . . . . . . . . . . . . . . . . . . .
8
Program play . . . . . . . . . . . . . . . . . . . . . . . . . . . . . . . . . . . . .
9
Other CD play functions
Repeat . . . . . . . . . . . . . . . . . . . . . . . . . . . . . . . . . . . . . . . . . . . 10
A-B repeat . . . . . . . . . . . . . . . . . . . . . . . . . . . . . . . . . . . . . . . . 10
Output level control . . . . . . . . . . . . . . . . . . . . . . . . . . . . . . . . . 10
Time fade . . . . . . . . . . . . . . . . . . . . . . . . . . . . . . . . . . . . . . . . . 11
Time mode selection . . . . . . . . . . . . . . . . . . . . . . . . . . . . . . . . 11
Auto cue . . . . . . . . . . . . . . . . . . . . . . . . . . . . . . . . . . . . . . . . . . 12
Peak search . . . . . . . . . . . . . . . . . . . . . . . . . . . . . . . . . . . . . . . 12
CD edit recording . . . . . . . . . . . . . . . . . . . . . . . . . . . . . 13
To listen with headphones . . . . . . . . . . . . . . . . . . . . . . 14
Concerning CDs . . . . . . . . . . . . . . . . . . . . . . . . . . . . . . . . . . 15
Maintenance . . . . . . . . . . . . . . . . . . . . . . . . . . . . . . . . . . . . . . 15
Troubleshooting guide . . . . . . . . . . . . . . . . . . . Back cover
Specifications . . . . . . . . . . . . . . . . . . . . . . . . . . . . Back cover
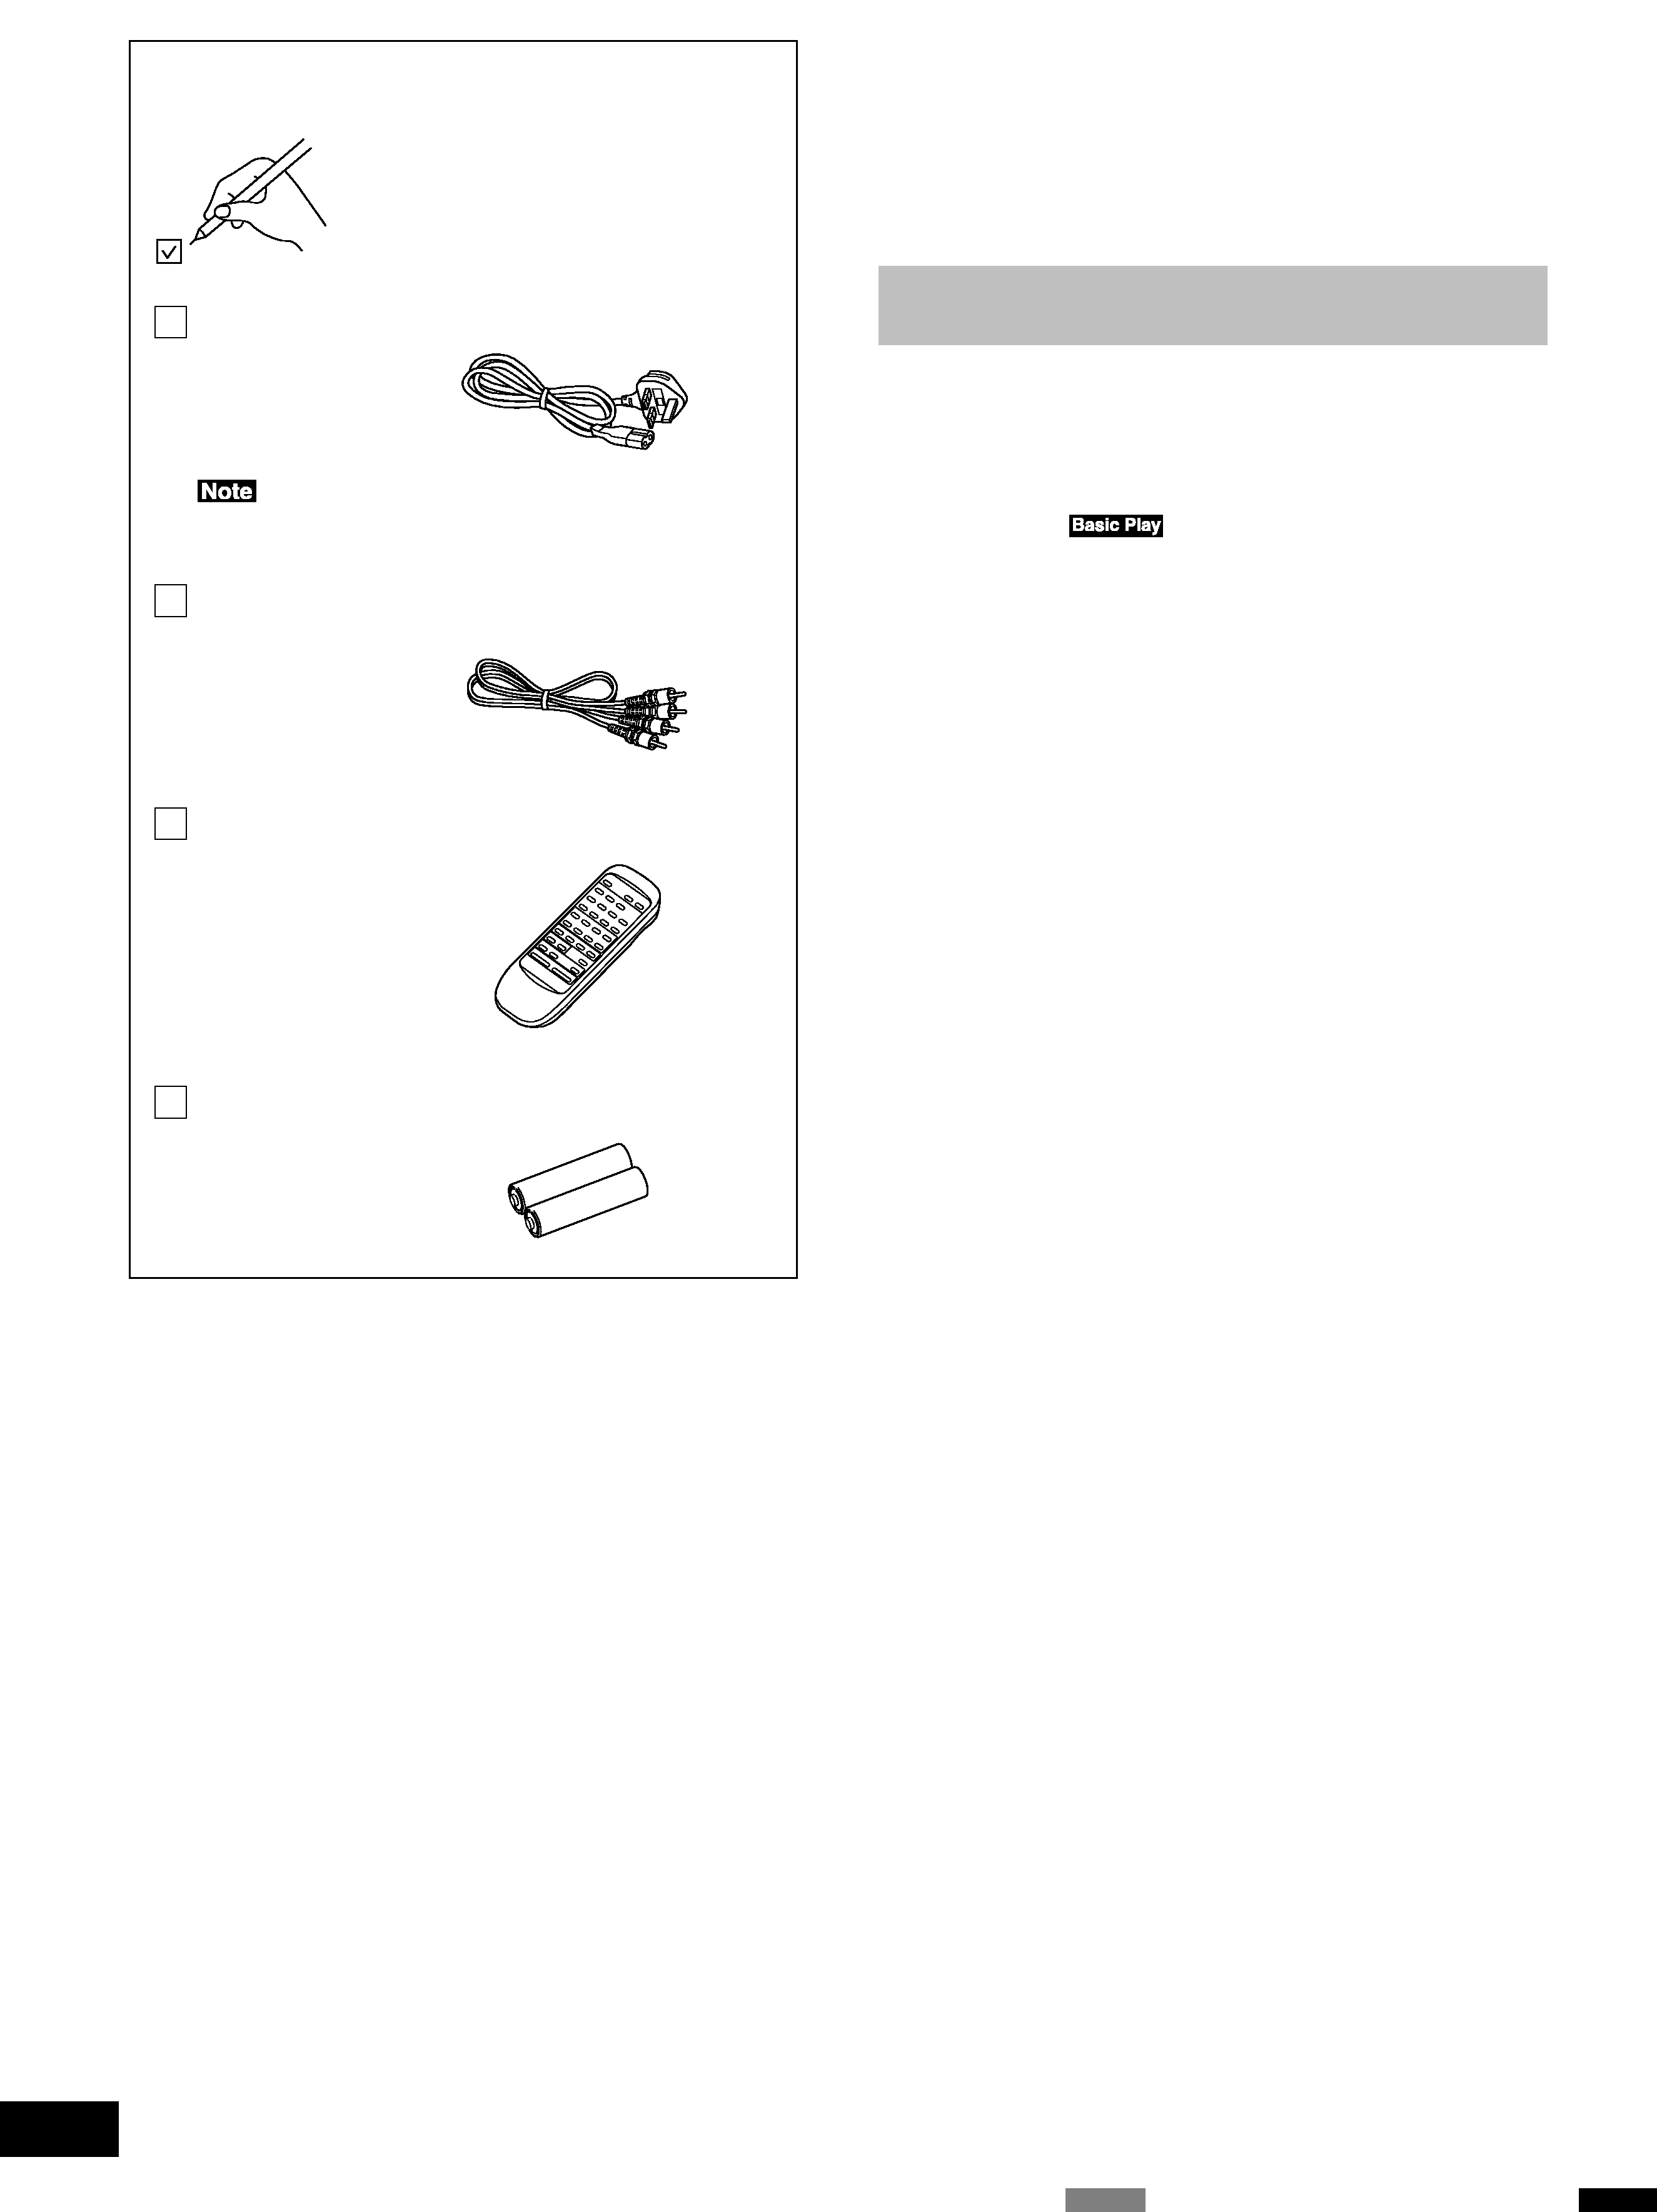
Supplied accessories
Please check and identify the supplied
accessories.
Use numbers indicated in parentheses
when asking for replacement parts.
AC mains lead
. . . . . . . . . . . . . . . . . . . . . . . . . . . . 1 pc.
(RJA0044-3C)
The included AC mains lead is for use with this unit only.
Do not use it with other equipment.
Stereo phono cable (RJL2P004B08A) . . . . . . . . . 1 pc.
Remote control (EUR645275) . . . . . . . . . . . . . . . . 1 pc.
Batteries for remote control . . . . . . . . . . . . . . . . . . 2 pcs.
RQT5414
3
(For United Kingdom)
("EB" area code model only)
For your safety, please read the following text
carefully.
This appliance is supplied with a moulded three pin
mains plug for your safety and convenience.
A 5-ampere fuse is fitted in this plug.
Should the fuse need to be replaced please ensure
that the replacement fuse has a rating of 5-ampere
and that it is approved by ASTA or BSI to BS1362.
Check for the ASTA mark m or the BSI mark o on
the body of the fuse.
If the plug contains a removable fuse cover you must
ensure that it is refitted when the fuse is replaced.
If you lose the fuse cover the plug must not be used
until a replacement cover is obtained.
A replacement fuse cover can be purchased from
your local dealer.
If a new plug is to be fitted please observe the wiring
code as stated below.
If in any doubt please consult a qualified electrician.
IMPORTANT
The wires in this mains lead are coloured in accor-
dance with the following code:
Blue: Neutral, Brown: Live.
As these colours may not correspond with the
coloured markings identifying the terminals in your
plug, proceed as follows:
The wire which is coloured Blue must be connected to
the terminal which is marked with the letter N or col-
oured Black or Blue.
The wire which is coloured Brown must be connected
to the terminal which is marked with the letter L or
coloured Brown or Red.
WARNING: DO NOT CONNECT EITHER WIRE TO
THE EARTH TERMINAL WHICH IS MARKED WITH
THE LETTER E, BY THE EARTH SYMBOL n OR
COLOURED GREEN OR GREEN/YELLOW.
THIS PLUG IS NOT WATERPROOF--KEEP DRY.
Before use
Remove the connector cover.
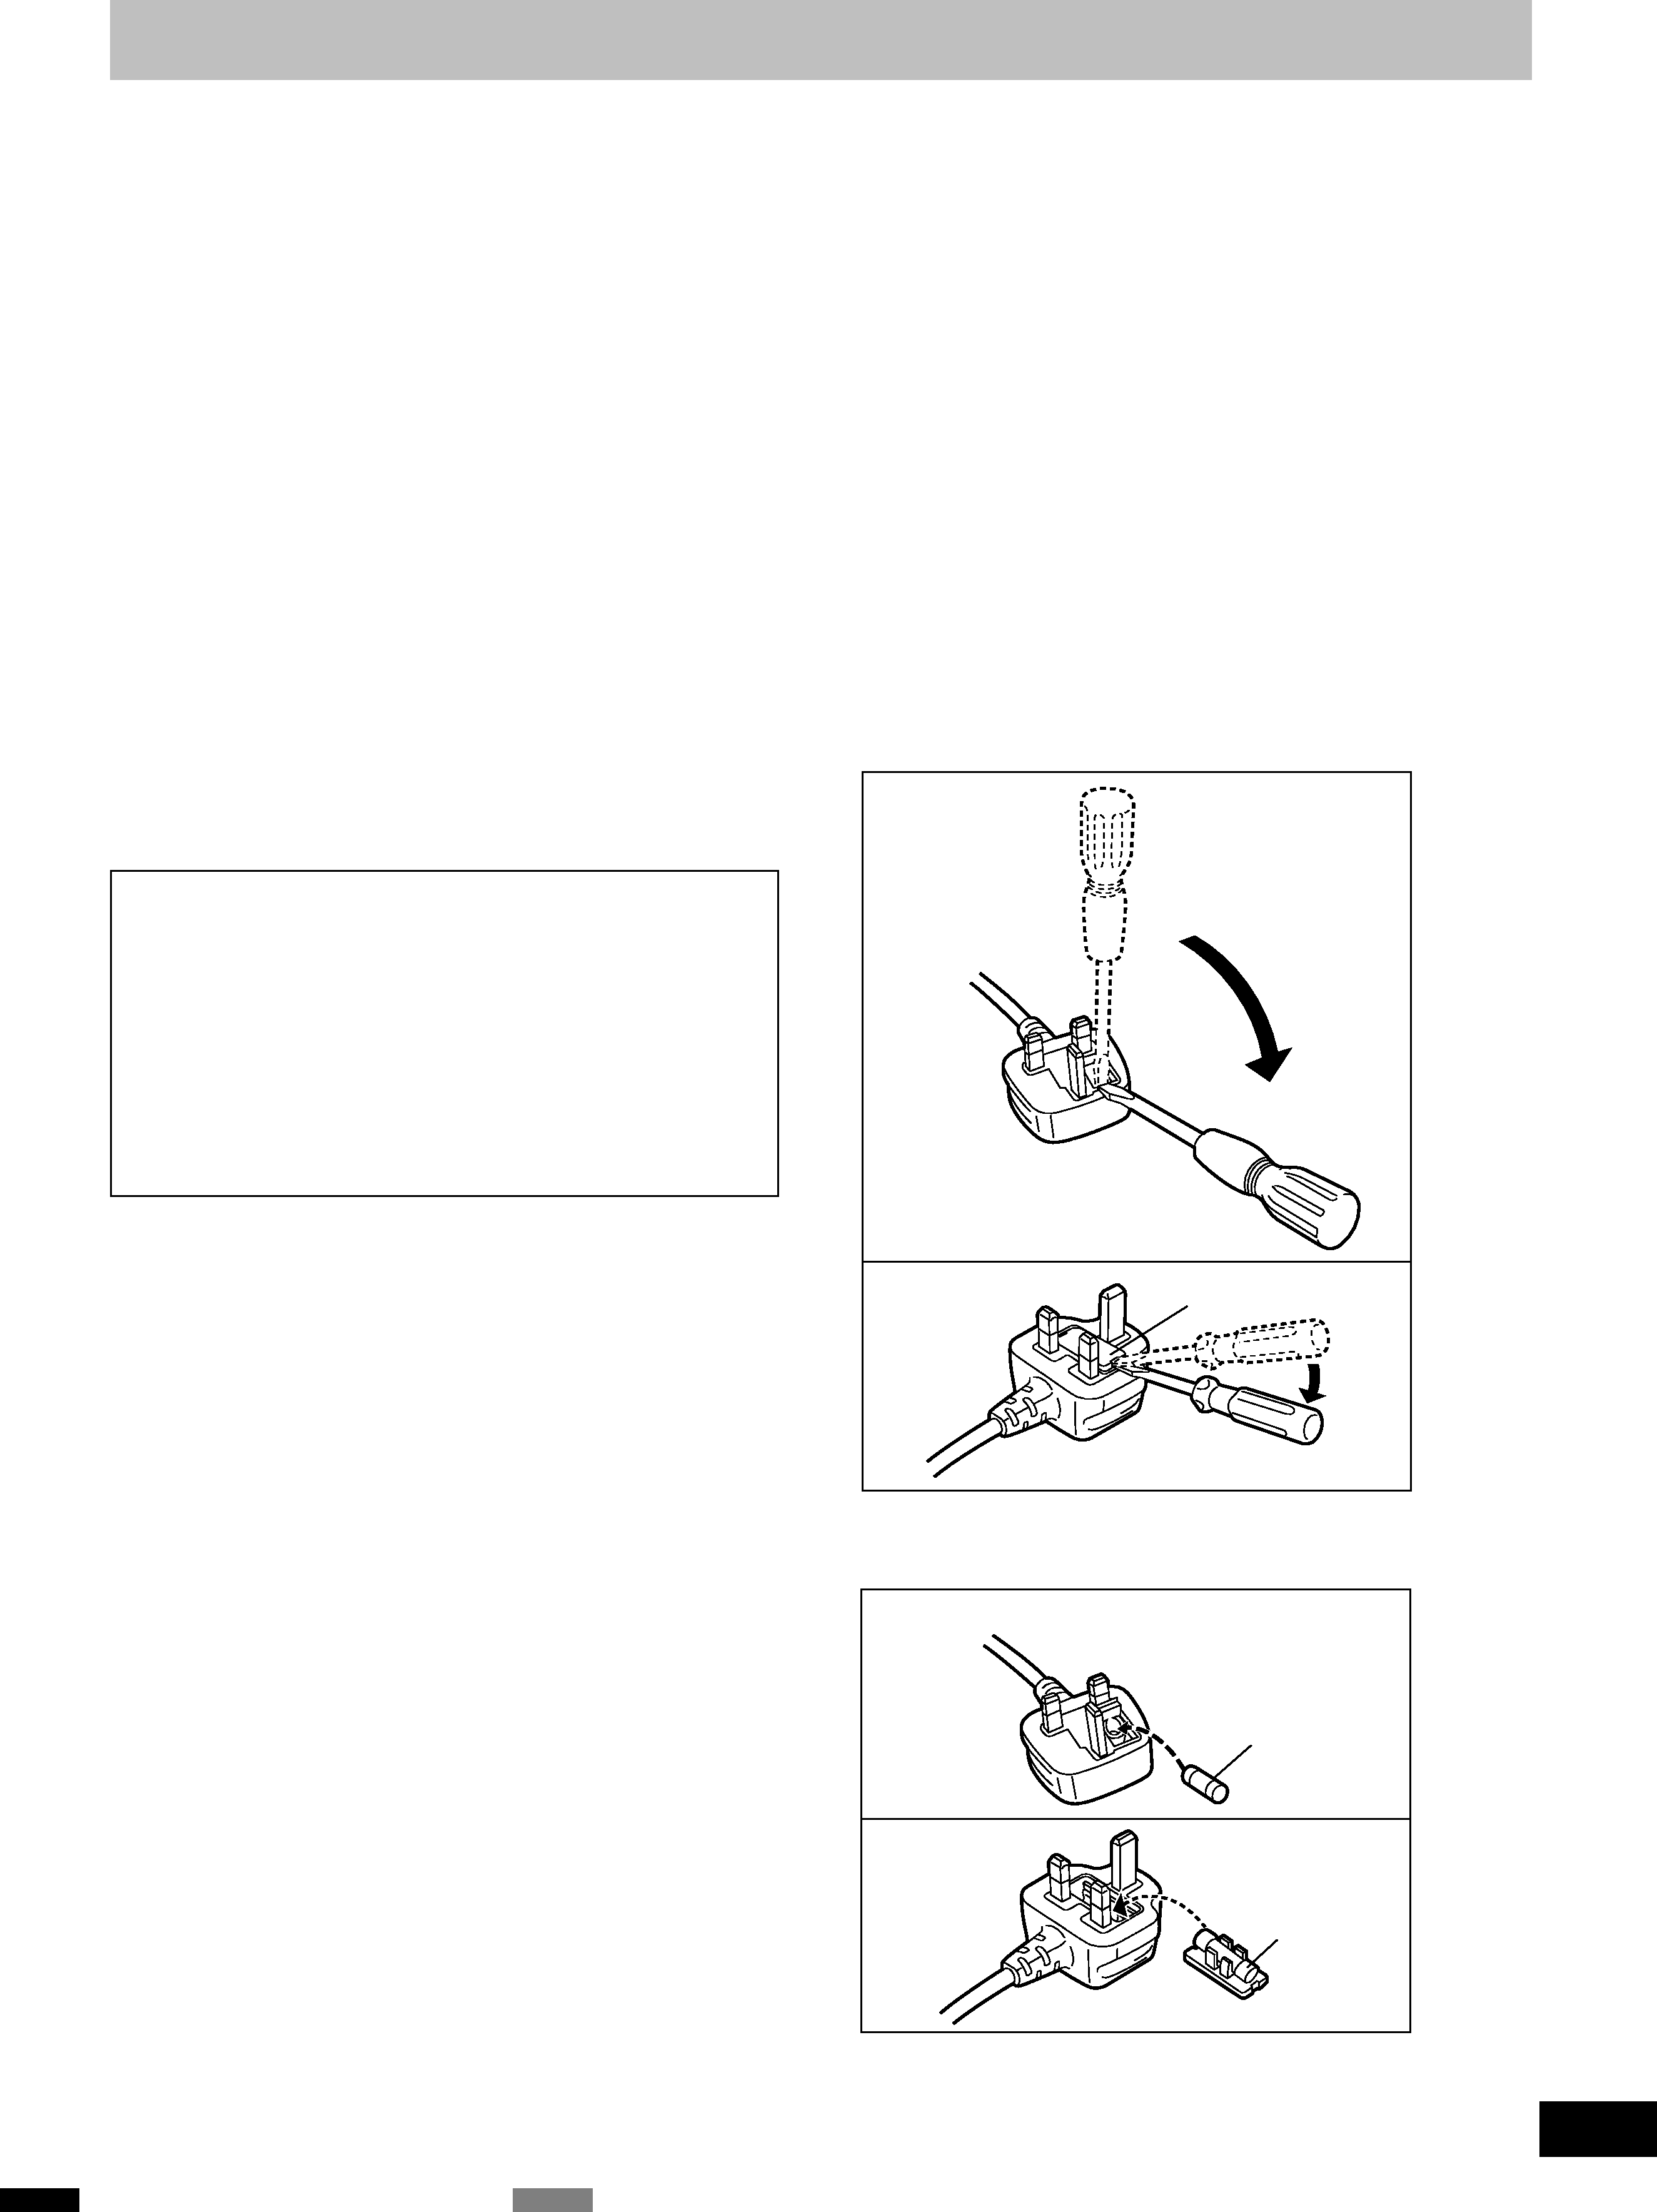
How to replace the fuse
The location of the fuse differ according to the type of
AC mains plug (figures A and B). Confirm the AC
mains plug fitted and follow the instructions below.
Illustrations may differ from actual AC mains plug.
1. Open the fuse cover with a screwdriver.
2. Replace the fuse and close or attach the fuse
cover.
Fuse cover
Figure A
Figure B
Fuse
(5 ampere)
Fuse
(5 ampere)
Figure A
Figure B
CAUTION!
IF THE FITTED MOULDED PLUG IS UNSUIT-
ABLE FOR THE SOCKET OUTLET IN YOUR
HOME THEN THE FUSE SHOULD BE RE-
MOVED AND THE PLUG CUT OFF AND DIS-
POSED OF SAFELY.
THERE IS A DANGER OF SEVERE ELECTRI-
CAL SHOCK IF THE CUT OFF PLUG IS IN-
SERTED INTO ANY 13-AMPERE SOCKET.
Caution for AC mains lead
RQT5414
4
AC IN~
DIGITAL
DIGITAL
OPTICAL
OUT
OUT
RE-MASTER
PROCESSING
L
R
ON OFF
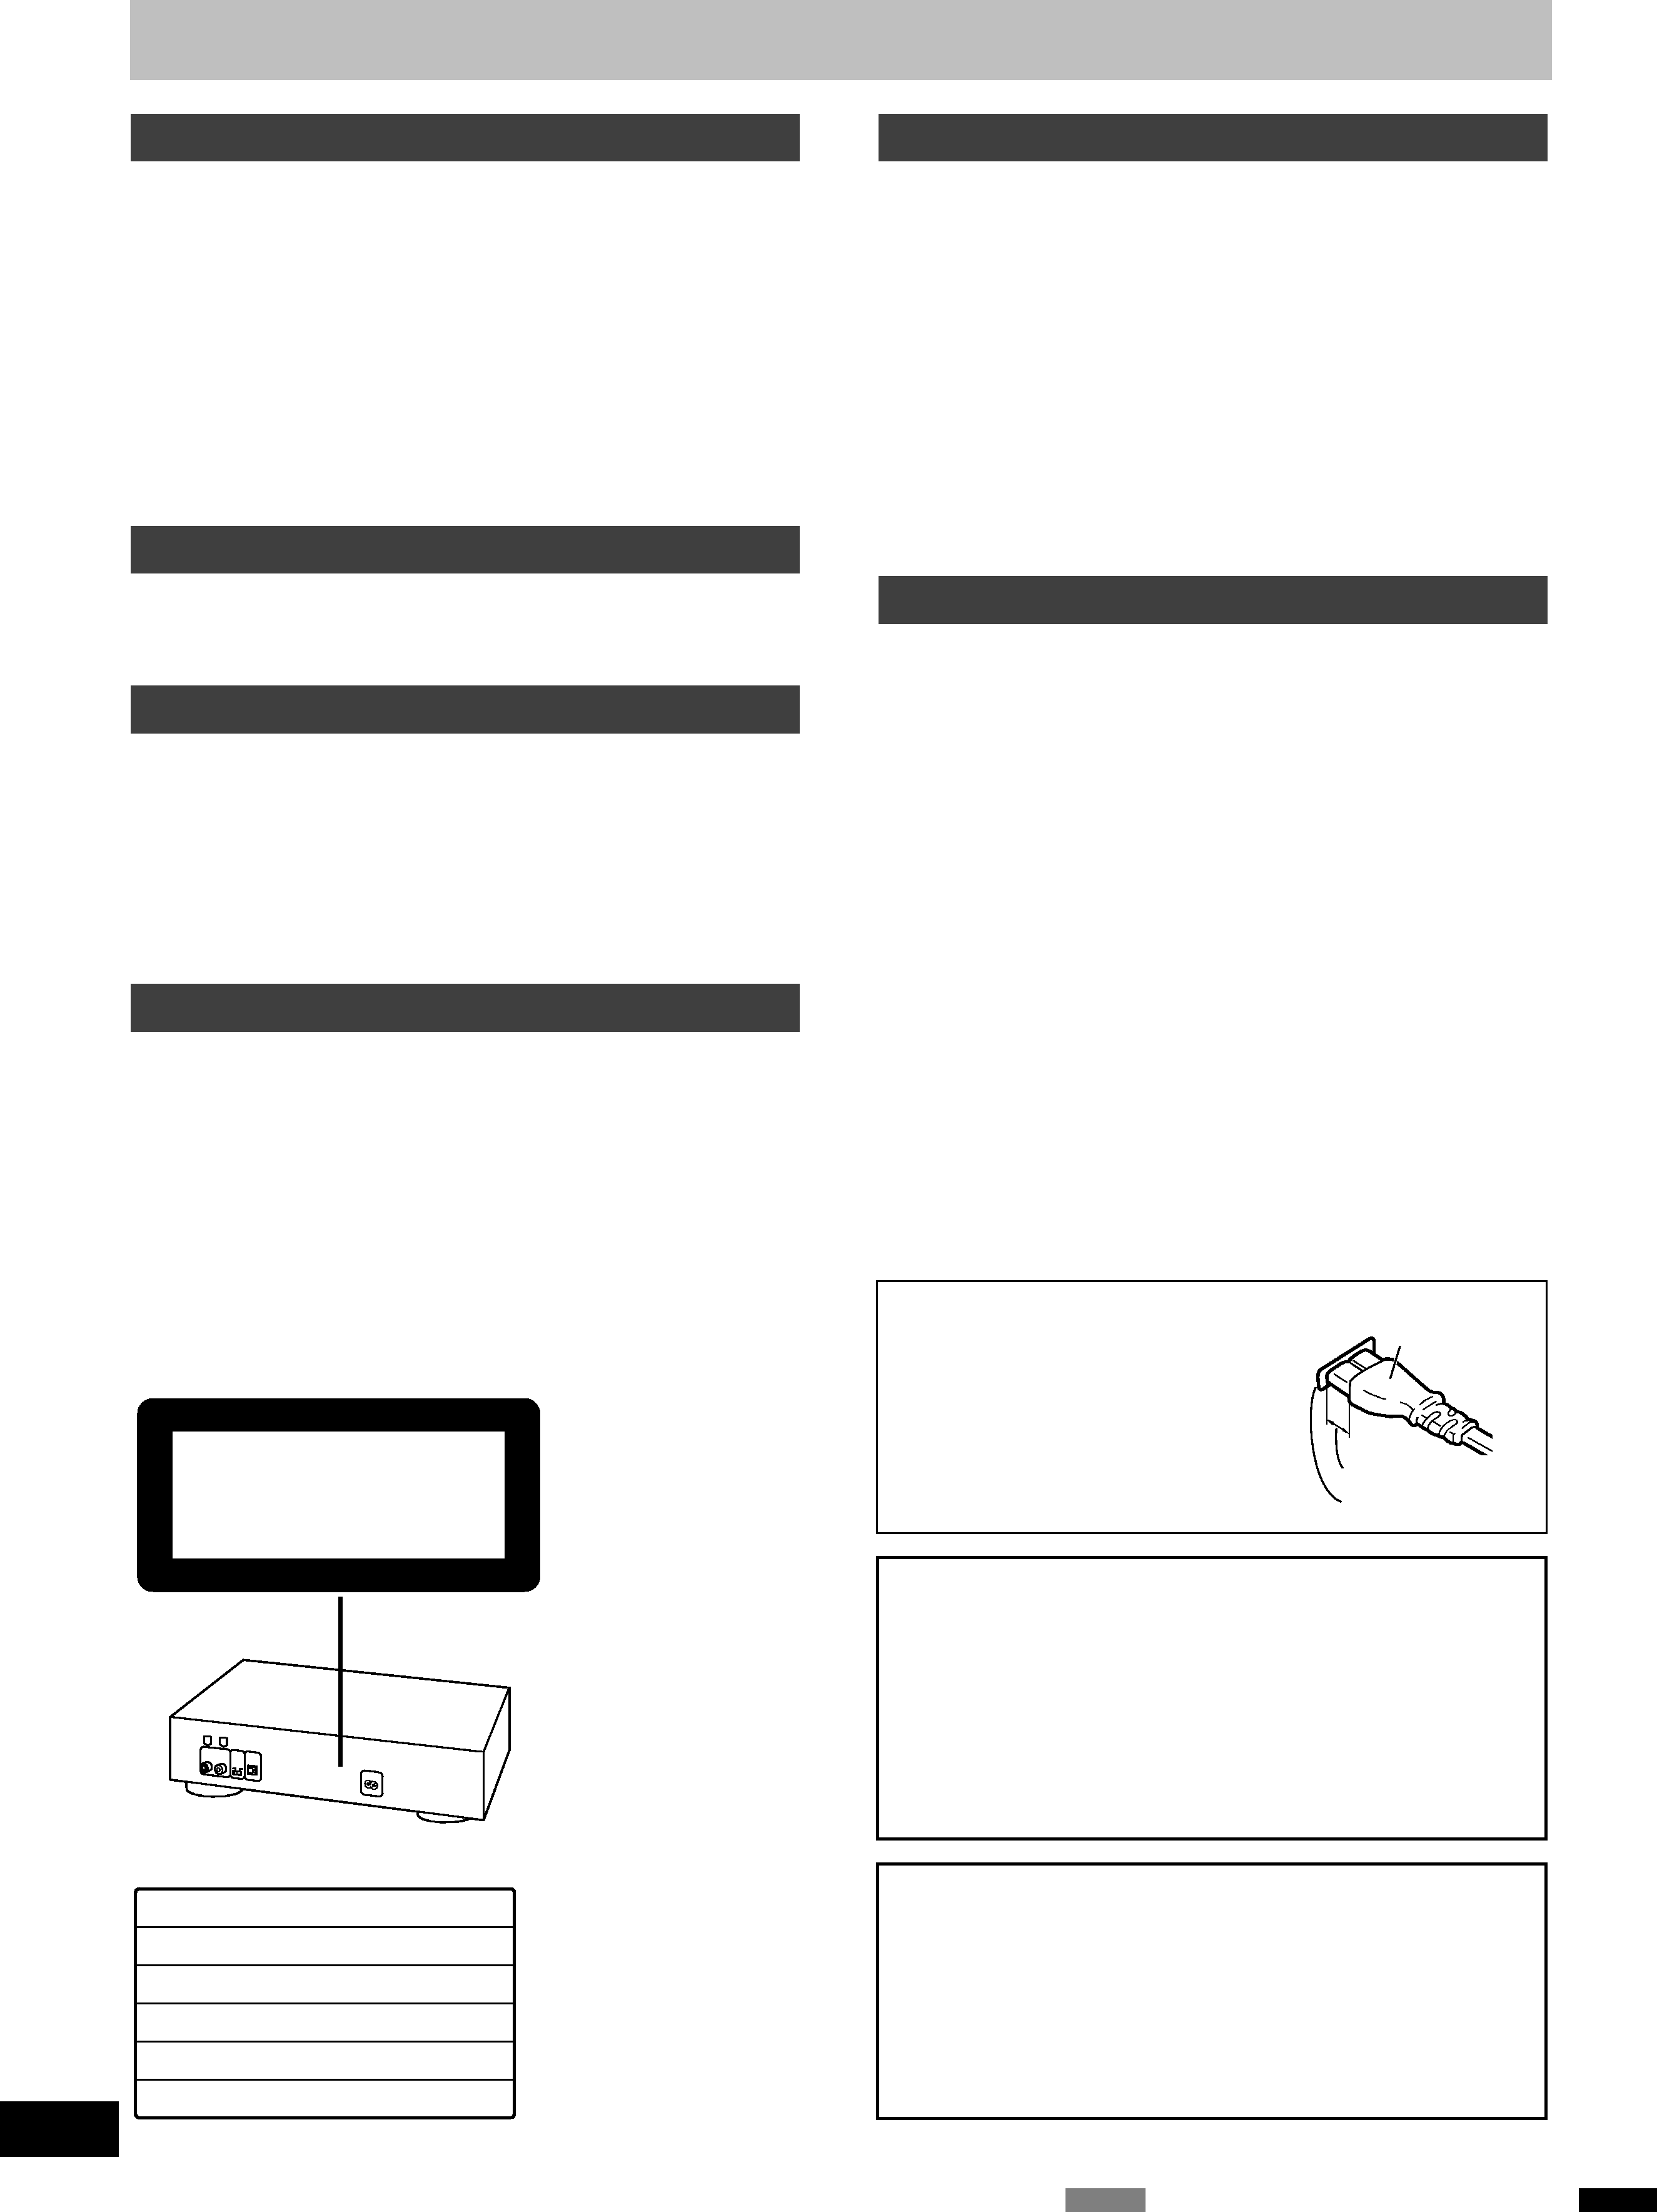
CLASS 1
LASER PRODUCT
(Back of product)
DANGER
INVISIBLE LASER RADIATION WHEN OPEN.
AVOID DIRECT EXPOSURE TO BEAM.
ADVARSEL
USYNLIG LASERSTRÅLING VED ÅBNING, NÅR SIKKERHEDSAFBRYDERE
ER UDE AF FUNKTION. UNDGÅ UDSÆTTELSE FOR STRÅLING.
VARO!
AVATTAESSA JA SUOJALUKITUS OHITETTAESSA OLET ALTTIINA
NÄKYMÄTÖNTÄ LASERSÄTEILYLLE. ÄLÄ KATSO SÄTEESEEN.
VARNING
OSYNLIG LASERSTRÅLNING NÄR DENNA DEL ÄR ÖPPNAD OCH
SPÄRREN ÄR URKOPPLAD. BETRAKTA EJ STRÅLEN.
ADVARSEL
USYNLIG LASERSTRÅLING NÅR DEKSEL ÅPNES OG SIKKERHEDSLÅS
BRYTES. UNNGÅ EKSPONERING FOR STRÅLEN.
VORSICHT
UNSICHTBARE LASERSTRAHLUNG, WENN ABDECKUNG GEÖFFNET.
NICHT DEM STRAHL AUSSETZEN.
(Indersiden at apparatet)
(Tuotteen sisällä)
(Apparatens insida)
(Produktets innside)
(Im Inneren des Gerätes)
(Inside of product)
Suggestions for safety
Placement
Avoid placing the unit in areas of:
·direct sunlight
·high temperature
·high humidity
·excessive vibration
·uneven surfaces (Place the unit on a flat level surface.)
Such conditions might damage the cabinet and/or other component
parts and thereby shorten the unit's service life.
To protect the unit against sound distortion and accoustical effects,
please place the unit at least 15 cm away from wall surfaces etc.
Stacking
Never place heavy items on top of the unit or the AC mains lead.
Voltage
·It is very dangerous to use an AC power source of high voltage such
as for an air conditioner.
A fire might be caused by such a connection.
·A DC power source can not be used.
Be sure to check the power source carefully, especially if on a ship
or other place where DC is used.
AC mains lead protection
·Avoid cuts, scratches or poor connection of the AC mains lead, as
this may result in fire or electric shock.
Excessive bending, pulling or slicing of the AC mains lead should
also be avoided.
·Do not pull on the AC mains lead when you are disconnecting the
power, as this could cause an electric shock. Grasp the plug firmly
when you disconnect the AC mains lead.
·Never touch the plug with wet hands or a serious electric shock
could result.
Foreign materials
·Ensure that no foreign objects, such as needles, coins, screwdriv-
ers etc., accidentally fall into the unit.
Otherwise, a serious electric shock or malfunction could occur.
·Be extremely careful about spilling water or liquid on/into the unit,
as a fire or electric shock could occur.
(Disconnect the power plug and contact your dealer immediately if
this occurs.)
·Avoid spraying insecticides onto the unit as they contain flammable
gases which can be ignited.
·Insecticides, alcohol, paint thinner and similar chemicals shoud never
be used to clean the unit as they can cause flaking or cloudiness to
the cabinet finish.
Service
·Never attempt to repair, disassemble or reconstruct the unit if there
seems to be a problem.
A serious electric shock could result if you ignore this precautionary
measure.
·If a problem occurs during operation (the sound is interrupted, indi-
cators fail to light up, smoke is detected, etc.) contact your dealer or
Authorized Service Center immediately.
·Disconnect the AC mains lead if the unit will not be used for a long
time. Otherwise the operation life could be shortened.
Connector
Approx. 6 mm
appliance inlet
Insertion of connector
Even when the connector is per-
fectly inserted, depending on the
type of inlet used, the front part of
the connector may jut out as
shown in the drawing.
However there is no problem
using the unit.
CAUTION!
THIS PRODUCT UTILIZES A LASER.
USE OF CONTROLS OR ADJUSTMENTS OR PERFORM-
ANCE OF PROCEDURES OTHER THAN THOSE SPECI-
FIED HEREIN MAY RESULT IN HAZARDOUS RADIATION
EXPOSURE.
DO
NOT
OPEN
COVERS
AND
DO
NOT
REPAIR
YOURSELF.
REFER
SERVICING
TO
QUALIFIED
PERSONNEL.
CAUTION!
DO
NOT
INSTALL
OR
PLACE
THIS
UNIT
IN
A
BOOKCASE, BUILT IN CABINET OR IN ANOTHER
CONFINED
SPACE.
ENSURE
THE
UNIT
IS
WELL
VENTILATED. ENSURE THAT CURTAINS AND ANY
OTHER
MATERIALS
DO
NOT
OBSTRUCT
THE
VENTILATION TO PREVENT RISK OF ELECTRIC SHOCK
OR FIRE HAZARD DUE TO OVERHEATING.
RQT5414
5
//
PHONES
PHONES LEVEL
SENSOR
MAX
MIN
EDIT GUIDE
TAPE
LENGTH
SIDE A/B
TIME
FADE
PEAK SERCH
TIME
MODE
AUTO
CUE
OPEN/CLOSE
12345
67890
10
PROGRAM
CLEAR
RECALL
RANDOM
REPEAT
VIRTUAL BATTERY OPERATION
DIGITAL RE-MASTER PROCESSING
PHONES
PHONES LEVEL
SENSOR
MAX
MIN
EDIT GUIDE
TAPE
LENGTH
SIDE A/B
TIME
FADE
PEAK SERCH
TIME
MODE
AUTO
CUE
OPEN/CLOSE
12345
67890
10
PROGRAM
CLEAR
RECALL
RANDOM
REPEAT
VIRTUAL BATTERY OPERATION
DIGITAL RE-MASTER PROCESSING
DIGITAL
OPTICAL
OUT
DIGITAL
INPUT
INPUT
OPTICAL
(R6,AA,UM-3)
30°
30°
L
R
DIGITAL
DIGITAL
OPTICAL
OUT
OUT
AC IN~
L
R
CD
This unit
ON
OFF
RE-MASTER
PROCESSING
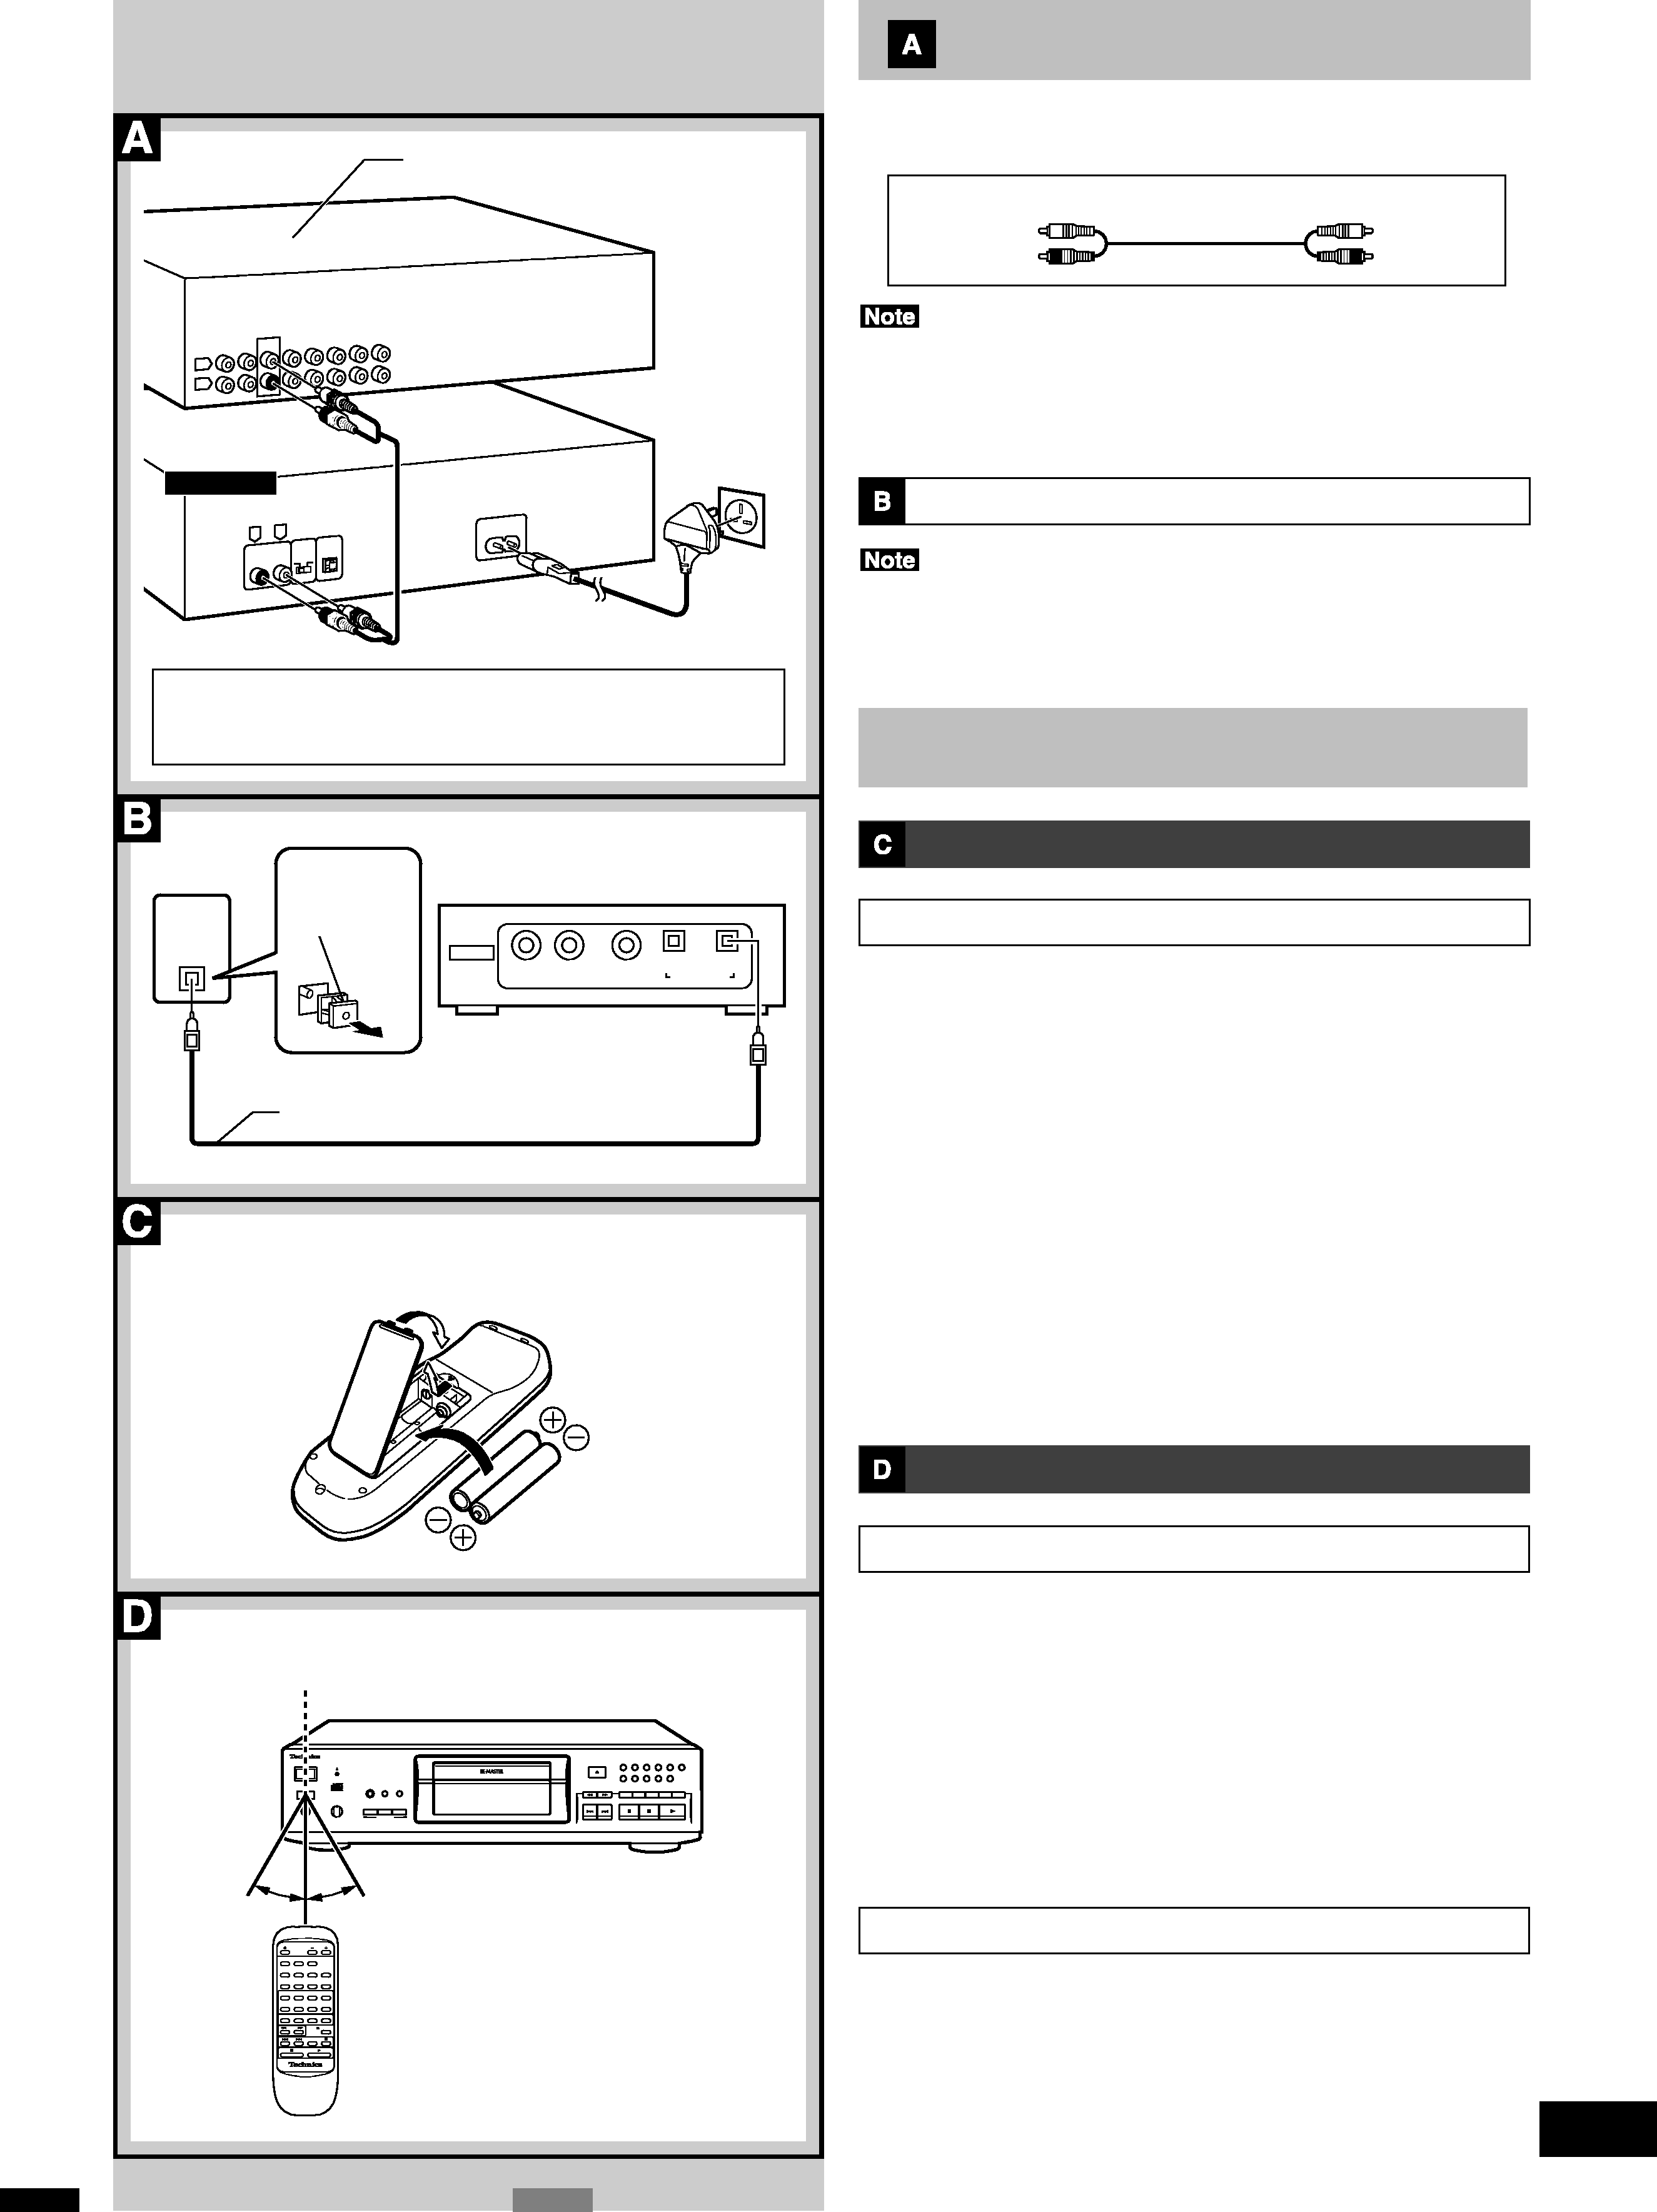
Connections
Before making connections, be sure that the power of this unit and all
other system components is first turned off.
Stereo phono cable
White (L)
Red (R)
Although the figure shows the AC mains lead being connected to a
household mains socket, if the amplifier (or receiver) is equipped with
an AC outlet, connect the cord to that outlet.
To connect a digital amplifier
Remove the dust cap which is inserted in the DIGITAL OPTICAL OUT
terminal only if you connect a digital amplifier.
When this terminal is not being used, attach the cap.
Concerning the remote control
Battery installation
Use of batteries
·Align the poles ( + and ) properly when inserting the batteries.
·Do not mix old and new batteries, or batteries of different types.
·Do not recharge ordinary dry cell batteries.
·Do not heat or disassemble the batteries. Do not allow them to con-
tact flame or water.
·Remove the batteries if the unit is not to be used for a long time.
·Do not keep together with metallic objects such as necklaces.
·Do not use batteries if the covering has been peeled off.
·Do not use rechargeable type batteries.
Mishandling of batteries can cause electrolyte leakage which can dam-
age items the fluid contacts and may cause a fire.
If electrolyte leaks from the batteries, consult your dealer.
Wash thoroughly with water if electrolyte comes in contact with any
part of your body.
Correct method of use
Operation notes
·Do not place obstacles between the remote control signal sensor
and remote control unit.
·Do not expose the remote control signal sensor to direct sunlight or
to the bright light of an invertor fluorescent light.
·Take care to keep the remote control signal sensor and end of the
remote control unit free from dust.
·If this system is installed in a rack with glass doors, the thickness
and color of the glass doors might make it necessary to use the
remote control a shorter distance from the system.
To prevent damage
·Do not place heavy items on the unit.
·Do not disassemble or reconstruct it.
·Do not spill water or other liquids onto it.
Optical-fiber cable (not included)
Remote control signal sensor
Digital amplifier, etc. (not included)
Amplifier or receiver (not included)
To household mains socket
FOR UNITED KINGDOM ONLY
READ THE CAUTION FOR THE AC MAINS LEAD
ON PAGE 3 BEFORE CONNECTION.
Dust cap
About 7 meters in front of
the signal sensor
