9A09897700
DVD Player
OWNER'S MANUAL
DV-3300VK

Contents
2
Thank you for choosing TEAC. Read this manual carefully to get
the best performance from this unit.
Remote Control Unit .............................................................................. 2
Before Use .............................................................................................. 3
Discs ........................................................................................................ 4
Connection ............................................................................................. 6
Names of Each Control ......................................................................... 8
Playback ............................................................................................... 10
Playback from a Specific Chapter/Track ........................................ 12
Slow-Motion Playback ....................................................................... 13
Direct Playback (except DVD) ........................................................... 13
Title or Chapter Select (DVD) ............................................................ 14
Time Select (DVD) ............................................................................... 15
Display ................................................................................................... 16
Dimmer .................................................................................................. 16
Sleep Timer .......................................................................................... 16
Picture Zoom......................................................................................... 17
Select a Subtitle Language................................................................. 17
Select an Audio ................................................................................... 18
Audio Channel Selection .................................................................... 18
Change the Angle ................................................................................ 18
Repeat Playback................................................................................... 19
Programmed Playback ....................................................................... 20
Karaoke functions ............................................................................... 21
Settings ................................................................................................. 22
TV DISPLAY ................................................................................... 23
TV SYSTEM .................................................................................... 23
VIDEO OUTPUT ............................................................................. 23
OSD LANG ...................................................................................... 23
DOWNMIX ..................................................................................... 24
DIGITAL OUTPUT .......................................................................... 24
DYNAMIC ....................................................................................... 24
AUDIO ............................................................................................. 25
DISC MENU ................................................................................... 25
PARENTAL ..................................................................................... 25
PASSWORD ................................................................................... 25
DEFAULTS ...................................................................................... 25
Troubleshooting ................................................................................... 26
Specifications ...................................................................................... 27
Remote Control Unit
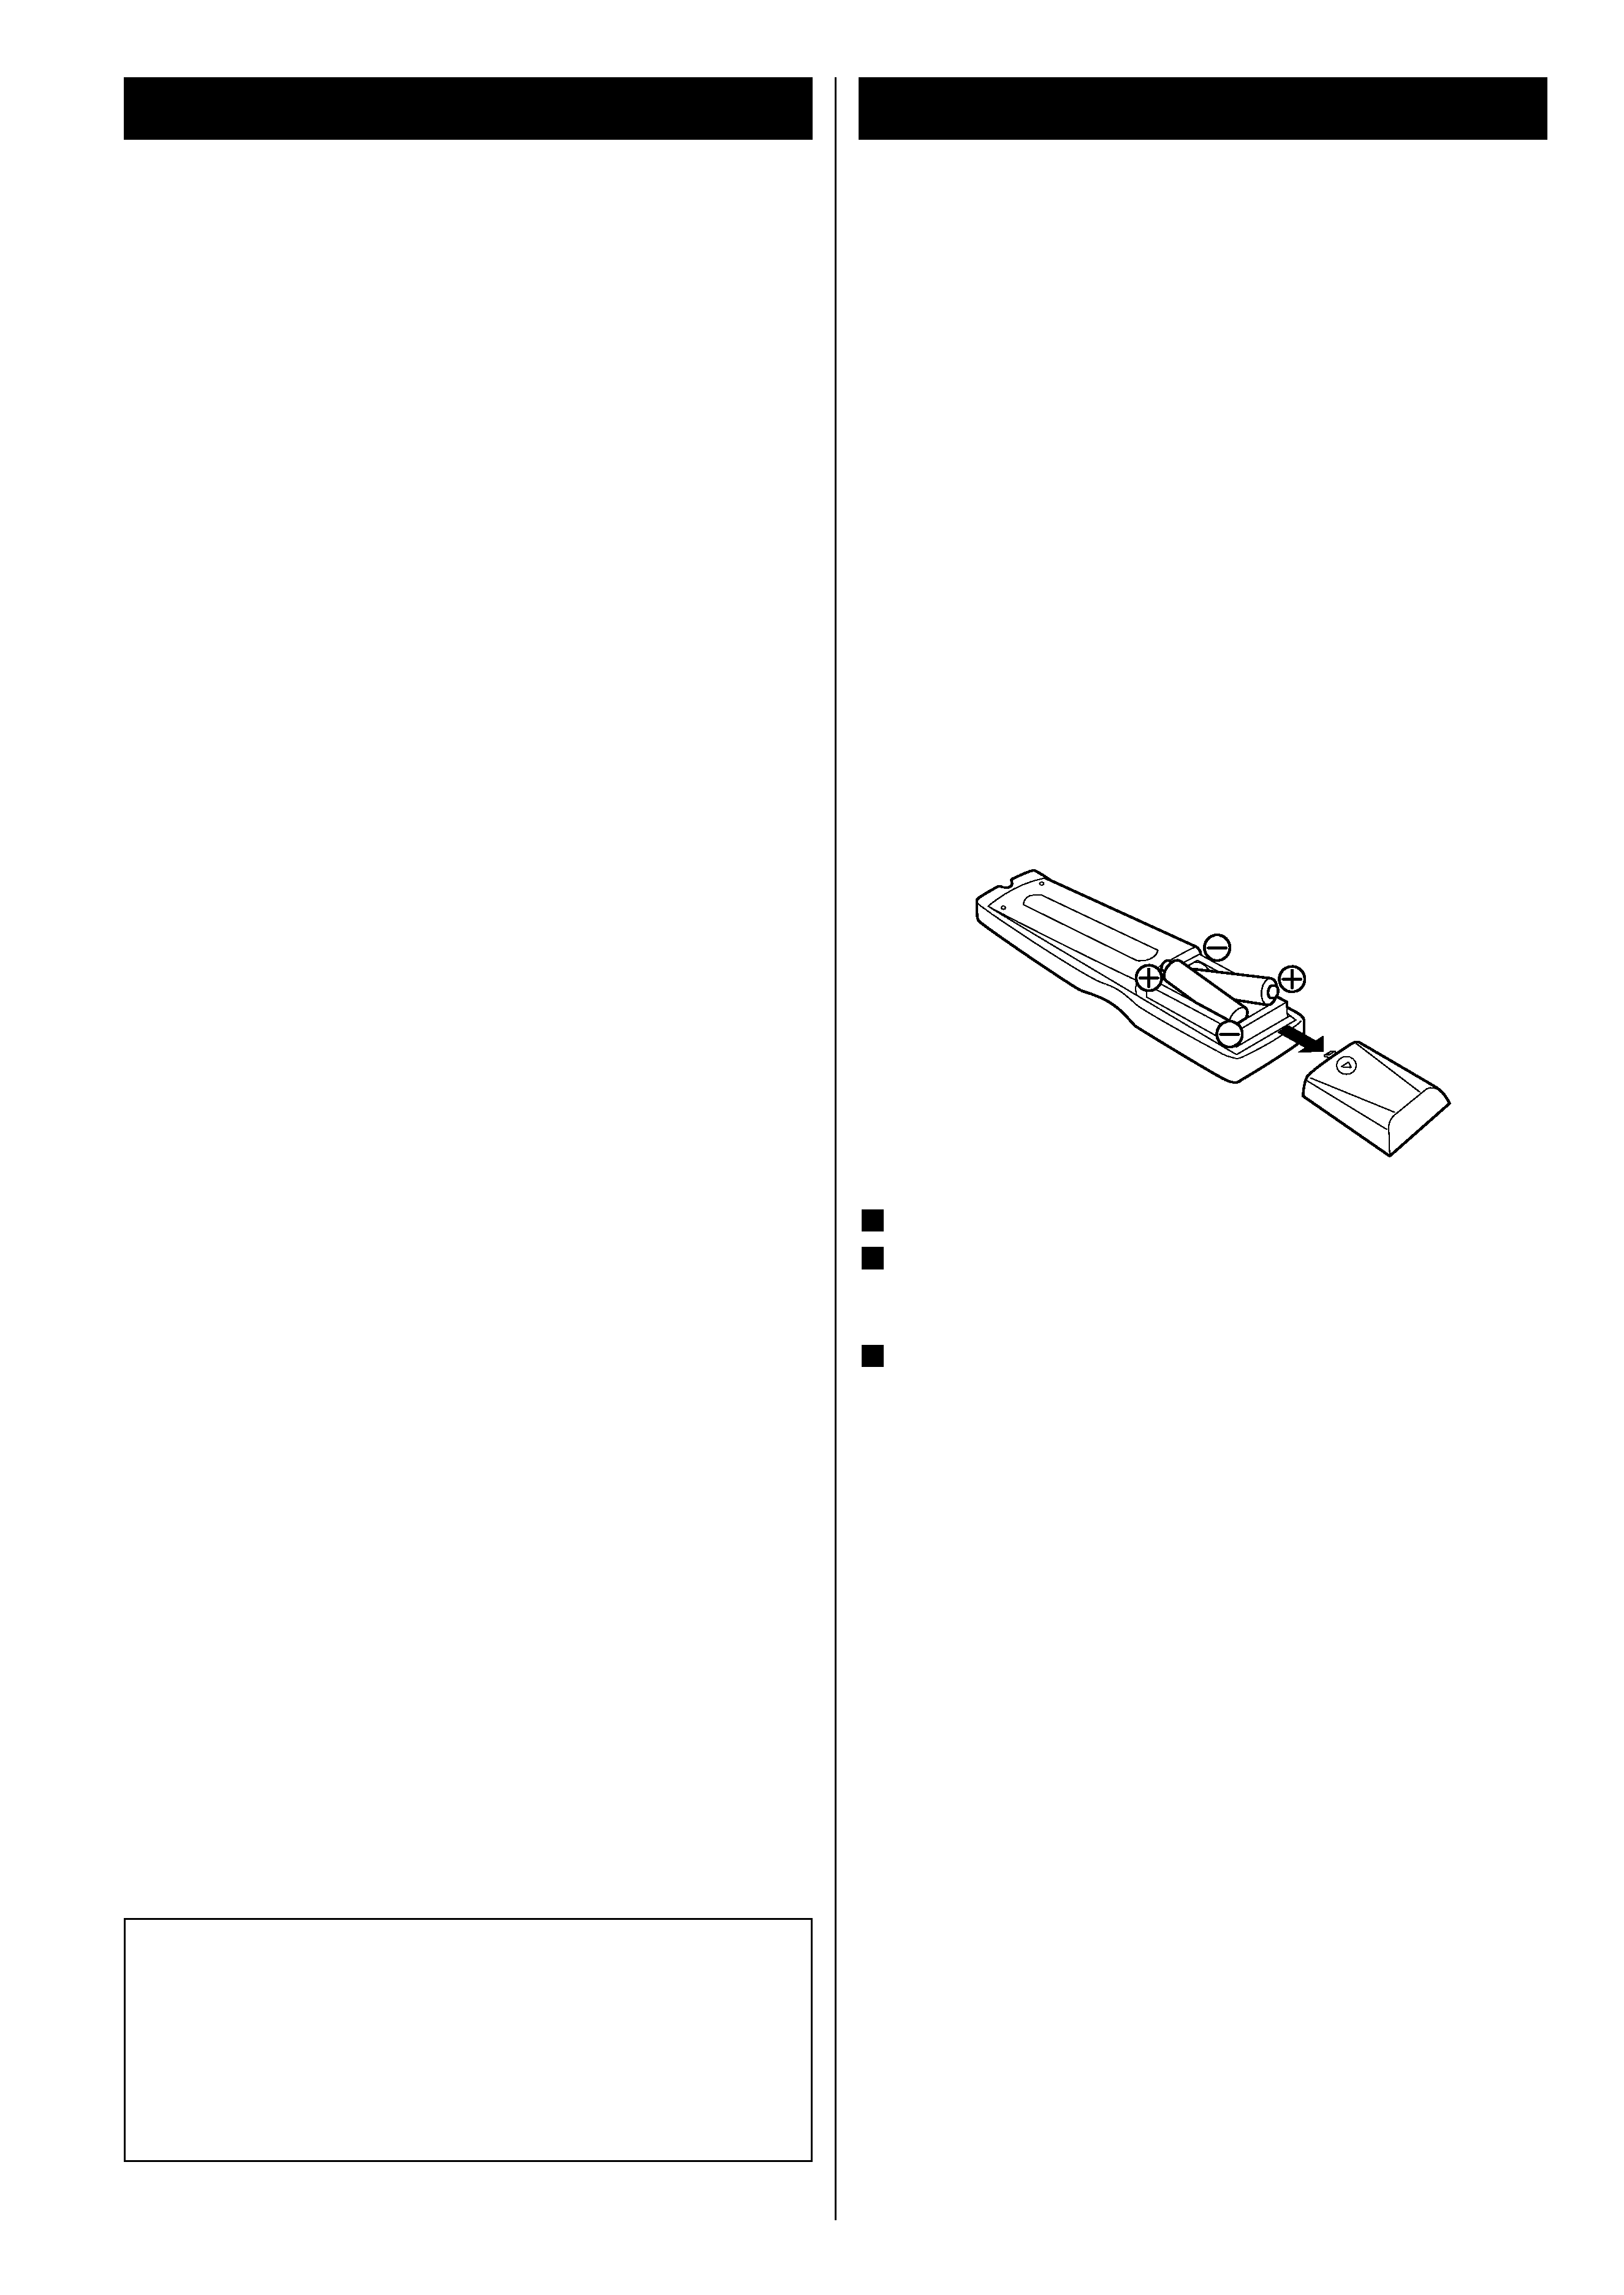
Remove the battery compartment cover.
Insert two "AA" (R6, SUM-3) dry batteries. Make sure that the
batteries are inserted with their positive "+" and negative "_"
poles positioned correctly.
Close the cover.
Battery Replacement
If the distance required between the remote control unit and main
unit decreases, the batteries are exhausted. In this case replace
the batteries with new ones.
Precautions concerning batteries
< Be sure to insert the batteries with correct positive "+" and
negative "_" polarities.
< Use batteries of the same type. Never use different types of
batteries together.
< Rechargeable and non-rechargeable batteries can be used.
Refer to the precautions on their labels.
< When the remote control unit is not to be used for a long time
(more than a month), remove the batteries from the remote
control unit to prevent them from leaking. If they leak, wipe
away the liquid inside the battery compartment and replace the
batteries with new ones.
< Do not heat or disassemble batteries and never dispose of old
batteries by throwing them in a fire.
3
2
1
The provided Remote Control Unit allows the unit to be operated
from a distance.
When operating the remote control unit, point it towards the
REMOTE SENSOR on the front panel of the unit.
< Even if the remote control unit is operated within the effective
range, remote control operation may be impossible if there are
any obstacles between the unit and the remote control.
< If the remote control unit is operated near other products
which generate infrared rays, or if other remote control
devices using infrared rays are used near the unit, it may
operate incorrectly. Conversely, the other products may
operate incorrectly.
Battery Installation
CAUTION
The product shall not be exposed to dripping or splashing and
that no object filled with liquids, such as vases, shall be placed
on the product.
Do not install this equipment in a confined space such as a
book case or similar unit.

3
Before Use
Conventions about This Manual
< This Owner's Manual largely describes how to control the
DV-3300VK using the included RC-926 remote control unit. The
duplicate buttons on the DV-3300VK provide the same
functions.
< The types of functions and operations that can be used for a
particular disc vary depending on the features of that disc. In
some cases, these functions and operations may differ from
the descriptions given in this Owner's Manual. In this event,
follow the instructions given on the screen. This Owner's
Manual only covers basic disc operations.
< For some operations, the PROHIBIT icon "" may appear on
the screen. This indicates that the operation described in this
Owner's Manual is not permitted for the current disc.
< The drawings about the TV screen and front panel display
used in this Owner's Manual are purely for the purposes of
explanation. The actual displays may differ slightly from what
are shown here.
Read this before operation
< As the unit may become warm during operation, always leave
sufficient space above the unit for ventilation.
< The voltage supplied to the unit should match the voltage as
printed on the rear panel. If you are in any doubt regarding this
matter, consult an electrician.
< Choose the installation location of your unit carefully. Avoid
placing it in direct sunlight or close to a source of heat. Also
avoid locations subject to vibrations and excessive dust, heat,
cold or moisture.
< Do not place the unit on the amplifier/receiver.
< Do not open the cabinet as this might result in damage to the
circuitry or electrical shock. If a foreign object should get into
the set, contact your dealer.
< When removing the power plug from the wall outlet, always
pull directly on the plug, never yank the cord.
< To keep the laser pickup clean, do not touch it, and do not
forget to close the disc tray.
< Do not attempt to clean the unit with chemical solvents as this
might damage the finish. Use a clean, dry cloth.
< Keep this manual in a safe place for future reference.
DO NOT MOVE THE UNIT DURING PLAYBACK
During playback, the disc rotates at high speed. Do NOT lift or
move the unit during playback. Doing so may damage the disc.
WHEN MOVING THIS UNIT
When changing places of installation or packing the unit for
moving, be sure to remove the disc and return the disc table to
its original position in the player. Then, press the power switch
to turn the power off, and disconnect the power cord. Moving
this unit with the disc loaded may result in damage to this unit.
"DTS" and "DTS Digital Out" are trademarks of Digital Theater
Systems, Inc. ©1996 Digital Theater Systems, Inc. All rights
reserved.
Manufactured under license from Dolby Laboratories. "Dolby",
"Pro Logic" and the double-D symbol are trademarks of Dolby
Laboratories.
This product incorporates copyright protection technology that
is protected by method claims of certain U.S. patents and other
intellectual property rights owned by Macrovision Corporation
and other rights owners. Use of this copyright protection
technology must be authorized by Macrovision Corporation,
and is intended for home and other limited viewing uses only,
unless otherwise authorized by Macrovision Corporation.
Reverse engineering or disassembly is prohibited.

4
Discs
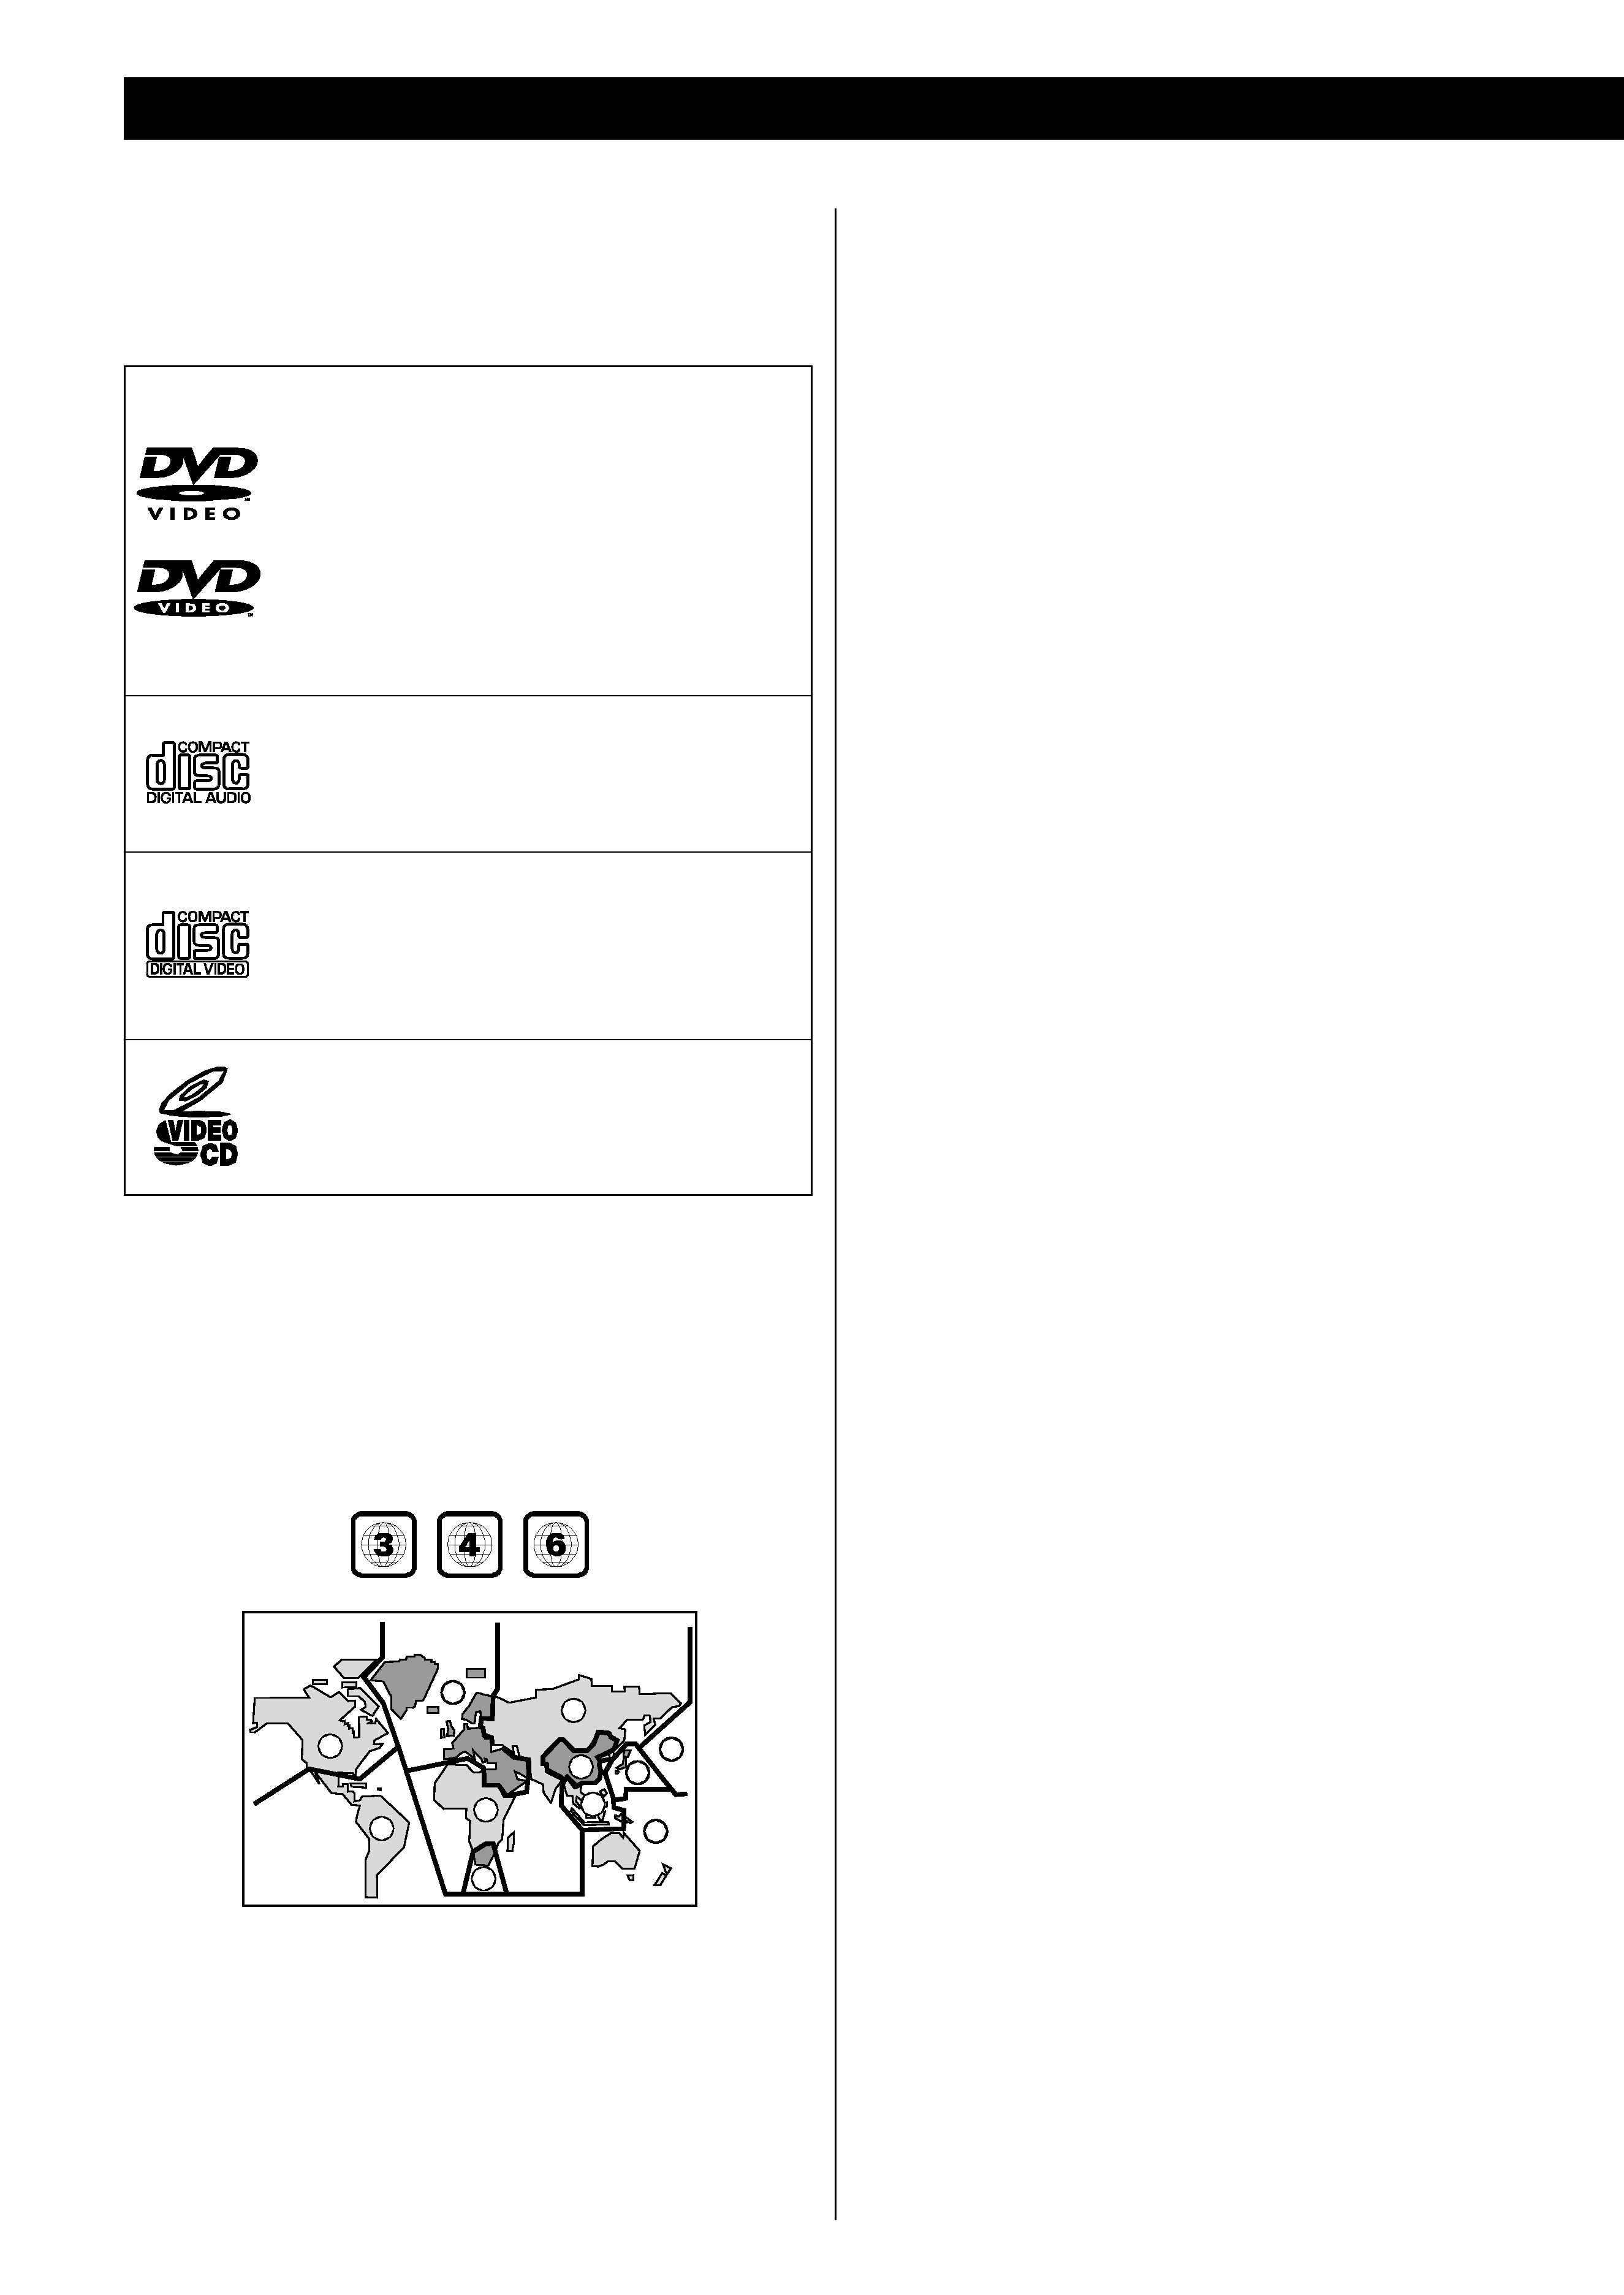
Region Number of DVD Video discs:
DVD players and discs are designed with region numbers that
dictate the regions in which a disc can be played. If the region
number on the disc you want to play does not match the region
number of your DVD player, you will not be able to play the disc.
In that case, an error message will appear on the screen.
The region number is printed on the rear panel of this unit.
About CD-R/CD-RW
CD-R/RW discs recorded in Audio CD format and finalized
correctly are playable. But depending on the quality of the disc
and/or the condition of the recording, some CD-R & CD-RW discs
may not be playable.
1
4
2
2
2
5
5
6
4
3
1
DVD Video:
· Single-sided or double-sided discs
· Single layer or dual layer discs
· Dolby Digital, DTS, MPEG or Linear PCM digital
audio
· MPEG-2 digital video
· This unit can play DVD-R/DVD-RW discs
recorded in DVD video format.
Discs are generally divided into one or more titles.
Titles may be further subdivided into chapters.
Audio CD:
· 12cm or 8cm discs
· Linear PCM digital audio
Audio CDs are divided into tracks.
Video CD:
· 12cm or 8cm discs
· MPEG-1 digital audio
· MPEG-1 digital video
Video CDs are divided into tracks.
SVCD:
· 12cm or 8cm discs
· MPEG-1 Audio Layer2
· MPEG-2 digital video
Type of Discs That Can be Played on This
System
This player can playback discs bearing any of the following logos:
MP3/JPEG compatibility
This player is compatible with CD-R, CD-RW and CD-ROM (Kodak
picture CD, etc.) discs that contain MP3 audio tracks or JPEG
files.
< File names of MP3/JPEG should be alphanumeric characters.
This unit cannot display symbols and full-size or 2 bytes-wide
characters (such as Japanese, Chinese, etc.) correctly. Also,
be sure to use the file extension "mp3", "jpg" or "jpeg".
< Only the first 8 characters of folder and track names
(excluding the "mp3", "jpg" or "jpeg" extension) are displayed.
< Use CD-R or CD-RW media for recording your MP3 or JPEG
files. The disc must be finalized in order to play.
< The CD-ROM must be ISO 9660 compatible.
< This player is not compatible with multi-session discs.
< When more than 200 files or folders are recorded on the disc,
the unit might not be able to play it correctly.
< It may take time to display a progressive JPEG picture.
< Depending on the file size and compression rate, some JPEG
pictures cannot be displayed correctly.
< Mono or stereo MPEG-1 Audio Layer 3 format, 44.1 or 48kHz,
fixed bit-rate.
< Not compatible with variable bit-rate (VBR) files.
< Audio encoded at 128Kbps should sound close to regular audio
CD quality. Although this player will play lower bit-rate MP3
tracks, the sound quality becomes noticeably worse at lower
bit-rates.
Caution:
< If you record a disc using a personal computer or a DVD
recorder, even if it is recorded in a compatible format, there
are cases in which it may not play because of the settings of
the application software used to create the disc. (Check with
the software publisher for more detailed information.)
< Unfinalized DVD-R/RW discs cannot be played.
Following discs cannot be played with this
unit:
· CD-G, Data part of CD-EXTRA, PHOTO CD, CD-ROM, SACD, DVD-
Audio, DVD-RAM and DVD-ROM discs
· discs recorded in a color system other than PAL or NTSC
· illegally produced discs
· scratched discs
· discs that are dusty, soiled or marked with fingerprints
Warning:
If you attempt to play back such discs, there is a risk that sudden
loud noise can blast over the speakers at full volume and cause
damage to the speakers and your hearing.
Copy-protected discs and other discs which do not conform to
the CD standard may not play back correctly in this player. If you
use such discs in this unit, TEAC Corporation and its subsidiaries
cannot be responsible for any consequences or guarantee the
quality of reproduction. If you experience problems with such
non-standard discs, you should contact the producers of the disc.

5
number of audio tracks recorded
on the disc
number of subtitles recorded on
the disc
screen aspect ratio
disc recorded with multiple
camera angles
region code
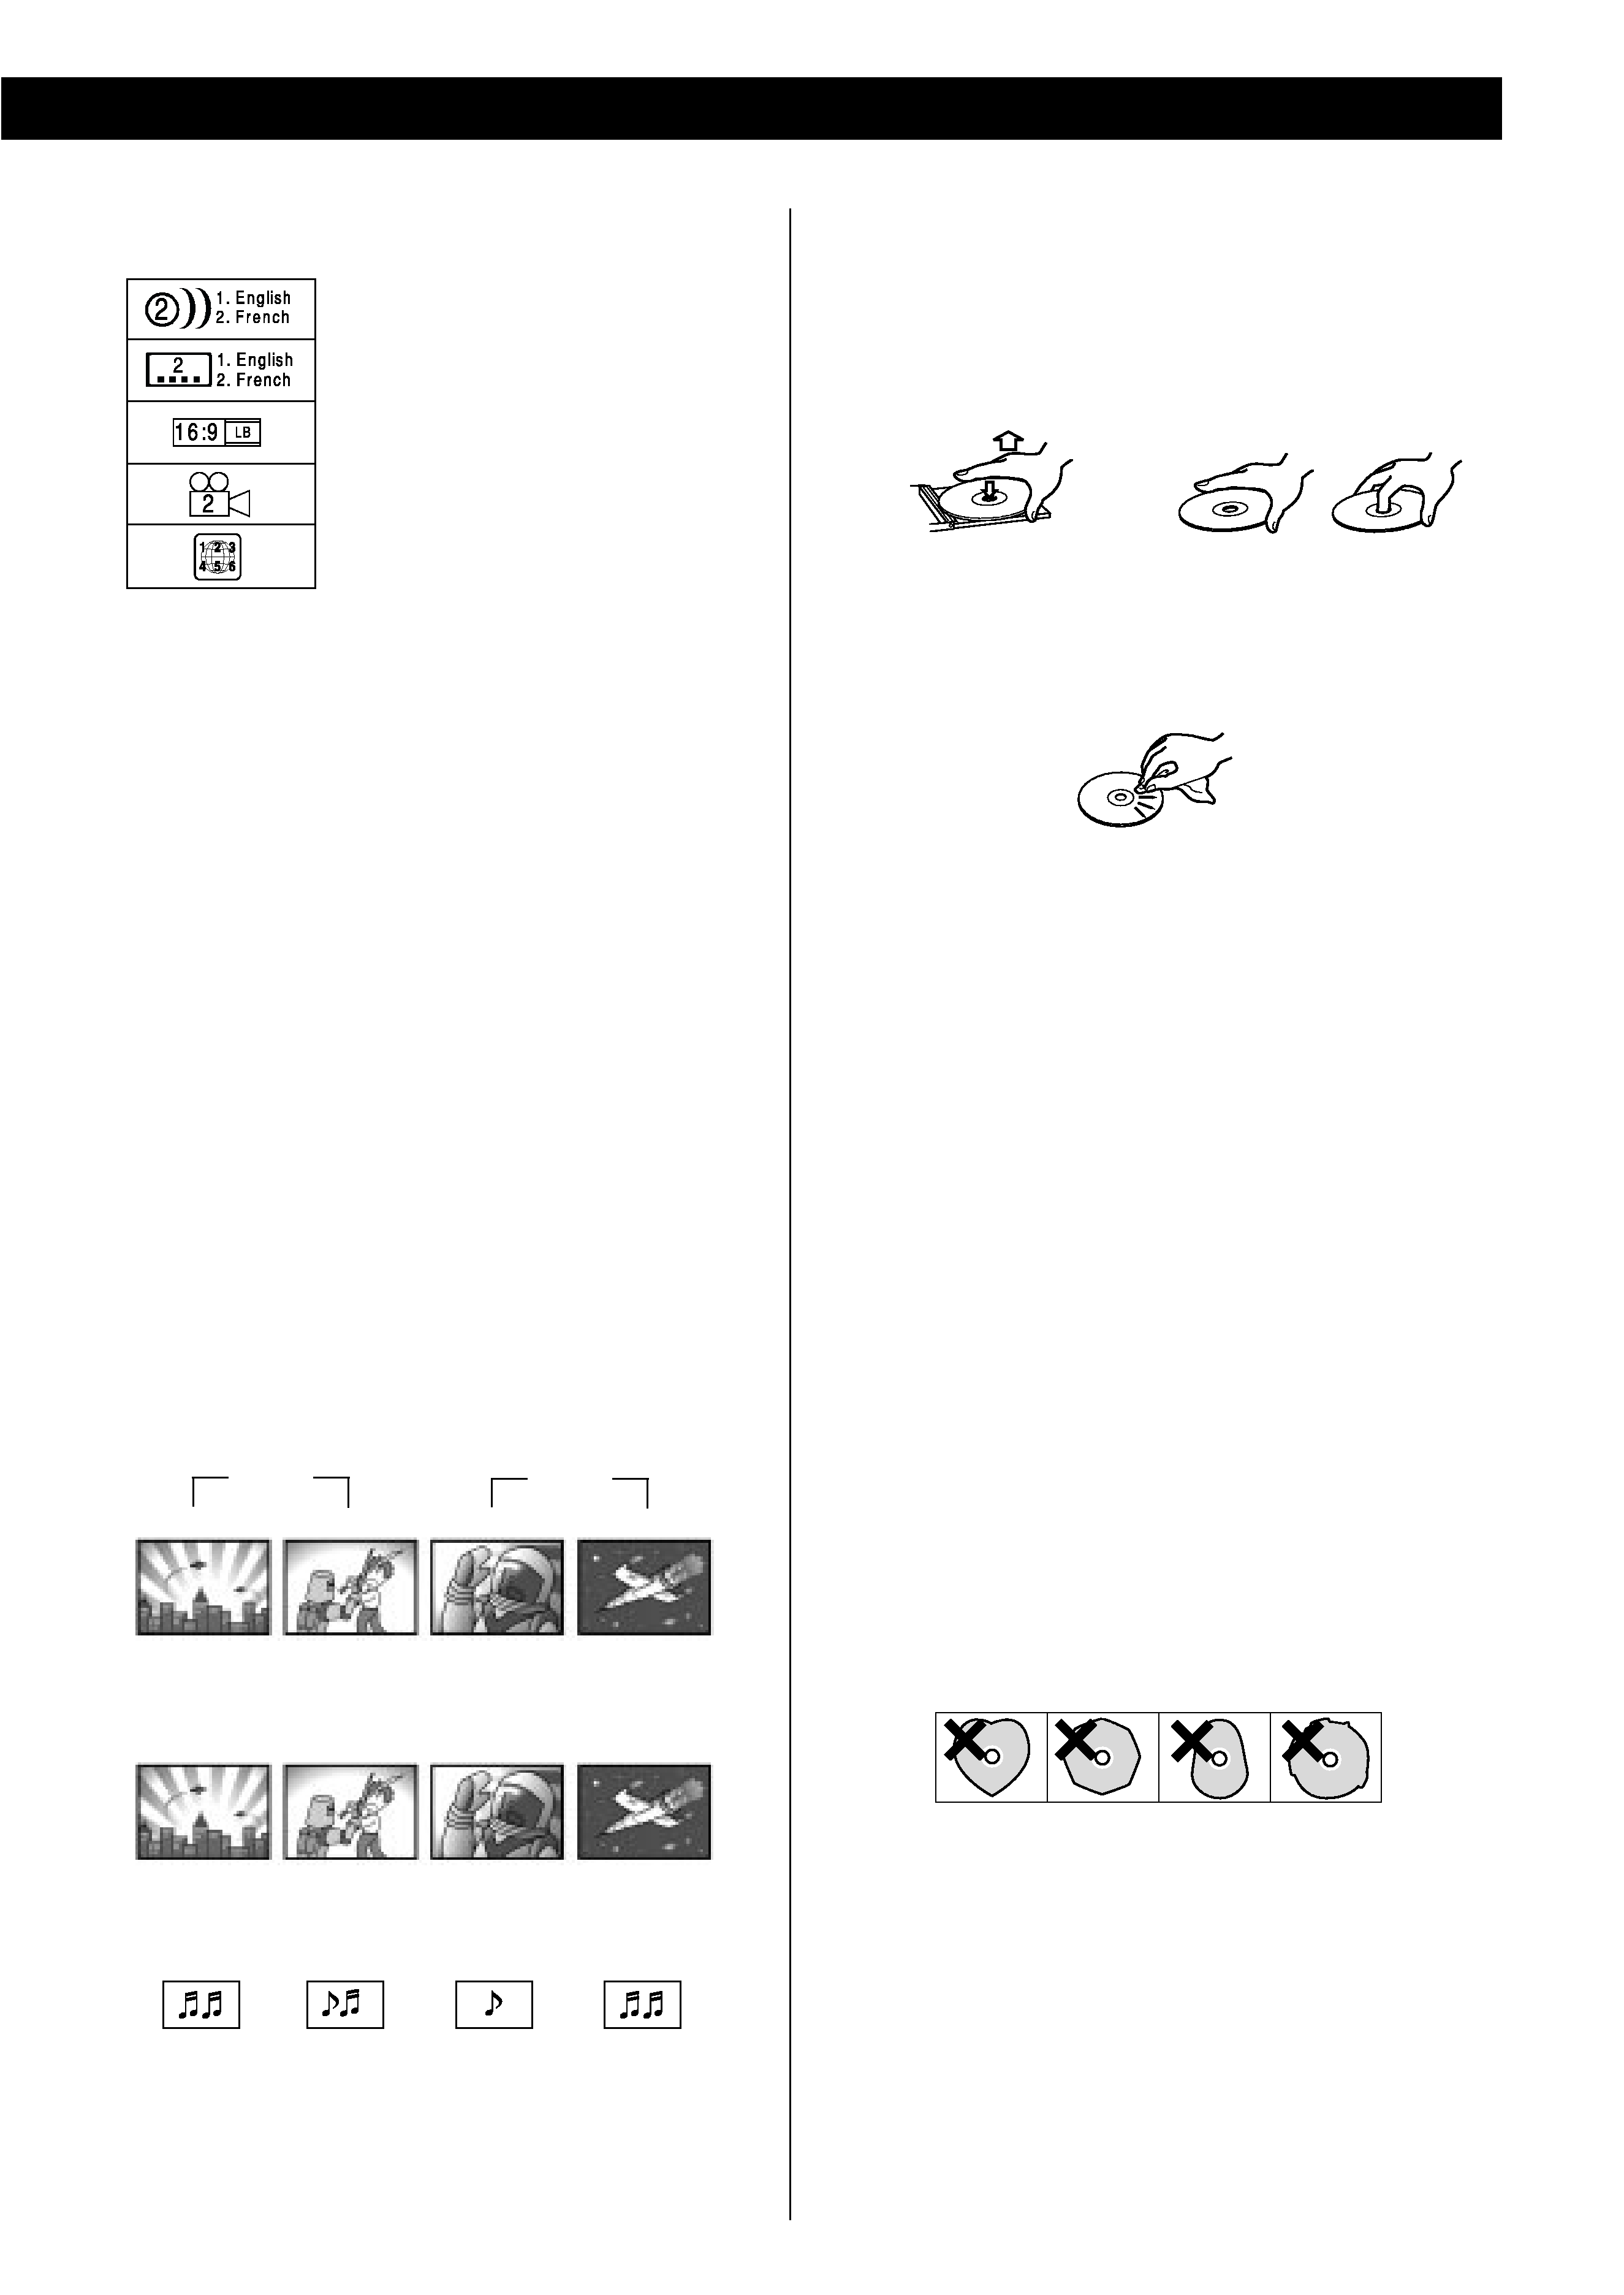
Example of Icons used on DVD discs:
How to remove the disc
How to hold the disc
< Always place the disc on the disc tray with the label side
uppermost. (Compact discs can be played or recorded only on
one side.)
< To remove a disc from its storage case, press down on the
center of the case and lift the disc out, holding it carefully by
the edges.
< Should the disc become dirty, wipe the surface radially (from
the center hole outward towards the outer edge) with a soft,
dry cloth:
< Never use such chemicals as record sprays, antistatic sprays
or fluid, benzine or thinner to clean the discs. Such chemicals
will do irreparable damage to the disc's plastic surface.
< Discs should be returned to their cases after use to avoid dust
and scratches that could cause the laser pickup to "skip."
< Do not expose discs to direct sunlight or high humidity and
temperature for extended periods. Long exposure to high
temperatures will warp the disc.
< Do not play any disc that is warped, deformed or damaged.
Playing such discs may cause irreparable harm to the playing
mechanisms.
< CD-R and CD-RW discs are more sensitive to the effects of
heat and ultraviolet rays than ordinary CDs. It is important that
they are not stored in a location where direct sunlight will fall
on them, and which is away from sources of heat such as
radiators or heat-generating electrical devices.
< Printable CD-R and CD-RW discs aren't recommended, as the
label side might be sticky and damage the unit.
< Do not stick papers or protective sheets on the discs and do
not use any protective coating spray.
< Use a soft oil-based felt-tipped pen to write the information on
the label side. Never use a ball-point or hard-tipped pen, as
this may cause damage to the recorded side.
< Never use a stabilizer. Using commercially available CD
stabilizers with this unit will damage the mechanisms and
cause them to malfunction.
< Do not use irregular shape CDs (octagonal, heart shaped,
business card size, etc.). CDs of this sort can damage the unit:
< If you are in any doubt as to the care and handling of a
CD-R/CD-RW disc, read the precautions supplied with the disc,
or contact the disc manufacturer directly.
Track 1
Track 2
Track 3
Track 4
Chapter 1
Chapter 2
Chapter 1
Chapter 2
Title 1
Glossary of Disc Terms
Title (DVD)
The longest sections of a picture or a music piece on a DVD; a
movie, et cetera, for a picture piece on a video software; or an
album, etc., for a music piece on an audio disc. Each title is
assigned a title number enabling you to locate the title you
want. On most DVD movies, there will be only one title.
Chapter (DVD)
Sections of a picture or a music piece that are smaller than
titles. A title is composed of several chapters. Each chapter is
assigned a chapter number enabling you to locate the chapter
you want. Depending on the disc, there may be only one
chapter per title recorded.
Track (Video or Audio CD)
Sections of a picture or a music piece on a VIDEO or an audio
CD. Each track is assigned a track number enabling you to
locate the track you want. On most audio CD's, one track is
equal to one song.
Title 2
DVD
VCD
Track 1
Track 2
Track 3
Track 4
CD
