Ver 1.0 2001.02
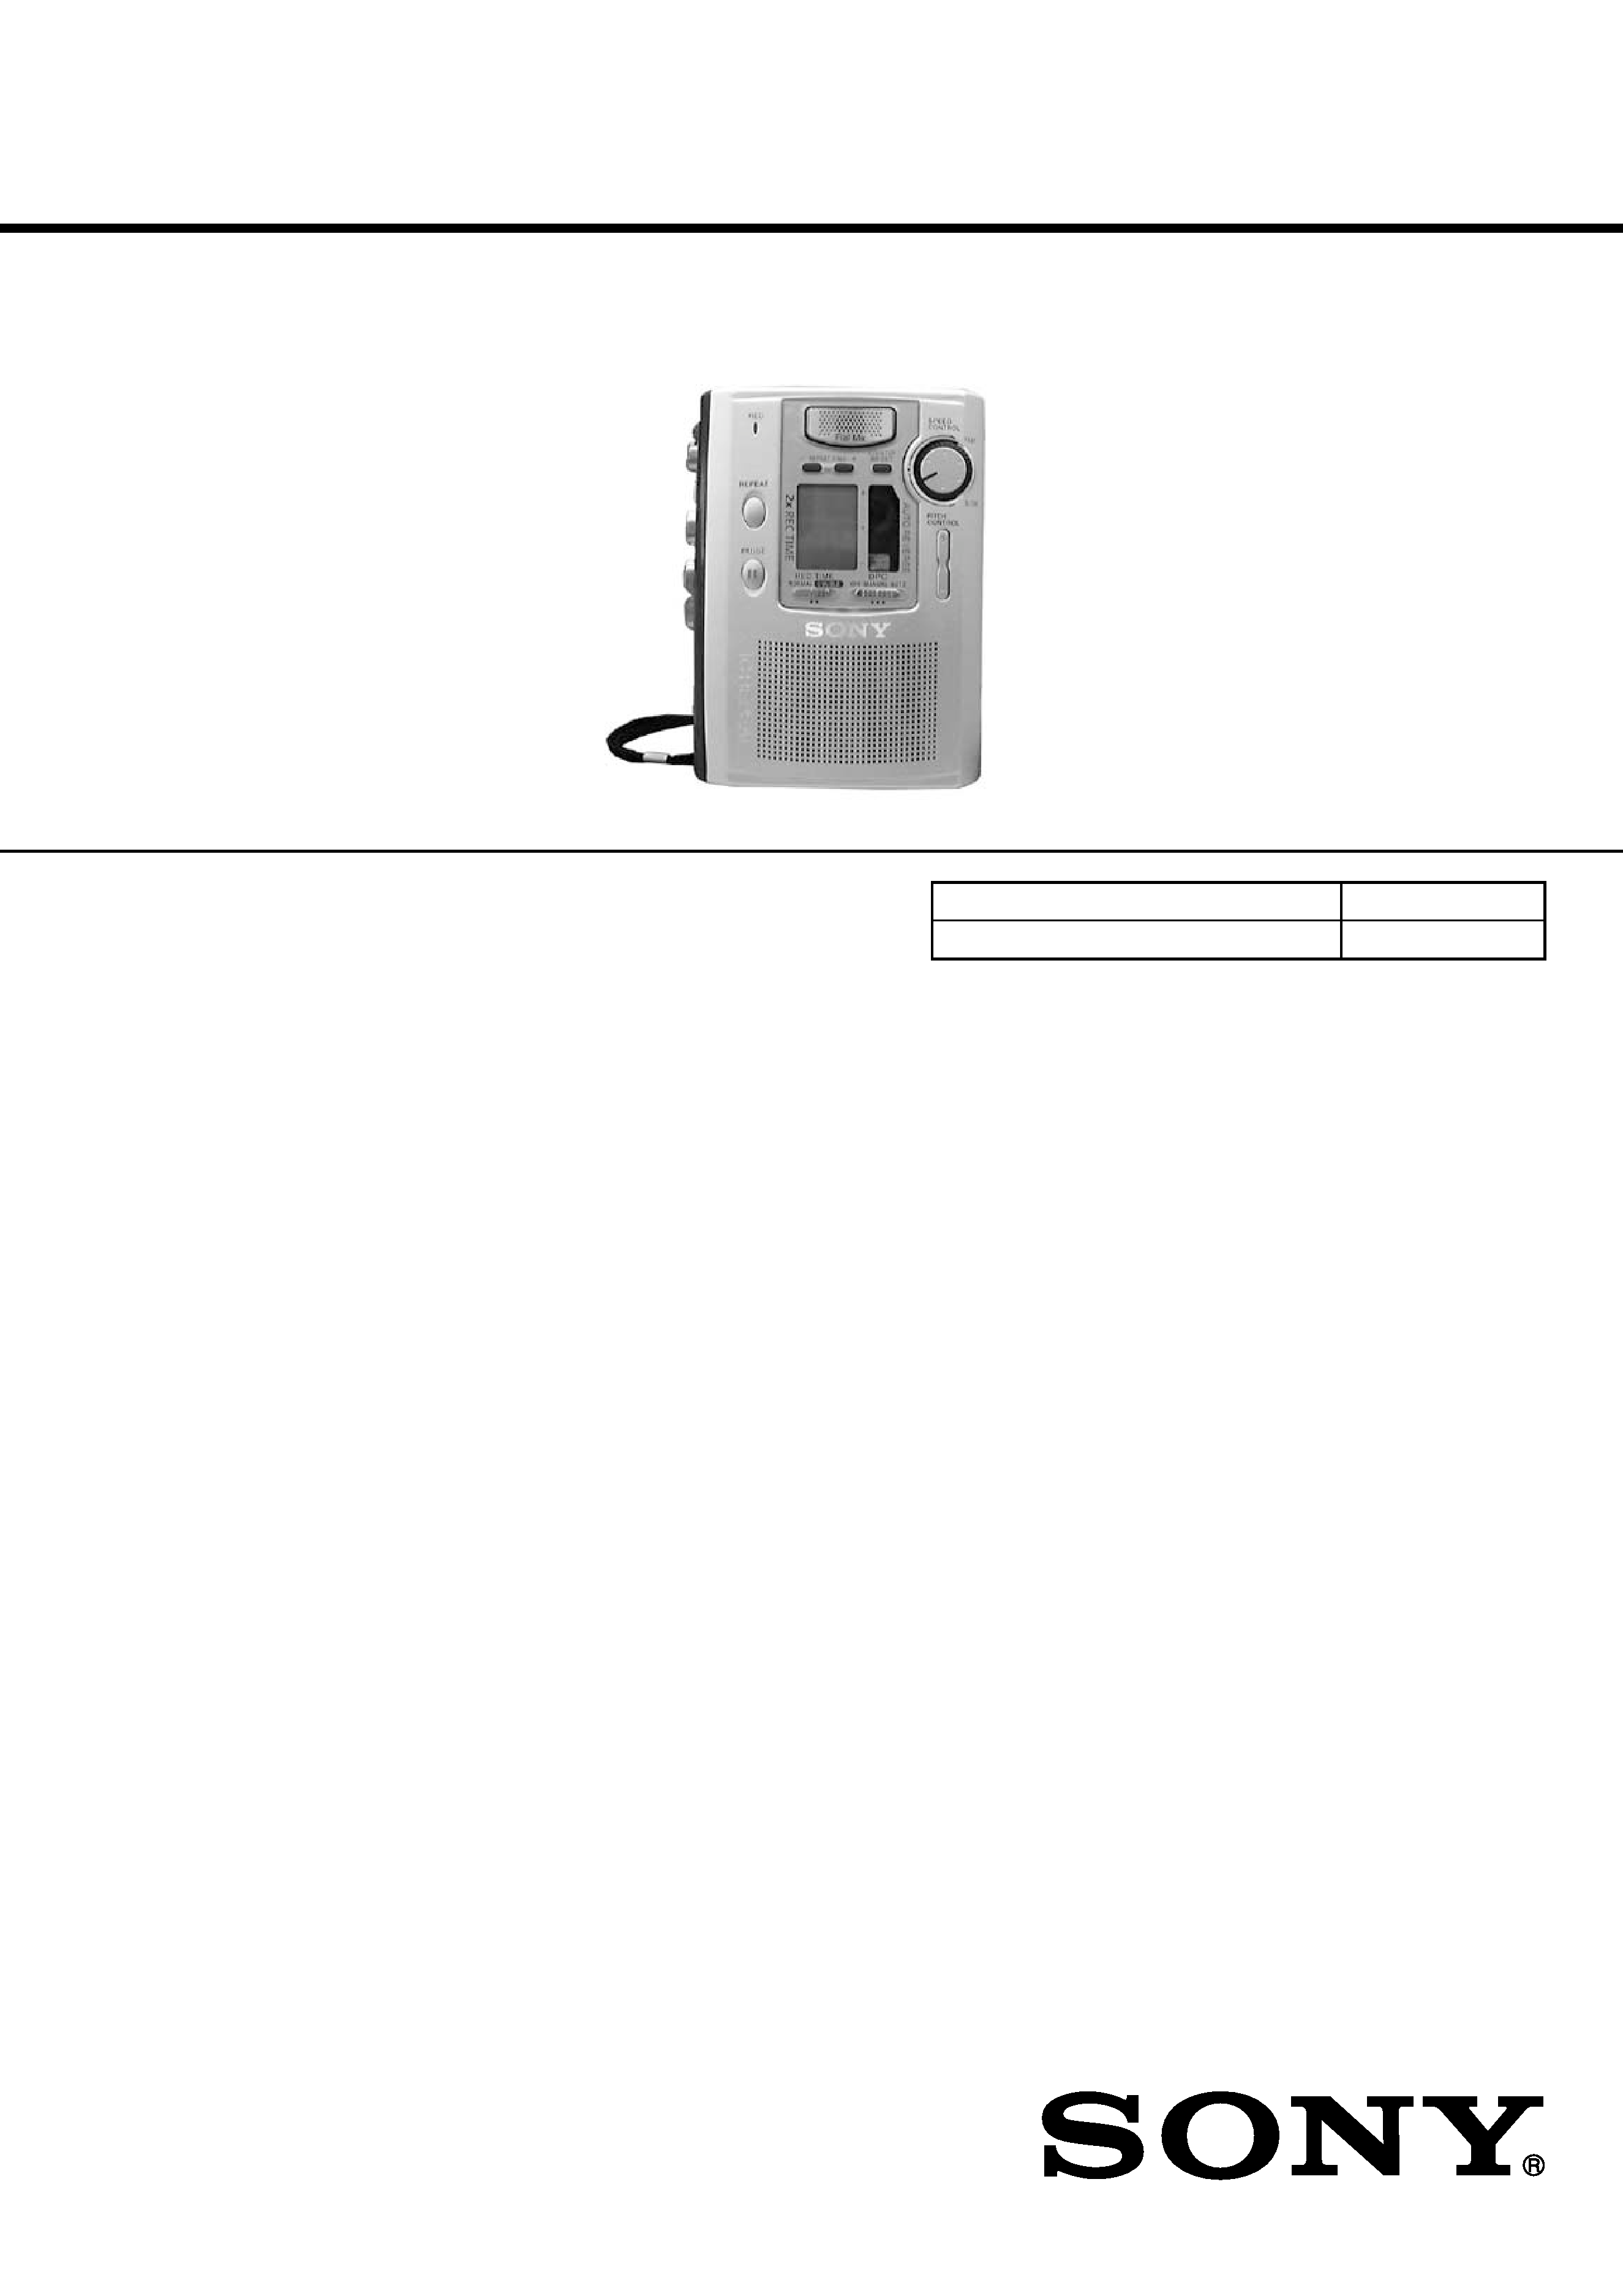
TCM-900DV
SERVICE MANUAL
CASSETTE-CORDER
SPECIFICATIONS
US Model
Canadian Model
AEP Model
Tourist Model
9-873-082-11
2001B0200-1
© 2001.2
Sony Corporation
Audio Entertainment Group
General Engineering Dept.
Model Name Using Similar Mechanism
NEW
Tape Transport Mechanism Type
MT-900-175
Recording system
2-track 1 channel monaural
Tape speed
4.8 cm/s or 2.4 cm/s
Frequency range
150 - 6 300 Hz using nomal (TYPEI) cassette
(with REC TIME switc hat "NORMAL")
Speaker
Approx. 3.6 cm (1 7/16 in.) dia.
Power output
250 mW (at 10 % harmonicdistortion)
Input
Microphone input jack (minijack)
sensitivity 0.12 mV for 3 kilohms or lower impedance
microphone
Output
Earphone jack (minijack) for 8 -300 ohms earphone
Variable range of the tape speed
From approx. +100% to 50% (with
REC TIME switch at "NORMAL")
From approx. +100% to 30% (with
REC TIME switch at "DOUBLE")
Variable range of pitch control variation
Approx. +1 octave to 1 octave
Power requirements
3 V DC batteries R6 (AA) x 2
External DC 3 V power sources
Dimensions (w/h/d) (incl. projecting
parts and controls)
Approx. 86.7 x 112.8 x 35.7 mm
(3 1/2 X 4 1/2 X 1 7/16 in.)
Mass
Approx. 200g (7.1 oz.)
Supplied accessories
Headphones with remote control (1)
R6 (size AA) batteries (2)
("Sony World Model" only)
Carrying pouch (1)
Design and specifications are subject
to change without notice.
2
TCM-900DV
Flexible Circuit Board Repairing
· Keep the temperature of the soldering iron around 270
°C during
repairing.
· Do not touch the soldering iron on the same conductor of the
circuit board (within 3 times).
· Be careful not to apply force on the conductor when soldering
or unsoldering.
Notes on chip component replacement
· Never reuse a disconnected chip component.
· Notice that the minus side of a tantalum capacitor may be dam-
aged by heat.
TABLE OF CONTENTS
SECTION 1
GENERAL
This section is extracted from
instruction manual.
Specifications ........................................................................... 1
1. GENERAL
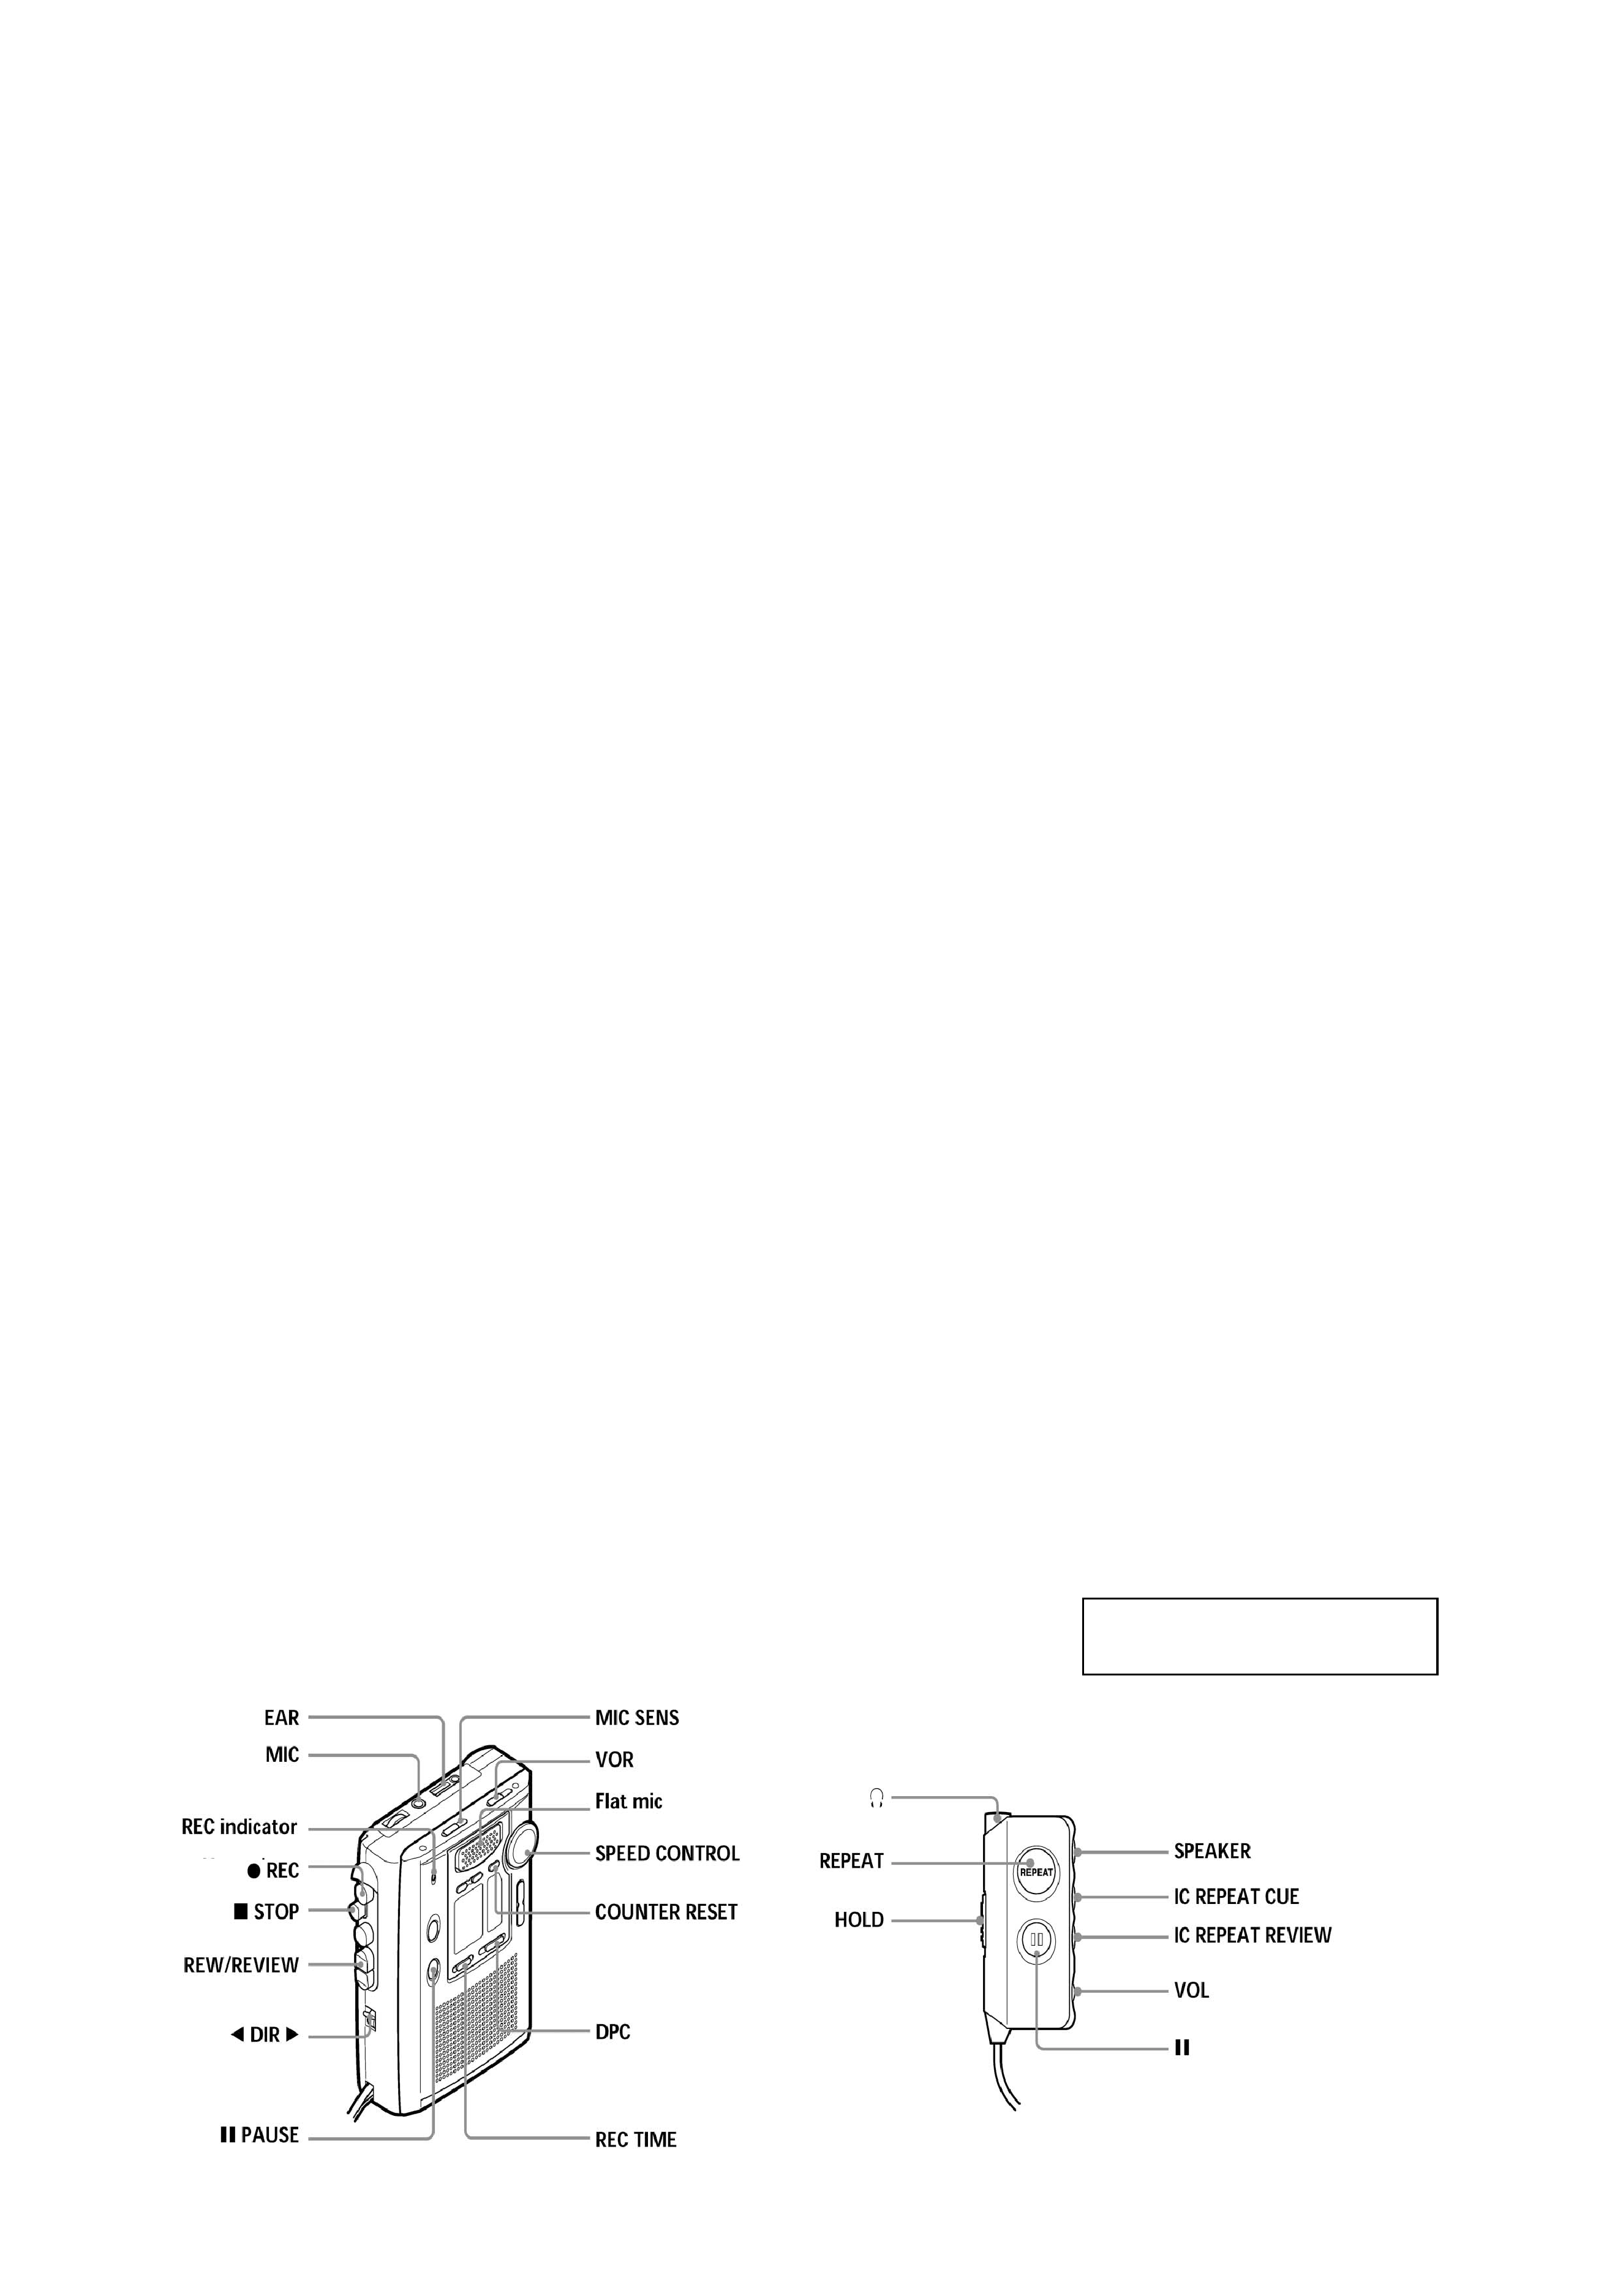
Location of Parts and Controls .......................................... 2
2. DISASSEMBLY
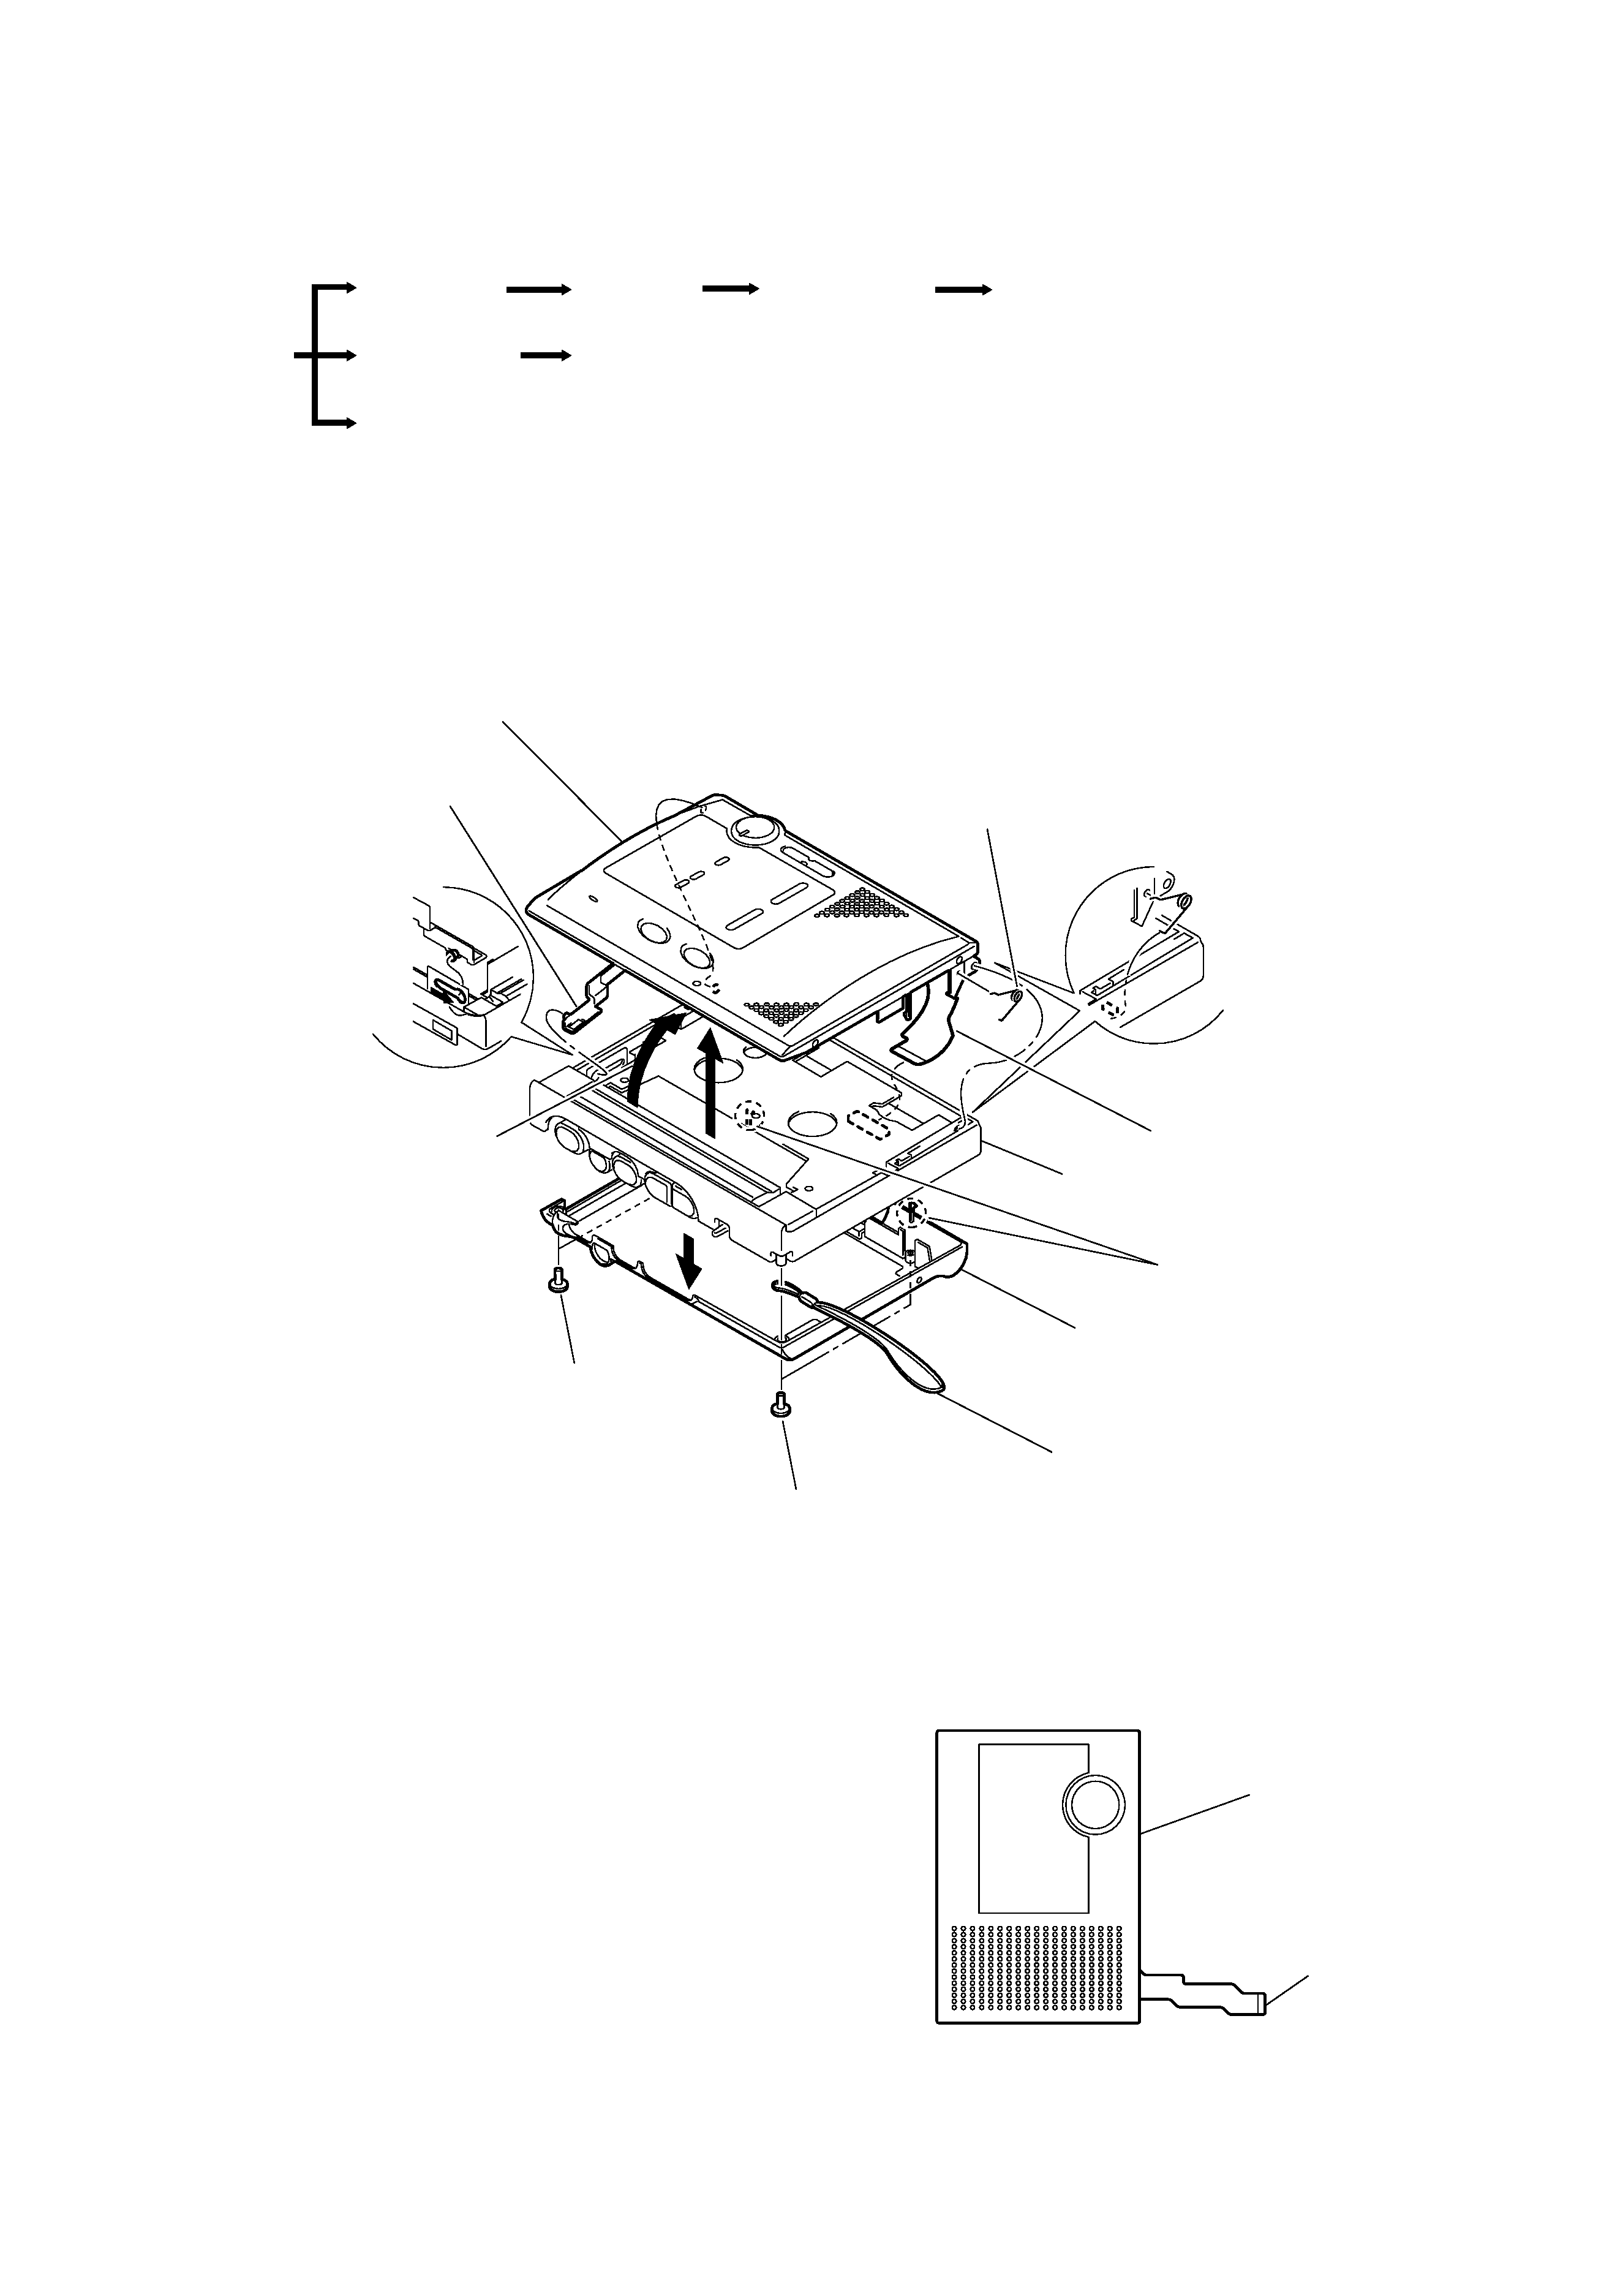
2-1. Cabinet (Rear), Cassette Lid ASSY ............................ 3
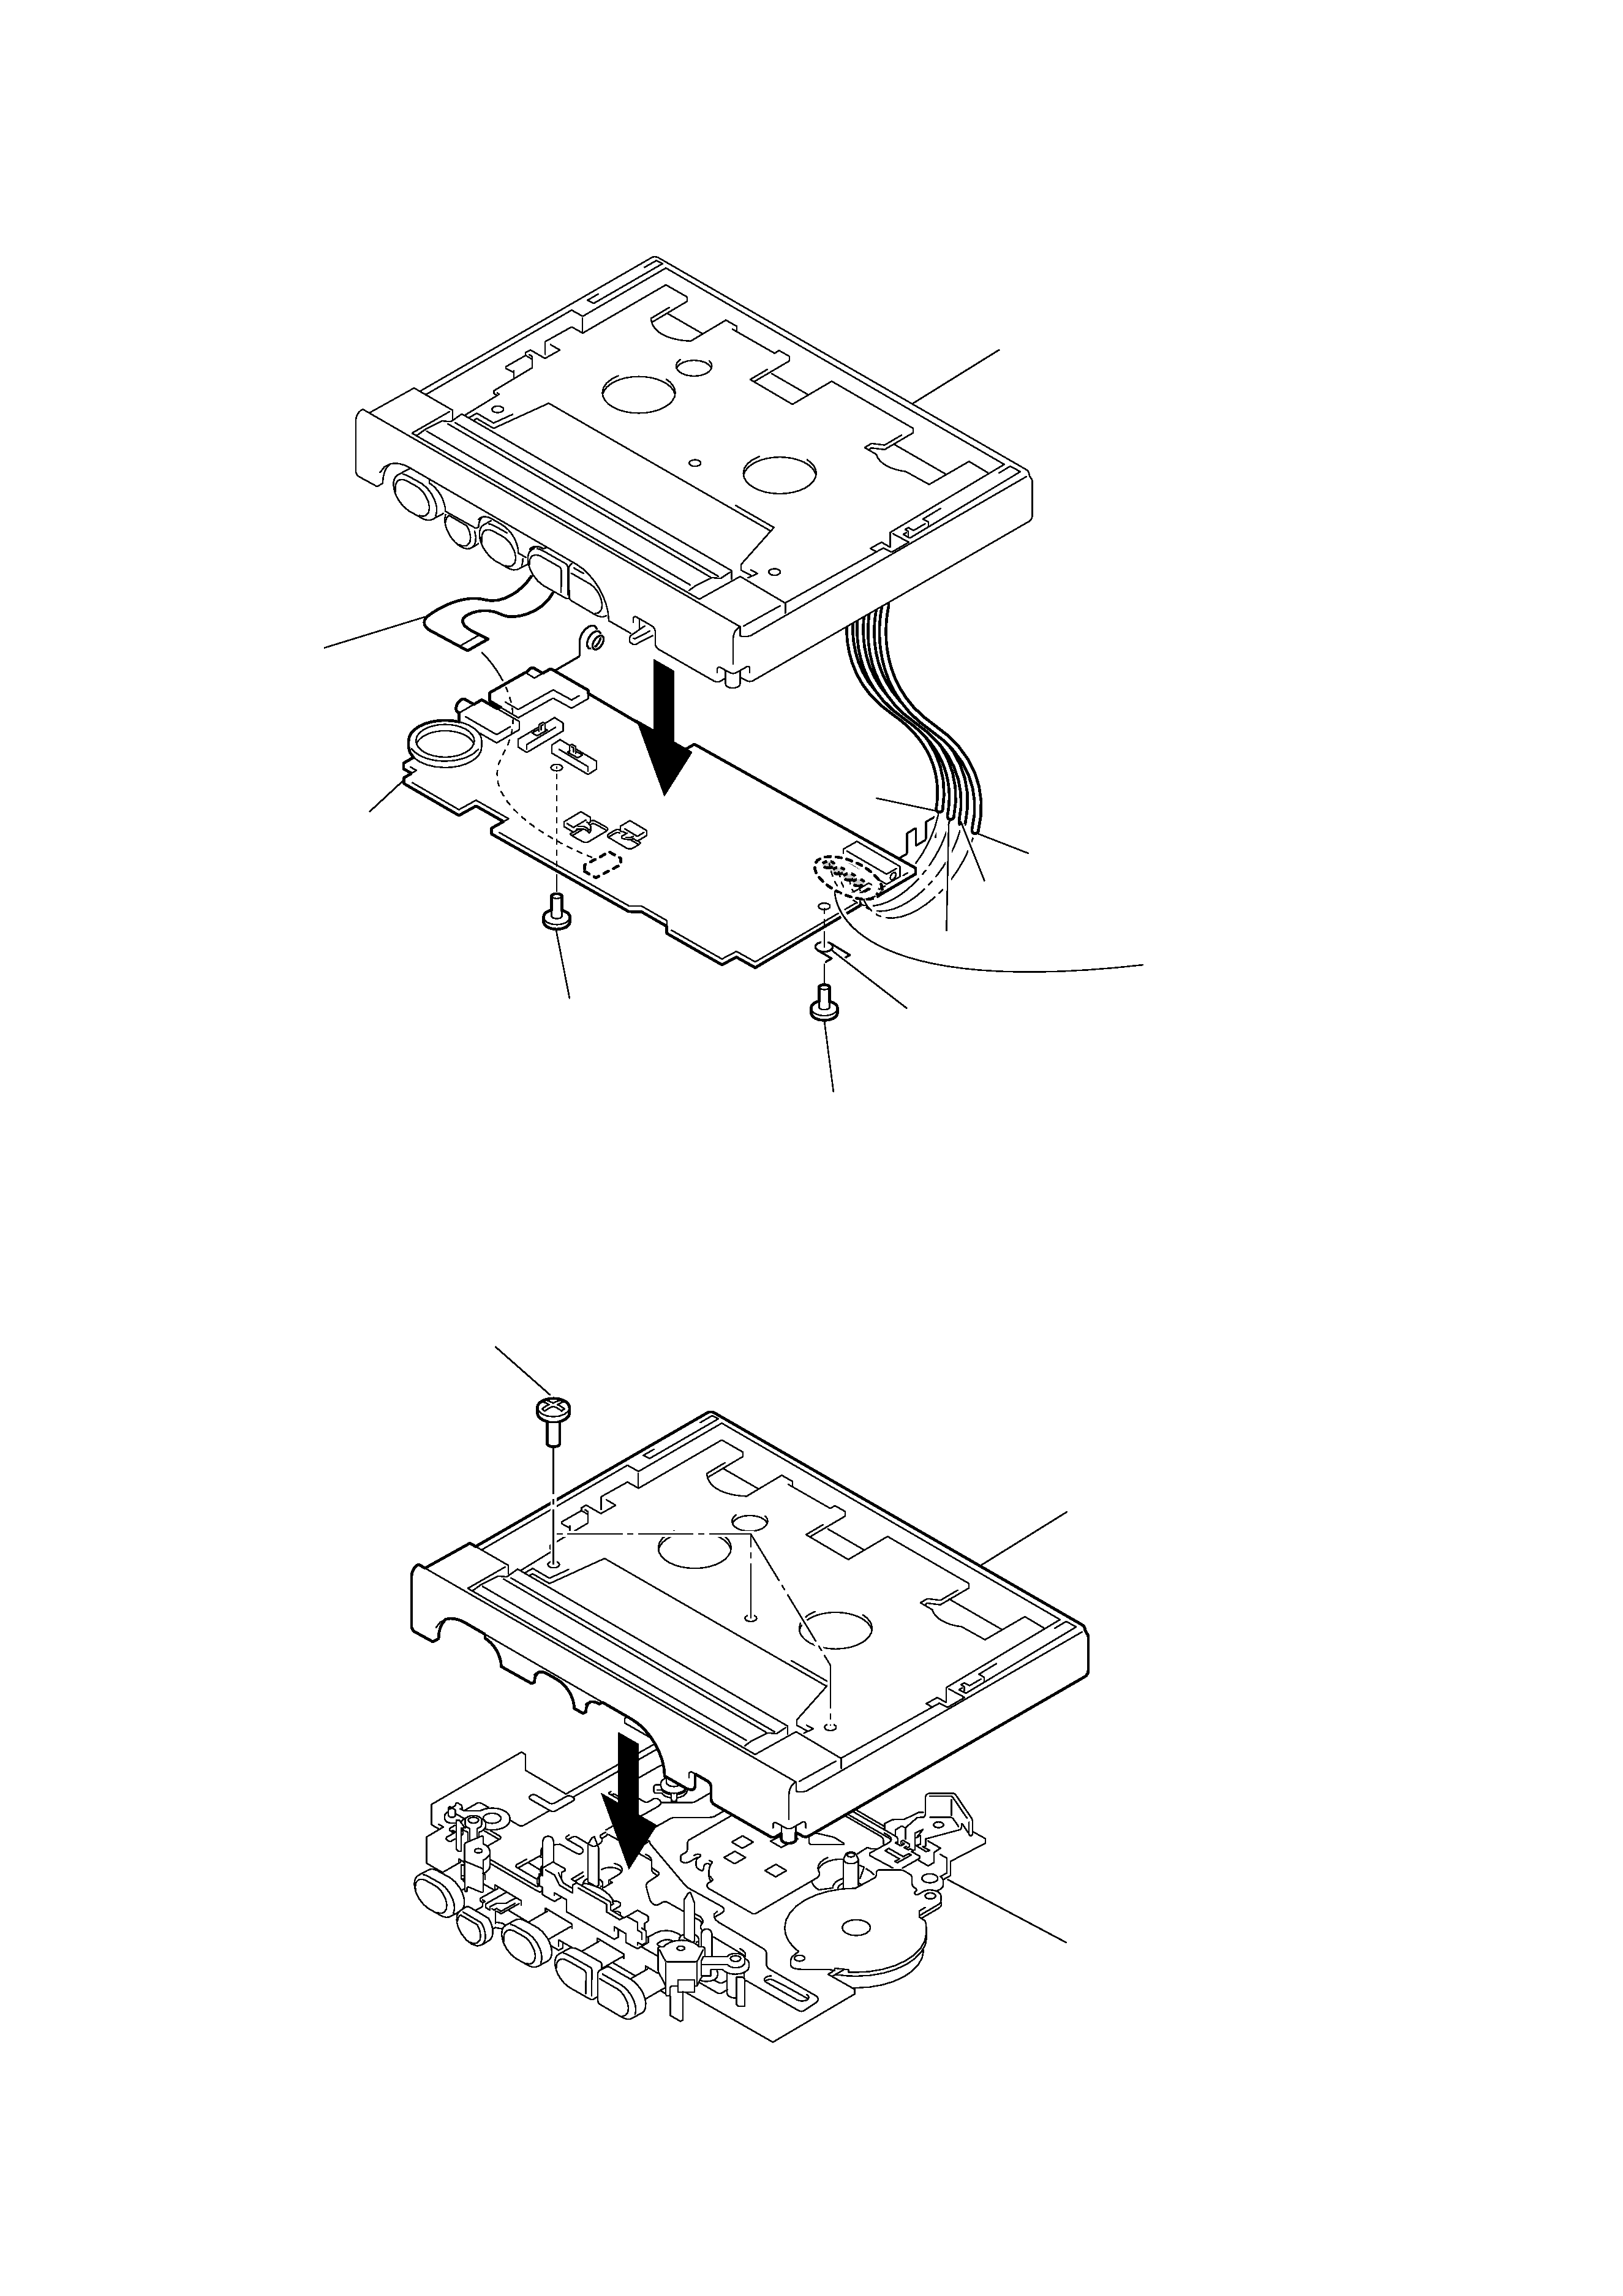
2-2. Main Board ................................................................. 4
2-3. Mechanism Deck ........................................................ 4
2-4. Belt (AR), M601 (Capstan/reel motor),
HRPE901 (REC/PB/ERASE head) ........................... 5
2-5. SW Board ................................................................... 5
3. ADJUSTMENTS
3-1. Mechanical Adjustments ............................................. 6
3-2. Electrical Adjustments ................................................ 6
4. DIAGRAMS
4-1. Block Diagrams -Main Section (1/2) - ....................... 9
4-2. Block Diagrams -Main Section (2/2) - ..................... 10
4-3. Schematic Diagram - Main Section (1/3) - ................ 11
4-4. Schematic Diagram - Main Section (2/3) - ............... 12
4-5. Schematic Diagram - Main Section (3/3) - ............... 13
4-6.Printed Wiring Boards -Main Section (side A)- ........ 14
4-7.Printed Wiring Boards -Main Section (side B)- ........ 15
4-8.Printed Wiring Boards -SW Section (side A)- ........... 16
4-9.Printed Wiring Boards -SW Section (side B)- .......... 17
4-10.Schematic Diagram - SW Section - ......................... 18
4-11.Explanation of IC Terminals .................................... 19
5. EXPLODED VIEWS
5-1. Main Board, Cabinet (Rear) section ......................... 22
5-2. Cassette Lid Section ................................................. 23
5-3. Mechanism deck Section -1(MT-900-175) ............... 24
5-4. Mechanism deck Section -2 (MT-900-175) .............. 25
6. ELECTRICAL PARTS LIST ................................ 26
Location of parts and controls
3
TCM-900DV
SECTION 2
DISASSEMBLY
Note : Follow the disassembly procedure in the numerical order given.
· The equipment can be removed using the following procedure.
Cassette lid assy
Cabinet (front)
SW board
Main board
Belt (AR), M601 (Capstan/reel motor),
HRPE901 (REC/PB/ERASE head)
Set
Mechanism deck
Cabinet (Rear)
2-1. CABINET (REAR), CASSETTE LID ASSY
Cassette lid assy
Note on installing the
cassette lid assy
Install the cassette lid assy with
the spring(toggle) as shown in
the figure so that it fits into the
holes on the cassette lid assy.
7
Slide the projection
of "lever ASSY, FWD
return" fully in the
arrow direction and
remove it.
8
Spring (toggle)
1
Screws (+B1.7X 9)
2
Screws (+B1.7X 9)
5
Open
Lever ASSY, FWD return
6
SW flexible board (Main board:CN901)
Hand strap
Cabinet (Rear)
3
Claws
4
9
Cabinet (front)
Cassette lid ASSY
SW flexible board
Note on installing the SW flexible board
Insert the SW flexible board as shown
in the figure.
4
TCM-900DV
2-2. MAIN BOARD
2-3. MECHANISM DECK
5
Screws (M1.4)
6
Black
Main board
Orange
White
Red
2
Flexible board
( from HPR901/HE901)
1
Remove soldering
four lead wires (from M601)
4
Spring, ground
3
Screw
Cabinet (front)
1
Screws ( IB LOCK )
Mechanism deck
( MT-900-175)
Cabinet (front)
2
5
TCM-900DV
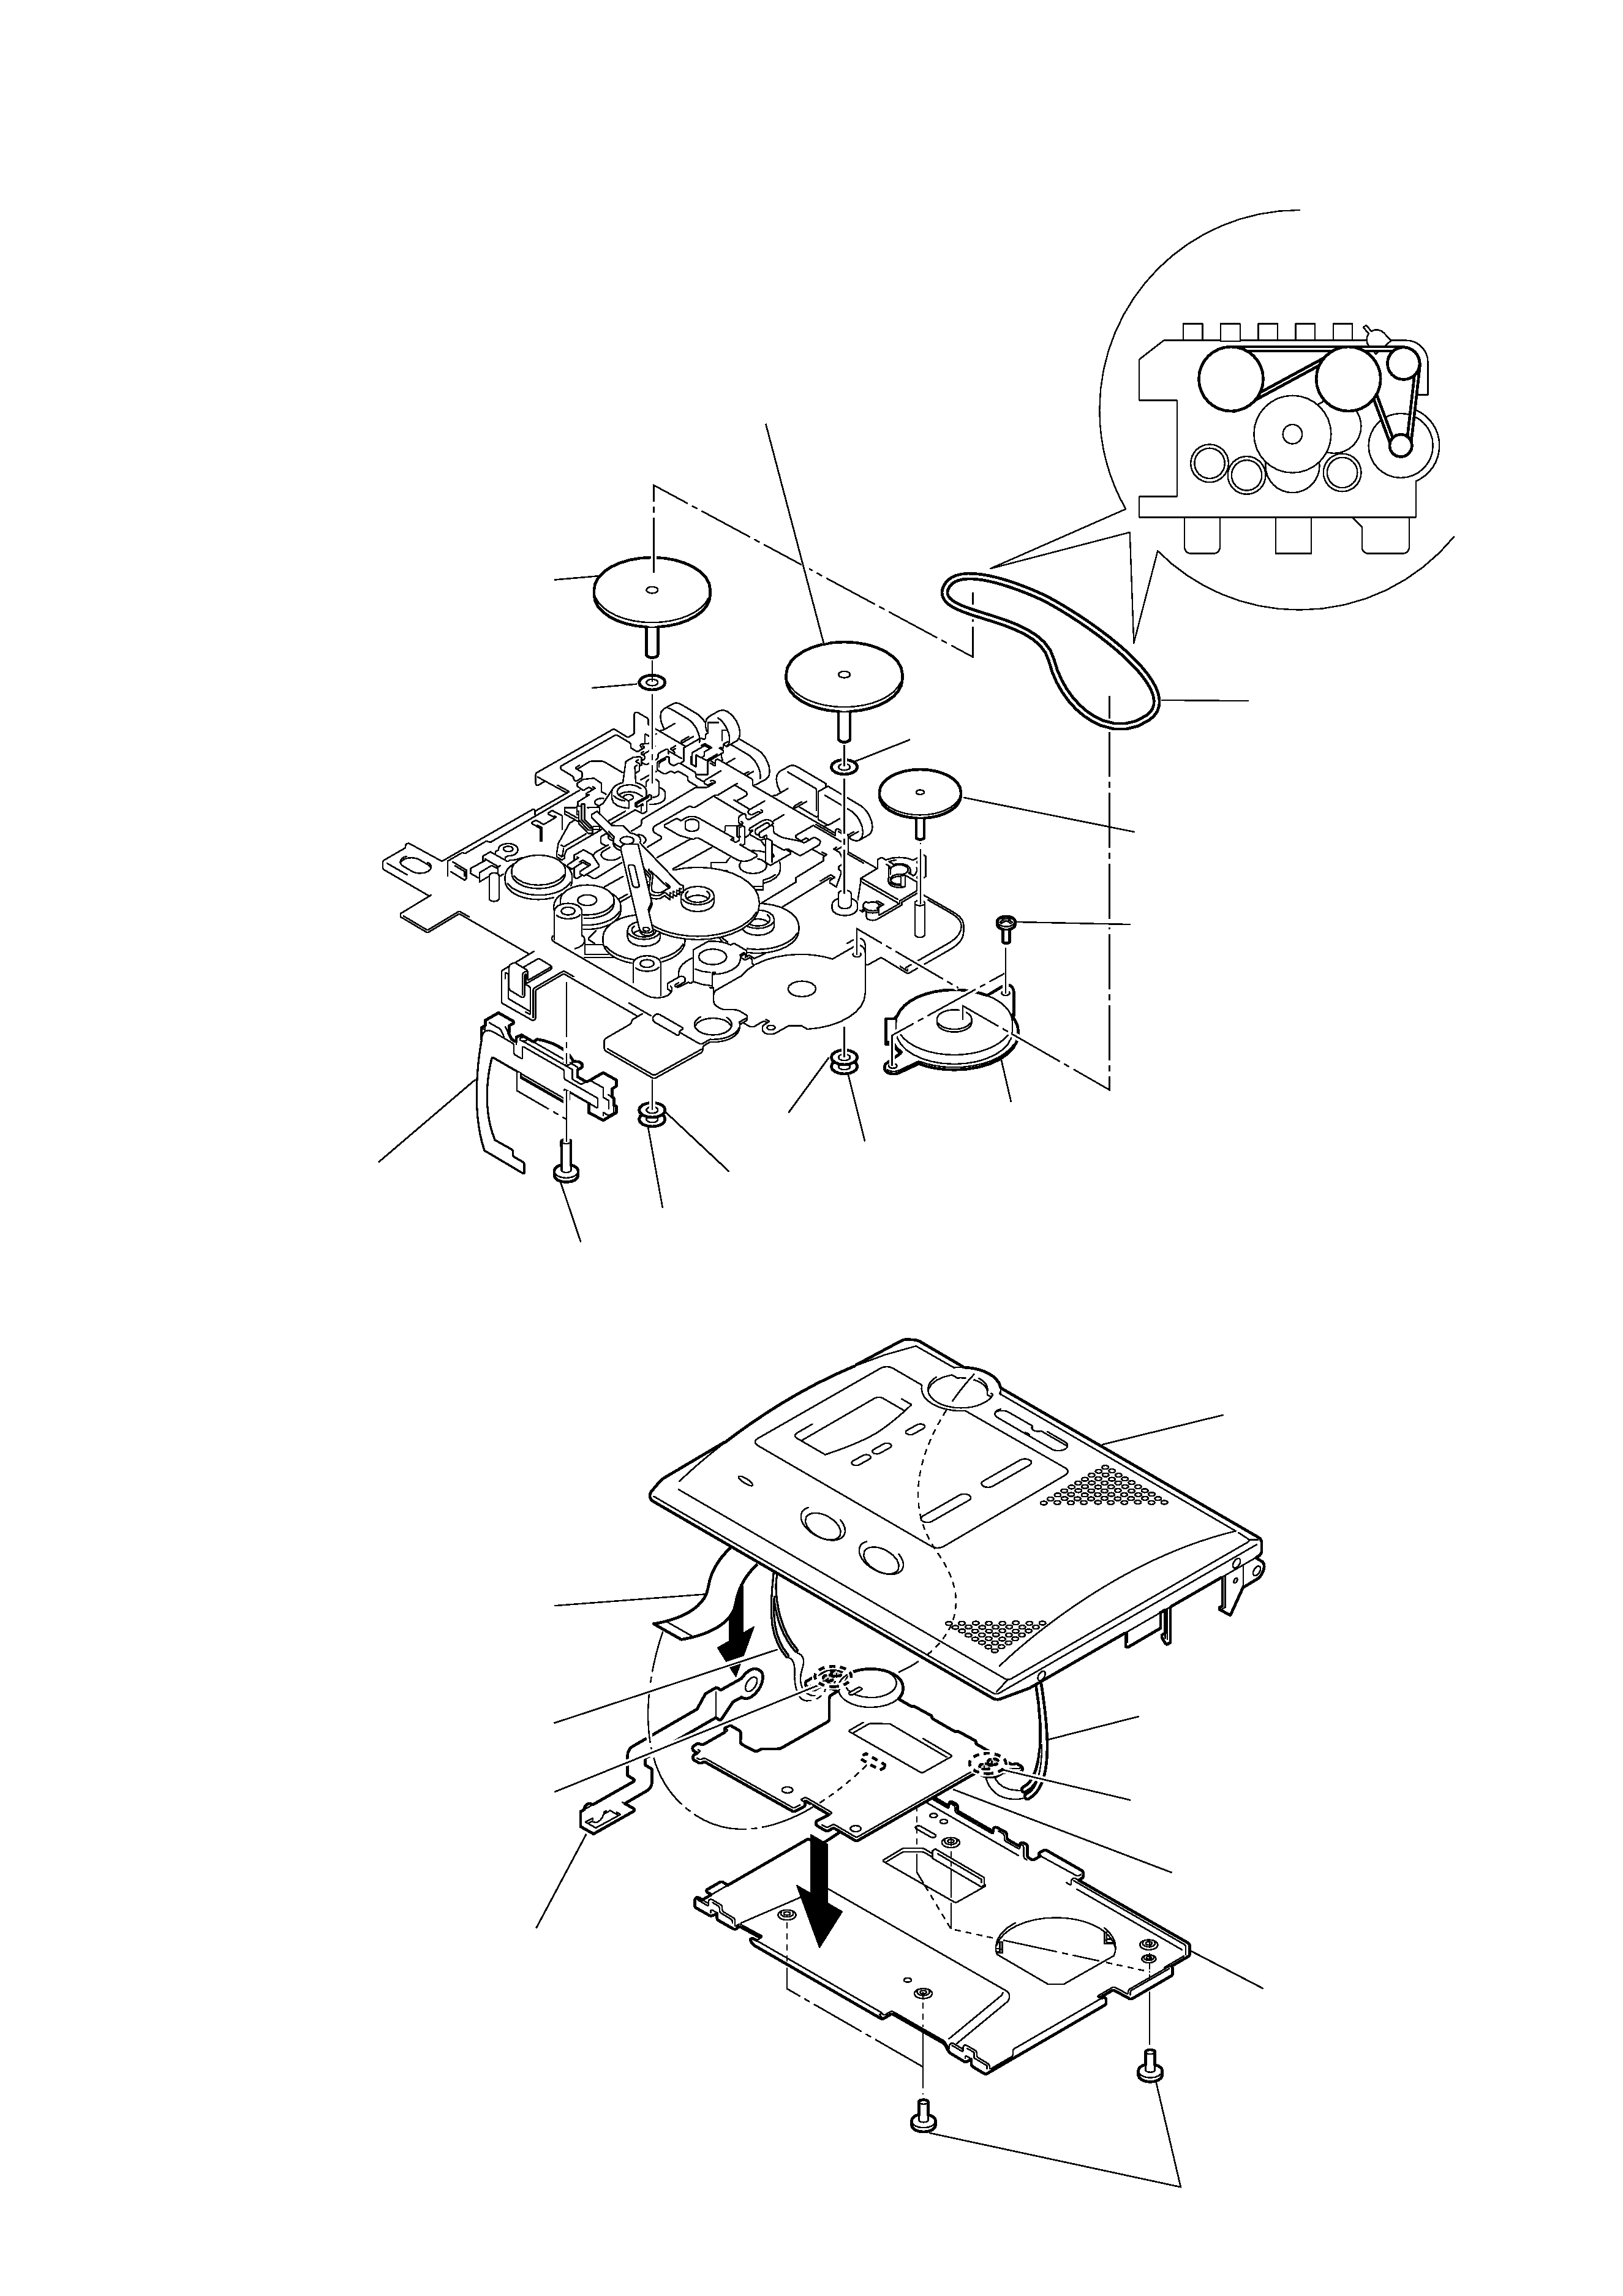
6
Washer
5
Washer (stopper N)
9
Screws (M1.4)
0
HRPE901
(REC/PB/ERASE head)
6
Washer
5
Washer (stopper N)
3
M601 (Capstan/reel motor)
2
Screws (M1.4)
4
Pulley (reverse)
8
Washer
8
Washer
7
Fly ASSY,Capstan
7
Fly ASSY,Capstan
1
Belt (AR)
Attaching belt (AR)
z
2-5. SW BOARD
2-4. BELT (AR), M601 (CAPSTAN/REEL MOTOR),
HRPE901 (REC/PB/ERASE head)
Cover, cassette lid
SW board
Lever assy, FWD return
Cassette lid assy
1
Screws (+B1.7X 3)
Lead Wires (from SP901)
Lead wires ( from MIC901)
4
Remove solder ( two places)
3
Remove solder ( two places)
5
Flexible board
( from LCD901)
6
2
