-- 1 --
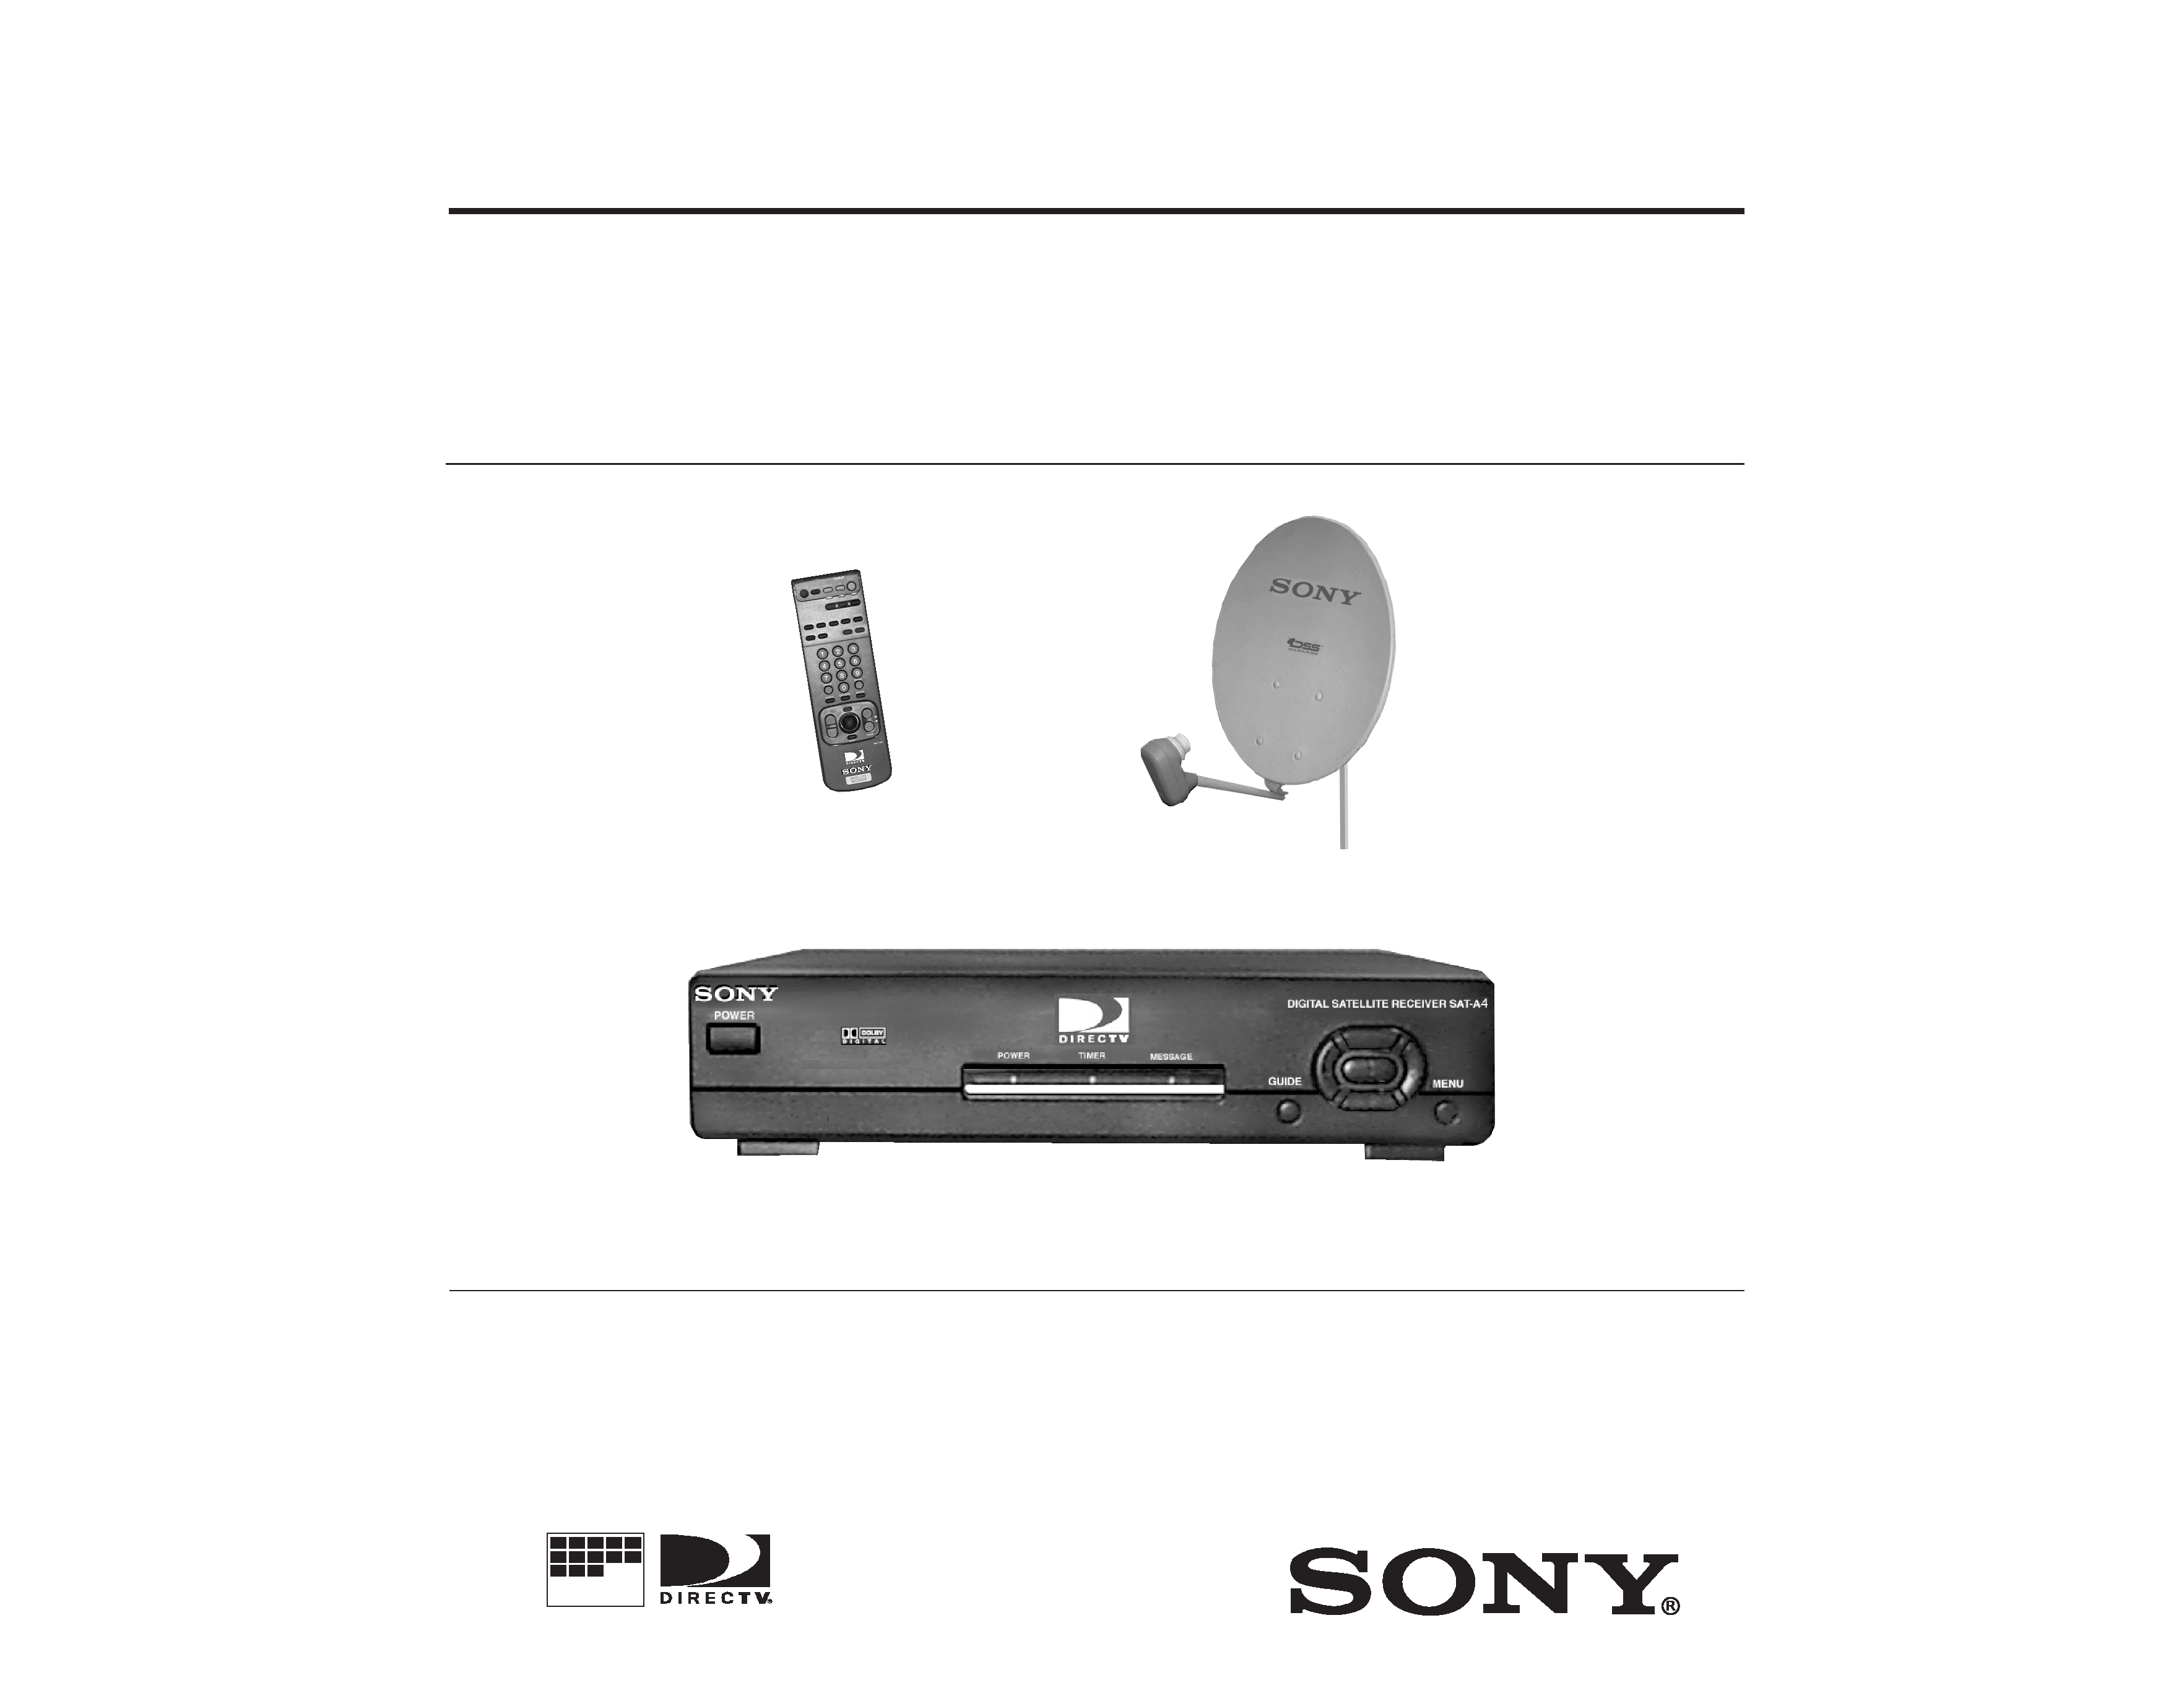
SAT-A4
SERVICE MANUAL
U.S. Model
DIGITAL SATELLITE RECEIVER/SATELLITE ANTENNA
SAT-A4 / SAN-18D2 RM-Y800
RM-Y800
MICROFILM
SAT-A4
SAN-18D2

-- 2 --
SAT-A4
Input Jacks
UHF/VHF
75 ohm F-type external terminal
Satellite Antenna
75 ohm F-type external terminal
CONTROL-S IN/S-LINK
(mini-jack) 5Vp-p
RF Remote
AC Power (120V, 60 Hz)
Output Jacks
S-VIDEO OUT
4-pin mini DIN
VIDEO (RCA jacks) (2)
AUDIO R/L (RCA jacks) (2)
VHF (SAT)/UHF, F-Type
Low Speed Data
9-pin D-Sub Female
TEL LINE
VCR control (1)
Optical output (1)
Input
Frequency
950 - 1450 Mhz
Power
Requirements
120V AC, 60 Hz
Power
Consumption
20 W max.
Dimensions
11 x 2 19/32 x 9 inches
(w/h/d)
280 x 66.5 x 228.5 mm
Weight
Set: 6.0 lb (2.7 kg)
Unit: 3.6 lb (1.6 kg)
Supplied
Remote Commander RM-Y800
Accessories
Size AA Batteries (2)
Access Card (1)
Audio/Video Cable (1)
S-VIDEO Cable (1)
RF Cable (1)
RF Antenna (1)
IR Blaster (1)
Telephone Cable (1)
AC Power Cord (1)
Specifications
FOR DIGITAL SATELLITE RECEIVER:
Local TV Antenna
ANJ-AA1
Installation Kit
ANJ-DS2
Amplifier
EAC-DA1
Diplexer
EAC-DD1
Coaxial Cable (25 ft.)
SAK-C25
Coaxial Cable (75 ft.)
SAK-C75
Voltage Switch
ECA-DV1
Multi-Room A/V Distribution System
MDR-D1
IR Target (for MRD-D1 System)
EAC-T1
Flat Cable
SAK-F1
Optional Sony-brand DSS Accessories
Design and specifications subject to change without notice.

-- 3 --
SAT-A4
Input Frequency
12.2 - 12.7 GHz
Output Frequency
950 - 1450 MHz
Output Connector
F-Type Female
Power
Consumption
3.0 W max.
Supply Voltage
DC + 11.5 - 14.0 V for RHCP
DC + 16.0 - 19.0 V for LHCP
Dimensions
185/8 x 31 x 185/16 inches
(w/h/d)
473 x 787 x 643 mm
Weight
8 lbs 6 oz (3.8 kg)
Specifications
FOR SATELLITE ANTENNA:
Supplied
Accessories
Snap in Cable Guides 1 pc
Weatherboot 2pcs (SAN-18D2)
Optional Supplied
Accessories
Local TV Antenna ANJ-AA1
Installation Kit
ANJ-DS2
Amplifier
EAC-DA1
Diplexer
EAC-DD1
Voltage Switch
ECA-DV1
Multi-Room A/V
Distribution System
MDR-D1
Coaxial Cable 25' SAK-C25
Coaxial Cable 75' SAK-C75
Flat Cable
SAK-F1
SAFETY CHECK-OUT
1. Check the area of your repair for unsoldered or poorly-sol-
dered connections. Check the entire board surface for sol-
der splashes and bridges.
2. Check the interboard wiring to ensure that no wires are
"pinched" or contact high-wattage resistors.
3. Check that all control knobs, shields, covers, ground straps,
and mounting hardware have been replaced. Be absolutely
certain that you have replaced all the insulators.
4. Look for unauthorized replacement parts, particularly tran-
sistors, that were installed during a previous repair. Point
them out to the customer and recommend their replacement.
5. Look for parts which, though functioning, show obvious
signs of deterioration. Point them out to the customer and
recommend their replacement.
6. Check the line cords for cracks and abrasion. Recommend
the replacement of any such line cord to the customer.
7. Check the B+ and HV to see if they are specified values.
Make sure your instruments are accurate; be suspicious of
your HV meter if sets always have low HV.
8. Check the antenna terminals, metal trim, "metallized"
knobs, screws, and all other exposed metal parts for AC
leakage using one of the methods listed.
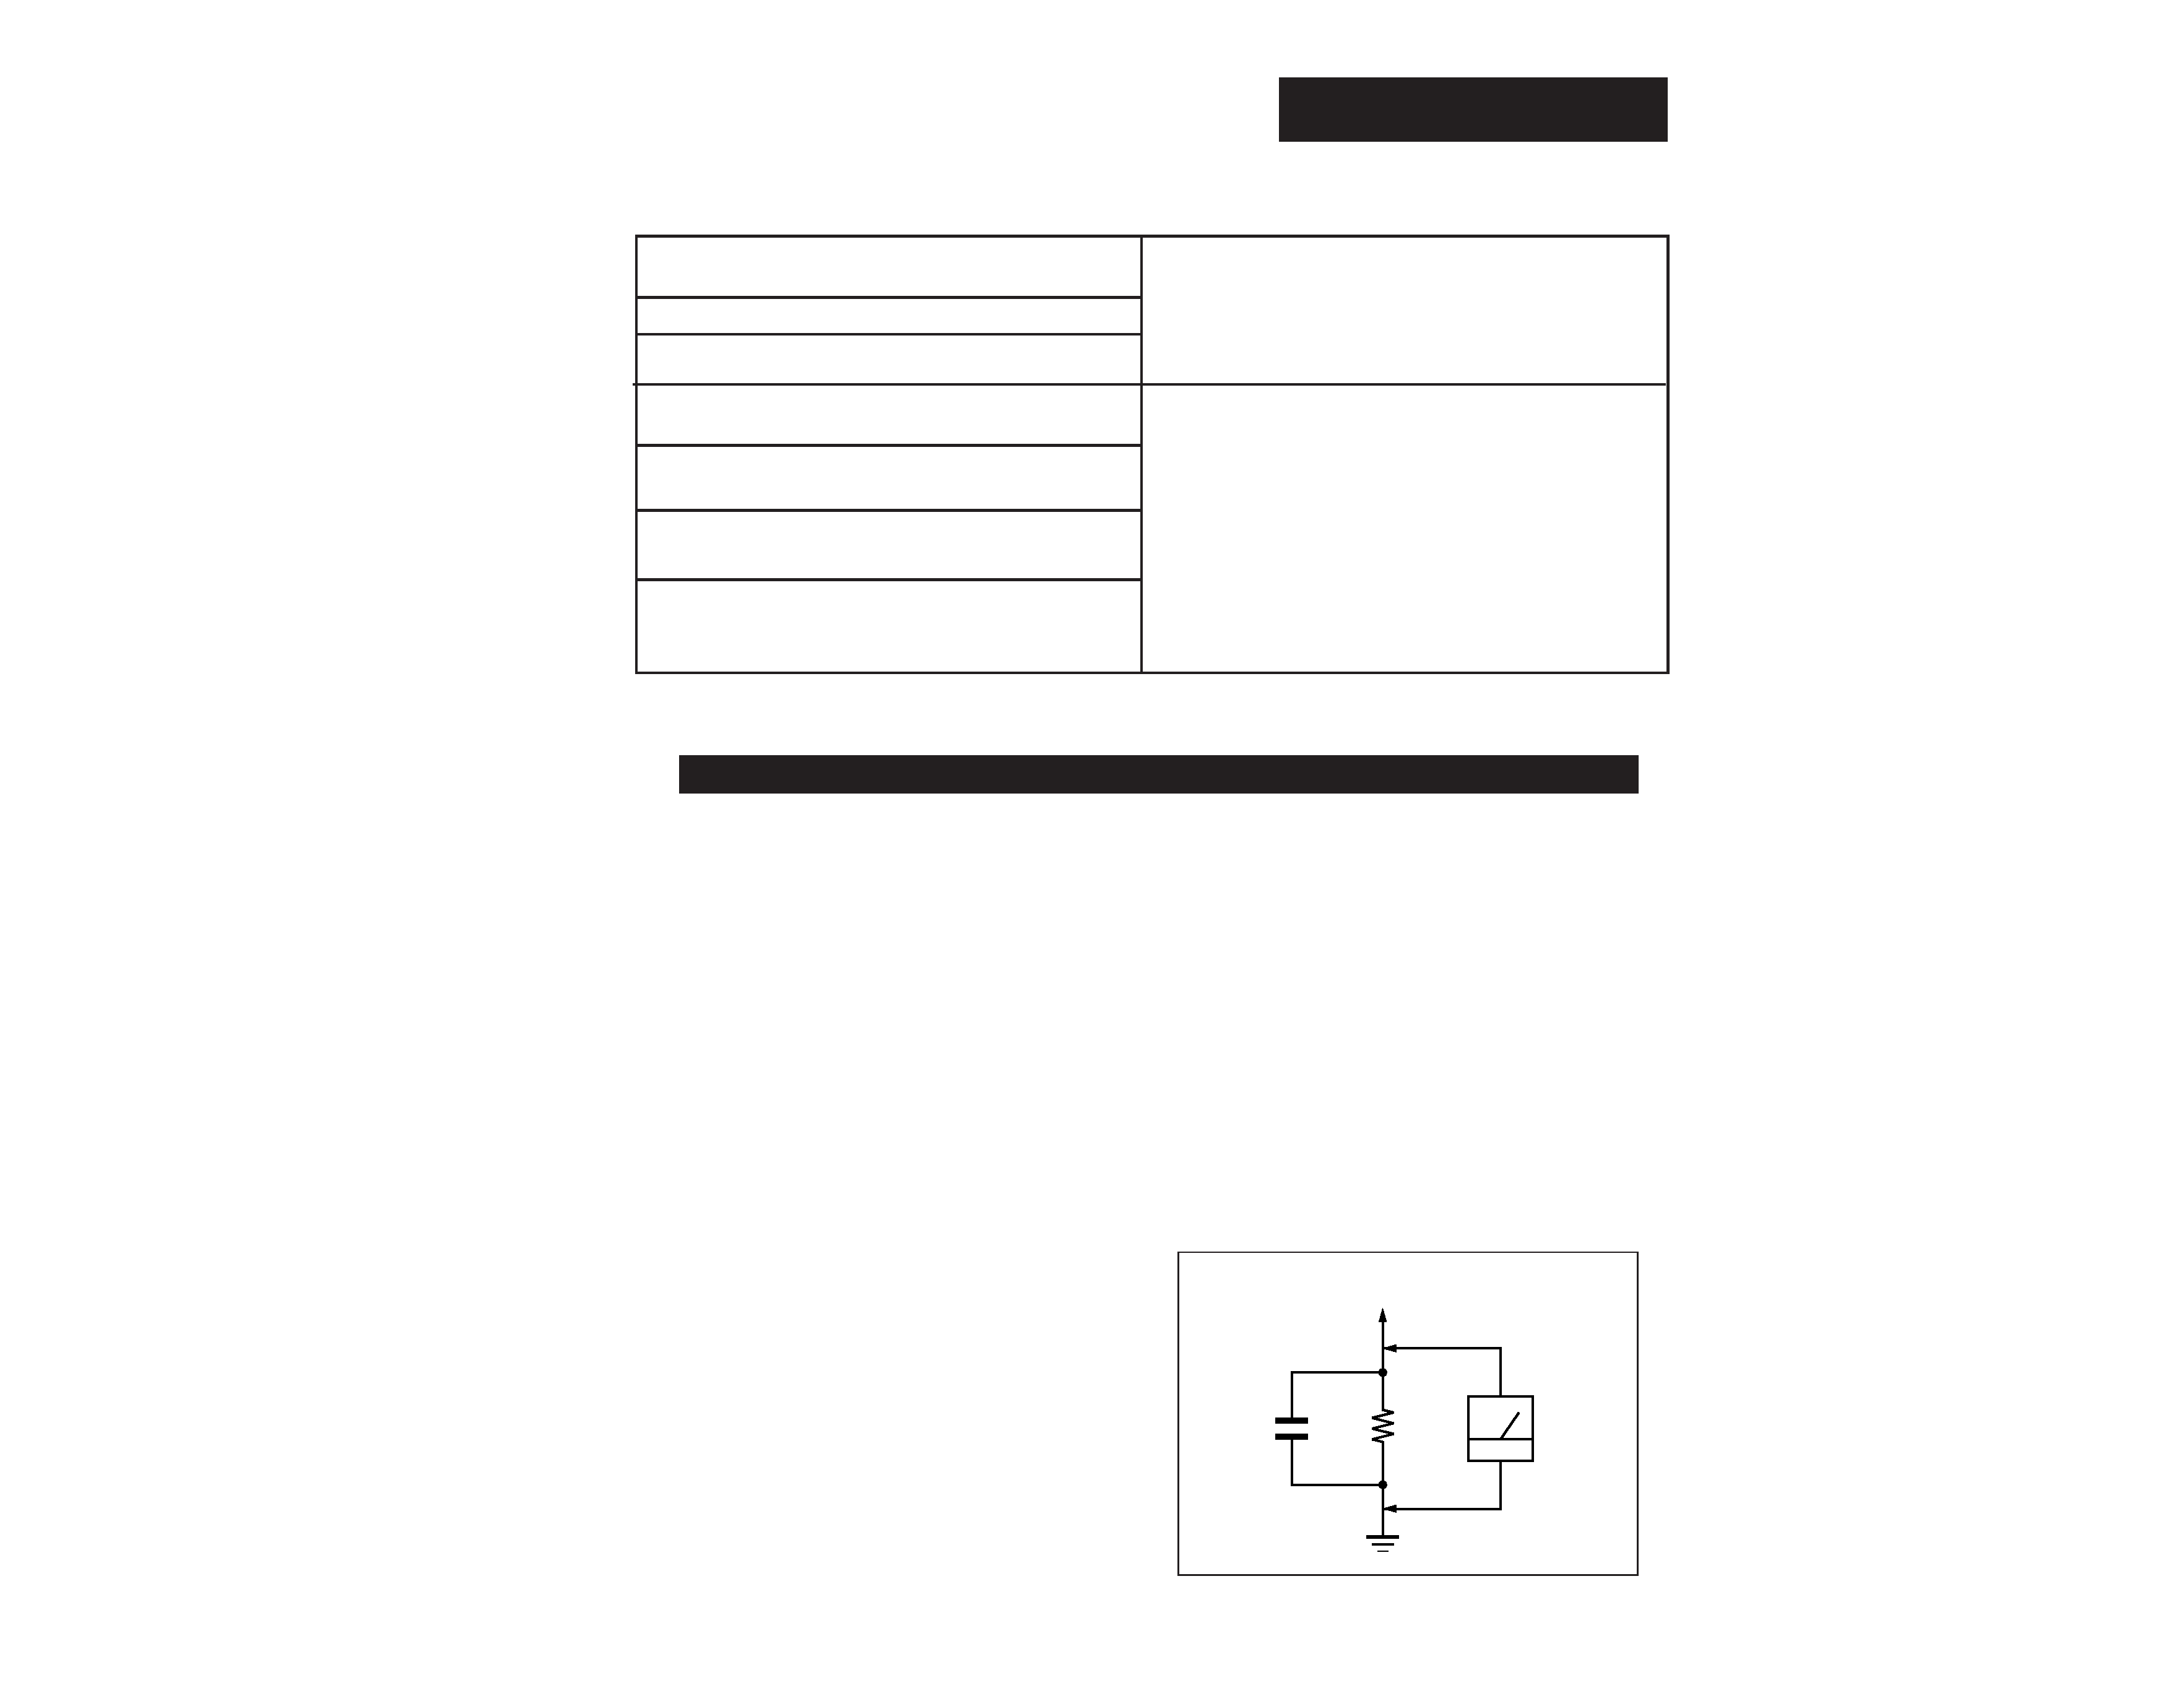
1.5 k W
0.15 µF
AC
Voltmeter
(0.75 V)
To Exposed Metal
Parts on Set
Earth Ground
Figure 1. Using an AC voltmeter to check AC leakage.
LEAKAGE TEST
The AC leakage from any exposed metal part to earth ground
and from all exposed metal parts to any exposed metal part
having a return to chassis, must not exceed 0.5 mA (500 mi-
croamperes). Leakage current can be measured by any one of
three methods.
1. A commercial leakage tester, such as the Simpson 229 or
RCA WT-540A. Follow the manufacturers' instructions
to use these instruments.
2. A battery-operated AC milliammeter. The Data Precision
245 digital multimeter is suitable for this job.
3. Measuring the voltage drop across a resistor by means of
a VOM or battery-operated AC voltmeter. The "limit" in-
dication is 0.75 V, so analog meters must have an accu-
rate low-voltage scale. The Simpson 250 and Sanwa SH-
63Trd are examples of passive VOMs that are suitable.
Nearly all battery operated digital multimeters that have
a 2 VAC range are suitable. (See Figure 1)

-- 4 --
SAT-A4
1.
General
5
2.
Disassembly
2-1.
Upper Case Removal
10
2-2.
H Board Removal
10
2-3.
A, SC Board Removal
10
3.
Diagrams
3-1.
Block Diagram
11
3-2.
Circuit Boards Location
14
3-3.
Schematic Diagrams and Printed Wiring Boards
14
(1) Schematic Diagrams of SC Board
15
(2) Schematic Diagrams of H Board
16
(3) Schematic Diagram of A Board (1/3)
17
(4) Schematic Diagram of A Board (2/3)
20
(5) Schematic Diagram of A Board (3/3)
23
(6) A Board PCB and Components Location
26
3-4.
Semiconductors
29
4.
Exploded Views
4-1.
SAT-A4 .
30
4-2.
SAN-18D2
31
5.
Electrical Parts List
32
¡
SAFETY-RELATED COMPONENT WARNING!!
Components identified by shading and mark
¡
on the schematic diagrams, exploded views and
in the parts list are critical for safe operation.
Replace these components with Sony parts
whose part numbers appear as shown in this
manual or in supplements published by Sony.
Circuit adjustments that are critical for safe op-
eration are identified in this manual. Follow these
procedures whenever critical components are
replaced or improper operation is suspected.
SECTION
TITLE
PAGE
TABLE OF CONTENTS

--
5
--
SA
T-A4
The operating instructions mentioned here are partial abstracts from the
Operating Manual. The page numbers referenced here reflect those of
the Operating Instruction Manual.
SECTION 1
GENERAL
7
Chapter 2
Using Basic Functions
You can start watching programs using just a few buttons on the
remote control. Here's an overview of the buttons you'll use most
often.
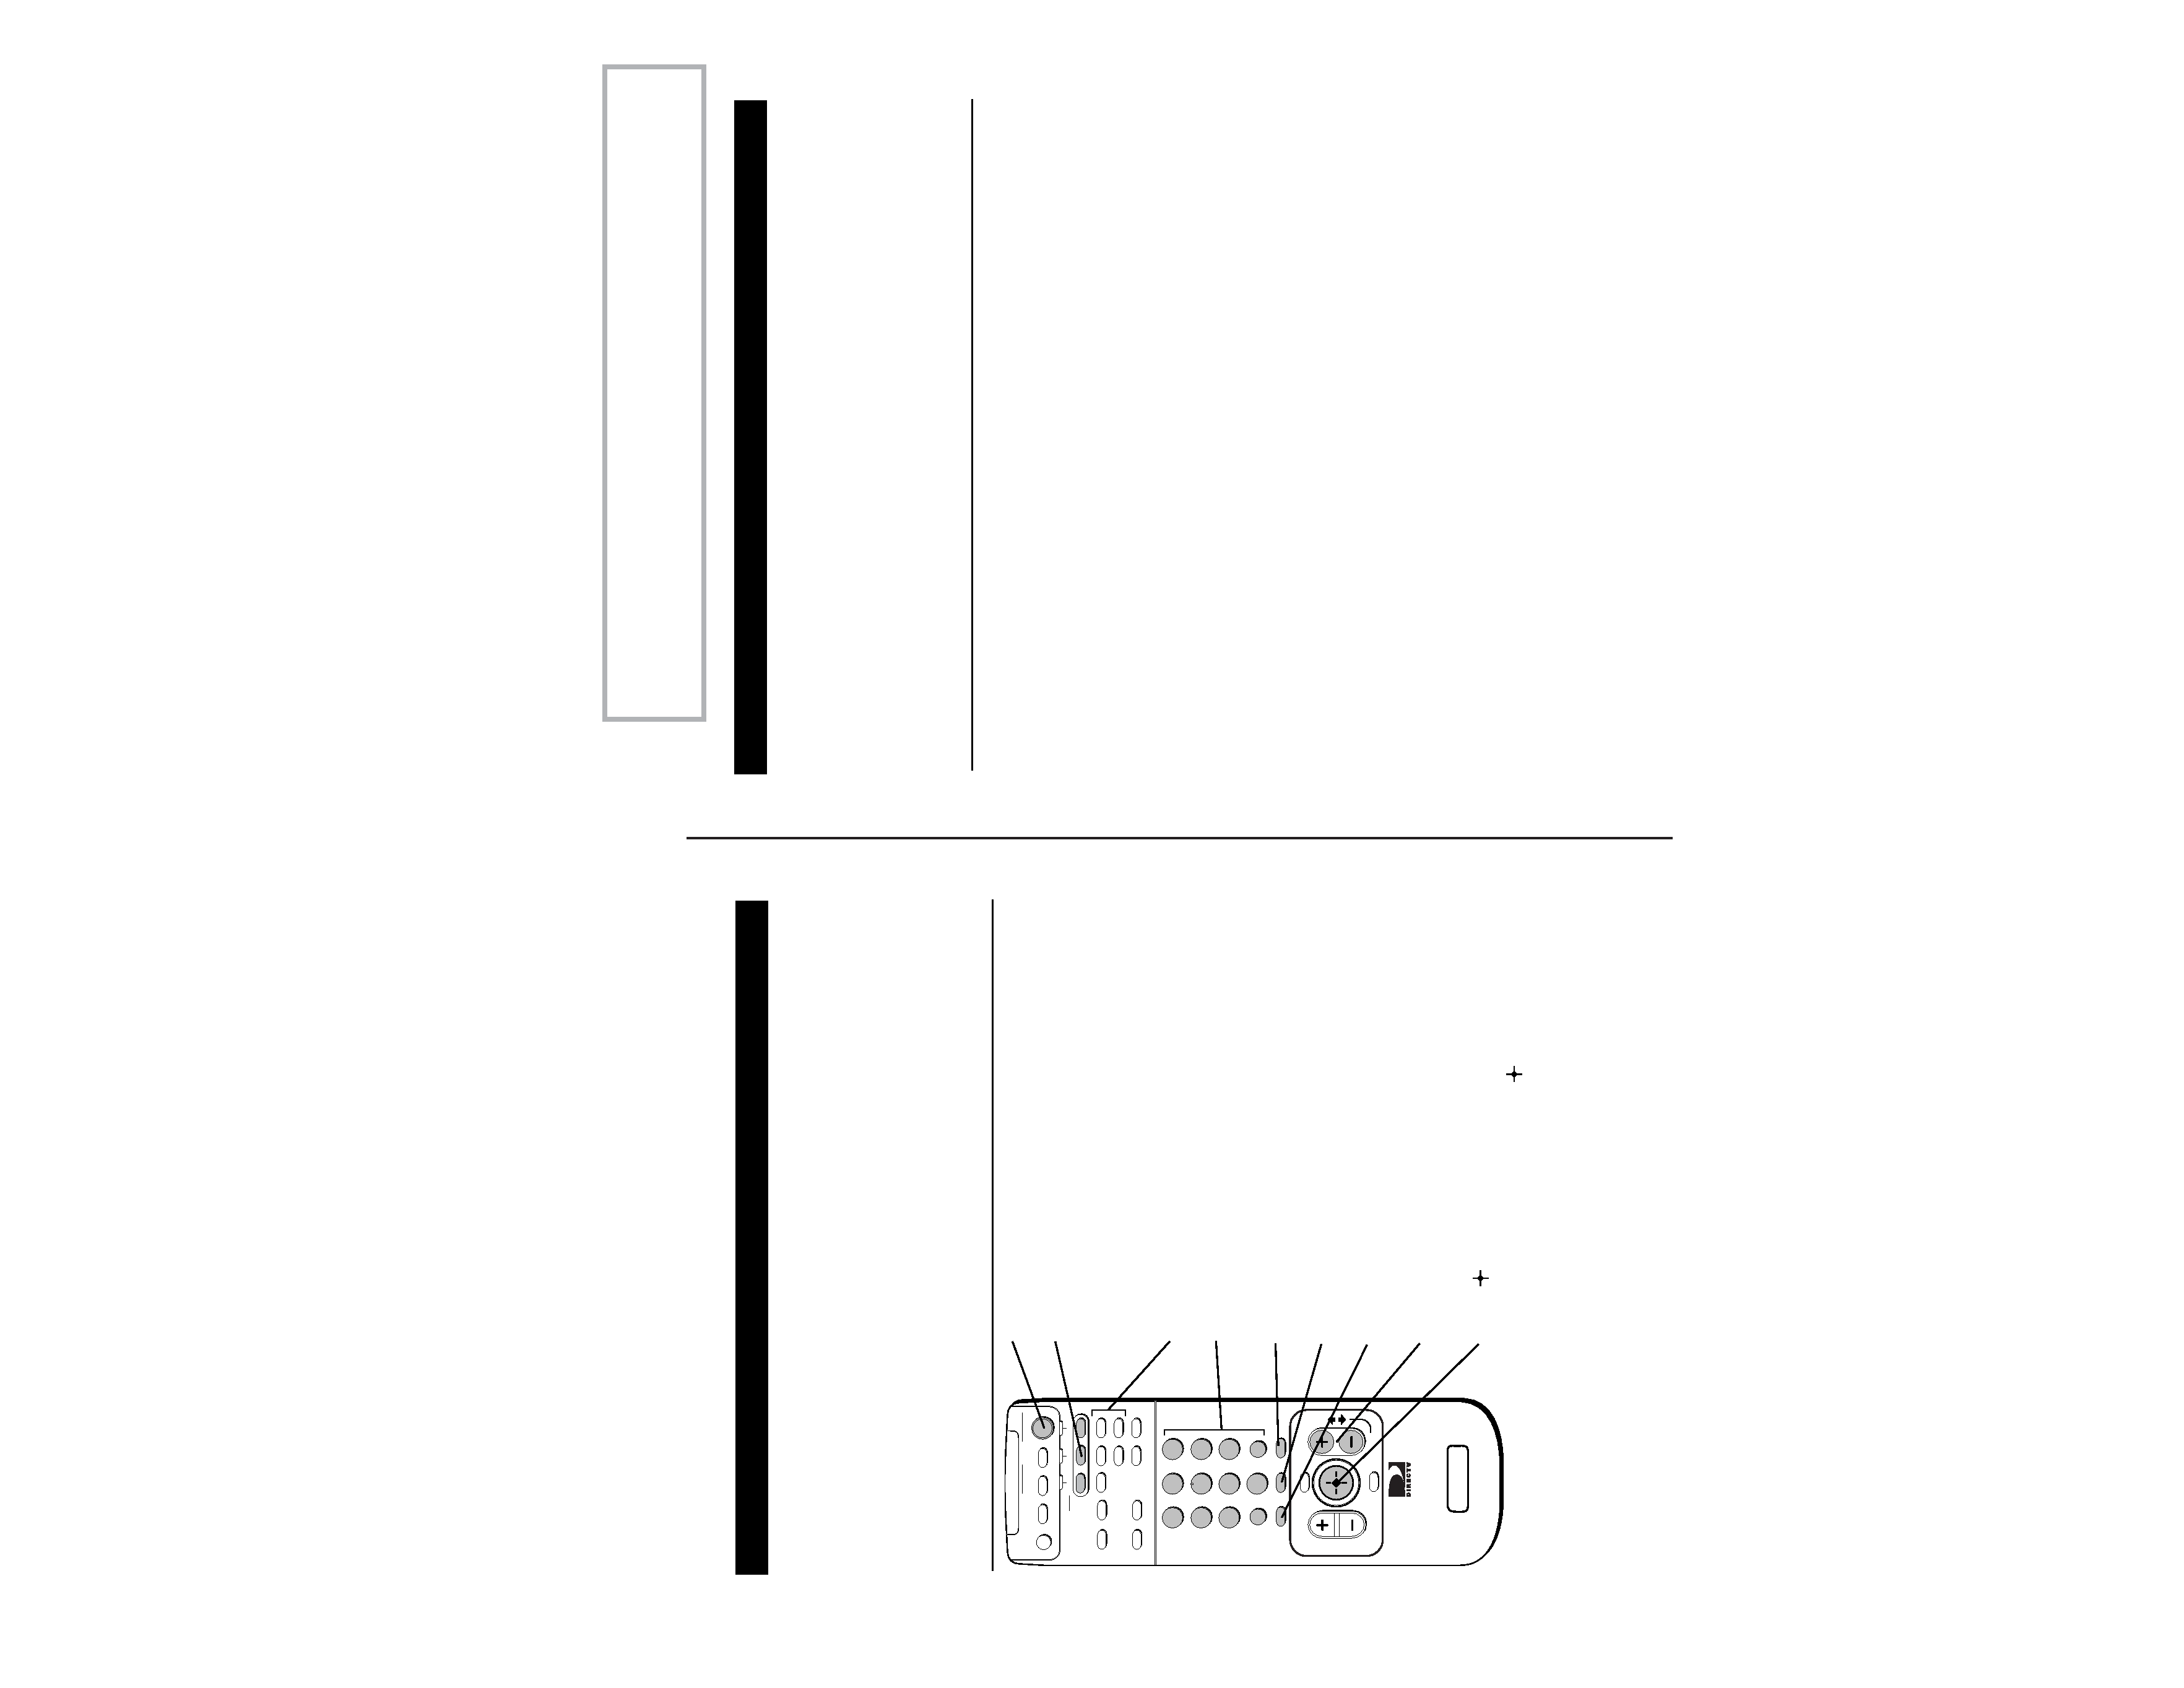
Remote Control for Model SAT-A4
See Also
q
Pages 910 for a quick start to using the program guide and the
Station Index.
q
Pages 8183 for a complete description of the buttons on the
remote.
MUTING
TV
POWER
CABLE
SLEEP
SAT
0
1
2
8
3
4
5
6
7
9
MENU
ENTER
GUIDE
TV/SAT
TV/VIDEO
SAT
TV
CABLE
DISPLAY
FUNCTION
EXIT
JUMP
FAVORITE
CH
OFF
AUDIO
POSITION
SWAP
PIP
SATELLITE
RECEIVER
S
CATEGORY
INDEX
PAGE
+
-
RM-Y800
CH
VOL
CH/PAGE Buttons
Changes the channel. When a program guide is displayed, pressing
the CH/PAGE buttons pages through the guide.
GUIDE Button
Press to display the Custom Guide.
SAT POWER Button
Turns the Digital Satellite Receiver on and off.
09 and ENTER Buttons
Pressing the 09 buttons and then the ENTER button selects a
station number directly.
CATEGORY Button
Press to display the Category Guide.
INDEX Button
Press to display the Station Index.
FUNCTION Buttons
Selects the component (SAT, TV, CABLE) that you want to operate.
These buttons flash to indicate which component the remote control
is set to operate. To switch from the TV to SAT mode, press the
SAT FUNCTION button, and then press the TV/SAT button. To control
your TV or cable box, you must first program the remote control, as
described on page 85.
Joystick/
Button
Moving the joystick up, down, left, right, and diagonally scrolls
through the program guides. Pressing the
button selects the
program that's highlighted.
PIP Buttons
Control the Picture-In-Picture functions of your Sony TV (see page 81).
11
Chapter 3
Connecting Your DIRECTV System
Read this chapter to set up your Digital Satellite Receiver for the first
time, or to add or remove audio or video components connected to
your system.
Overview
You can connect the Digital Satellite Receiver in a variety of
configurations. The answers to the following questions will determine
how you hook up and operate your Digital Satellite Receiver. For
example:
q
Do you have cable TV or a broadcast (terrestrial) TV antenna?
q
What type of connectors do your TV and VCR have: S-VIDEO,
A/V (RCA-type), or RF coaxial?
q
Do you plan to integrate your Digital Satellite Receiver with your
audio or video system?
q
Do you have a Dolby Digital decoder or Dolby Digital A/V
receiver?
Detailed hookup instructions are provided on the pages that follow.
For optimum audio and video performance, follow these general
recommendations as much as possible when hooking up your
components:
q
If you have an audio or audio/video system, consider integrating
the Digital Satellite Receiver into a home entertainment
configuration to take advantage of your hi-fi system's audio
capabilities.
q
If your TV has an S-VIDEO jack, use it to connect your TV to the
Digital Satellite Receiver. An S-Video connection provides a better
picture than A/V or RF connections.
q
If your TV does not have an S-VIDEO jack, use your TV's A/V
connectors to connect your components. An A/V connection
provides a better picture and audio when compared to an RF
connection.
q
If you have a Dolby Digital decoder, or an A/V receiver with Dolby
Digital, you can connect these components using an optical cable
and set the Audio options to allow Dolby Digital signals to be
output to your other components (see page 58). Dolby Digital
provides six discrete channels of audio for a complete surround
sound experience.
q
If your A/V receiver has a digital optical input terminal, you can
connect it to your A/V receiver using an optical cable.
(SAT-A4 Only)
Note:
Before you connect the RG-6 coaxial cable
from the LNB to the Digital Satellite
Receiver, make sure the Digital Satellite
Receiver is unplugged. This will prevent
your Digital Satellite Receiver from
experiencing a short.
