VAIO Digital StudioTM
Computer User Guide
PCV-RX580/PCV-RX590G

Change to Current Document Title
3
Welcome
Thank you for purchasing your Sony VAIO® computer! Your new
computer is a superb blend of high technology and easy-to-use
functionality. The information provided here is designed to help you to
become familiar with the hardware and software applications included
with your system.

5
Locating Controls and
Connectors
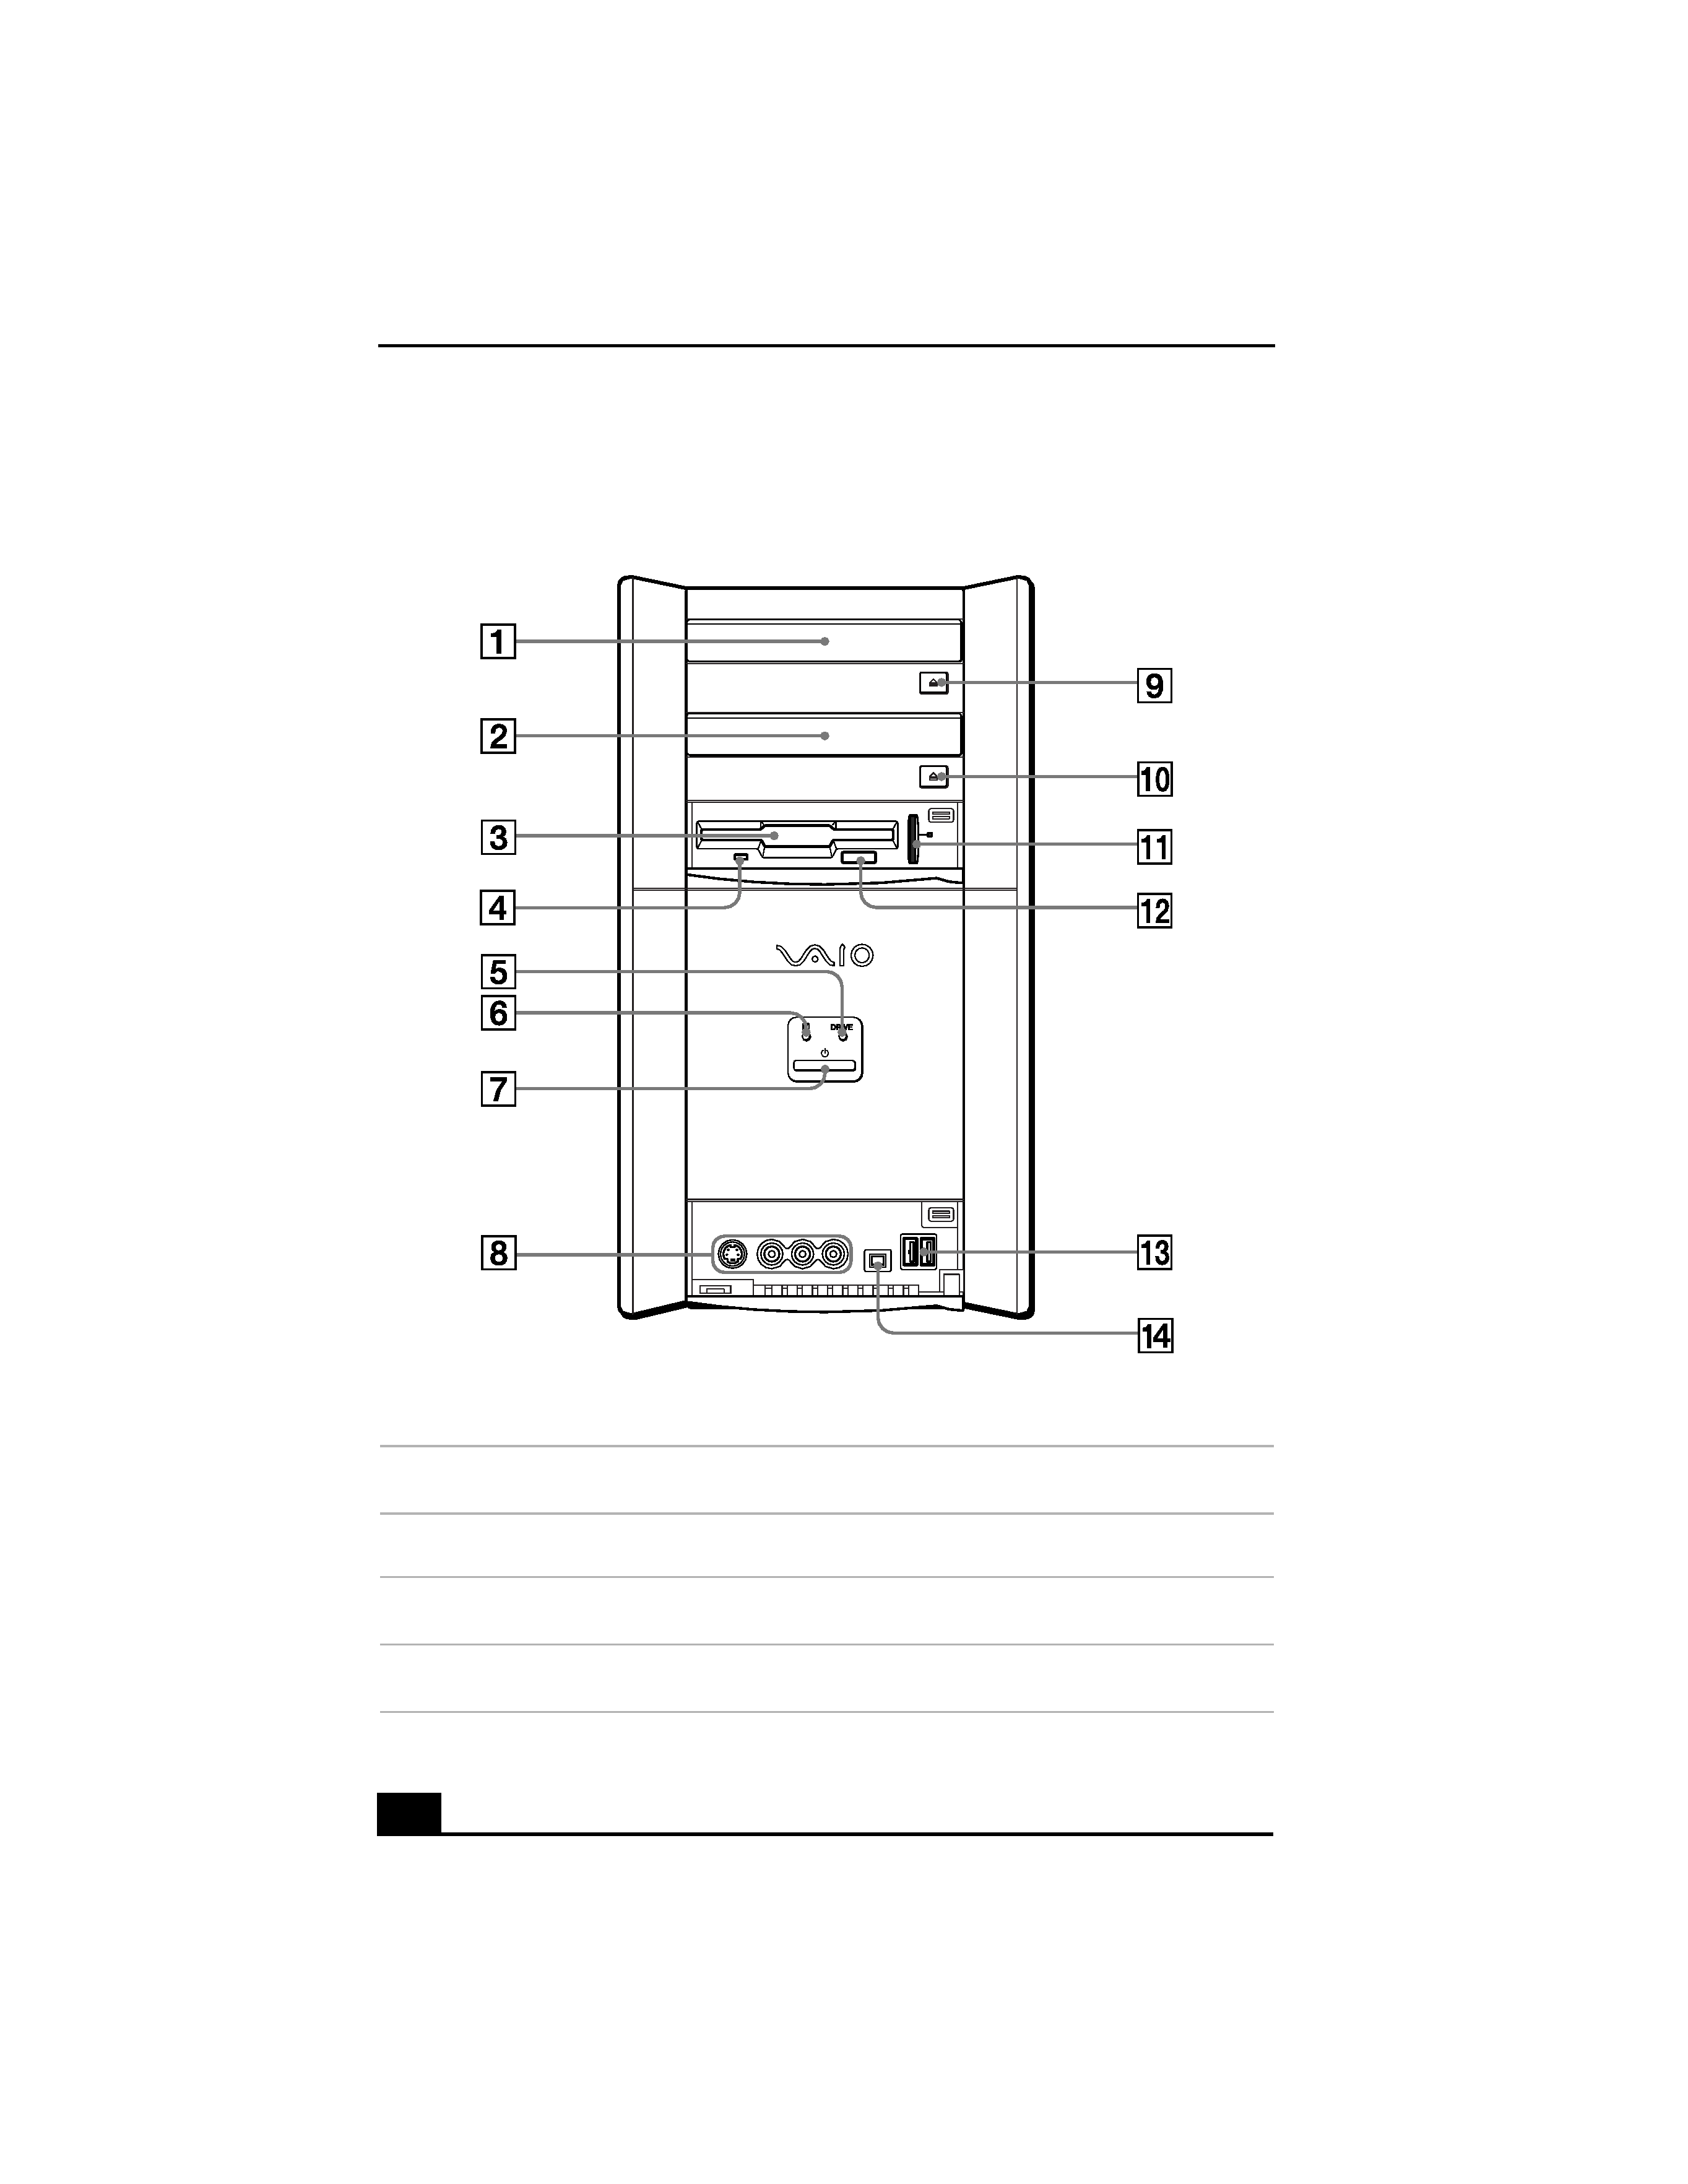
Front Panel Overview
The front panel of your VAIO Digital StudioTM Computer enables access to the
optical and floppy disk drives. On certain models, the front panel also provides
access to Giga Pocket Personal Video Recorder jacks and ports, Universal Serial
Bus (USB), and i.LINK® ports to connect compatible peripheral devices.
i.LINK is a trademark of Sony used only to designate that a product contains an
IEEE1394 connection. The i.LINK connection may vary, depending on the software
applications, operating system, and compatible i.LINK devices. All products with an
i.LINK connection may not communicate with each other.
Please refer to the documentation that came with your compatible i.LINK device for
information on operating conditions and proper connection. Before connecting
compatible i.LINK PC peripherals to your system, such as an optical or hard disk drive,
confirm their operating system compatibility and required operating conditions.

Change to Current Document Title
6
Front panel (Model equipped with Giga Pocket shown)
1
Optical drive 1
See the Specifications sheet for more information.
2
Optical drive 2
See the Specifications sheet for more information.
3
Floppy disk drive
Reads and writes data from and to a 3.5-inch floppy disk.
4
Floppy disk drive access indicator light
Lights in green while reading and writing data from and to a floppy disk.

Locating Controls and Connectors
7
5
Optical drive access indicator light
Lights in amber while reading and writing data from and to the optical drives.
6
Hard disk drive access indicator light
Lights in amber while reading and writing data from and to the hard disk.
7
Power switch and indicator light
Turns the computer on and off. The indicator light is blue while the power is on and
amber when the computer is in Stand by mode.
8
(For models equipped with Giga Pocket)
S-video In port
Connection for an S-video cable (optional).
Video In jack
Connection for a video cable (supplied).
Audio L In jack/Audio R In jack
Connection for an audio cable (supplied).
9
Optical drive 1 eject button
Ejects a disc from Optical drive 1.
10
Optical drive 2 eject button
Ejects a disc from Optical drive 2.
11
Memory Stick drive and eject button
Reads and writes data from and to a Memory Stick media.
12
Floppy disk eject button
Ejects a floppy disk from the floppy disk drive.
13
Universal Serial Bus (USB) ports (2)
Connection for a compatible USB device.
14
i.LINK (4-pin) port (IEEE1394)
Connection for a compatible digital device.
For your convenience, your computer includes Giga Pocket, USB, and i.LINK ports and
jacks on both the front and back panels. (The 4-pin i.LINK port is located on the front
panel and the 6-pin i.LINK port is located on the back.)
