Ref. No.
Part No.
Description
Ref. No. Part No.
Description
1
X-4951-002-1 PANEL ASSY, FRONT
1
X-4952-584-1 PANEL ASSY, FRONT
5
4-216-754-01 KNOB (INPUT)
5
4-216-754-21 KNOB (INPUT)
6
4-216-755-01 KNOB (AMS)
6
4-216-755-21 KNOB (AMS)
66
7
X-4951-417-1 ESCUTCHEON ASSY
7
X-4952-585-1 ESCUTCHEON ASSY
8
4-216-752-01 BUTTON (MODE)
8
4-216-752-21 BUTTON (MODE)
9
4-216-751-01 BUTTON (FF)
9
4-216-751-21 BUTTON (FF)
10
4-216-768-01 BUTTON (EDIT)
10
4-216-768-21 BUTTON (EDIT)
15
4-990-703-91 COVER
15
4-226-601-11 COVER
* 59
4-216-765-12 PANEL, BACK (US)
59
4-228-697-01 PANEL, BACK (US)
* 59
4-216-765-22 PANEL, BACK (CND)
59
4-228-697-11 PANEL, BACK (CND)
* 59
4-216-765-32 PANEL, BACK (AE, UK, AED, AR)
59
4-228-697-21 PANEL, BACK (AEP, UK, AED, AR)
67
* 59
4-216-765-42 PANEL, BACK (SP)
59
4-228-697-31 PANEL, BACK (SP)
* 59
4-216-765-52 PANEL, BACK (HK)
59
4-228-697-41 PANEL, BACK (HK)
* 59
4-216-765-62 PANEL, BACK (AUS)
59
4-228-697-51 PANEL, BACK (AUS)
ACCESSORIES & PACKING MATERIALS
ACCESSORIES & PACKINT MATERIALS
********************************
********************************
3-865-729-12 MANUAL, INSTRUCTION (ENGLISH)
4-228-655-11 MANUAL, INSTRUCTION (ENGLISH)
(EXCEPT AED)
(EXCEPT AED)
3-865-729-22 MANUAL, INSTRUCTION (FRENCH,
4-228-655-21 MANUAL, INSTRUCTION (FRENCH,SPANISH,
SPANISH, PORTUGUESE)
PORTUGUESE)(CND, AEP, SP, AR)
(CND, AEP, AR)
75
3-865-729-31 MANUAL, INSTRUCTION (GERMAN,
4-228-655-31 MANUAL, INSTRUCTION (GERMAN, DUTCH,
DUTCH, ITALIAN)(AEP)
ITALIAN)(AEP)
3-865-729-41 MANUAL, INSTRUCTION
4-228-655-41 MANUAL, INSTRUCTION (SWEDISH, DANISH,
(SWEDISH, FINNISH)(AED)
DANISH,FINNISH)(AED)
3-865-729-51 MANUAL, INSTRUCTION (ENGLISH,
4-228-655-51 MANUAL, INSTRUCTION (ENGLISH, POLISH,
POLISH, RUSSIAN)(AEP)
RUSSIAN)(AEP)
3-865-729-61 MANUAL, INSTRUCTION (CHINESE)
4-228-655-61 MANUAL, INSTRUCTION (CHINESE)(SP, HK)
(SP, HK)
SERVICE MANUAL
Sony Corporation
Home Audio Division Company
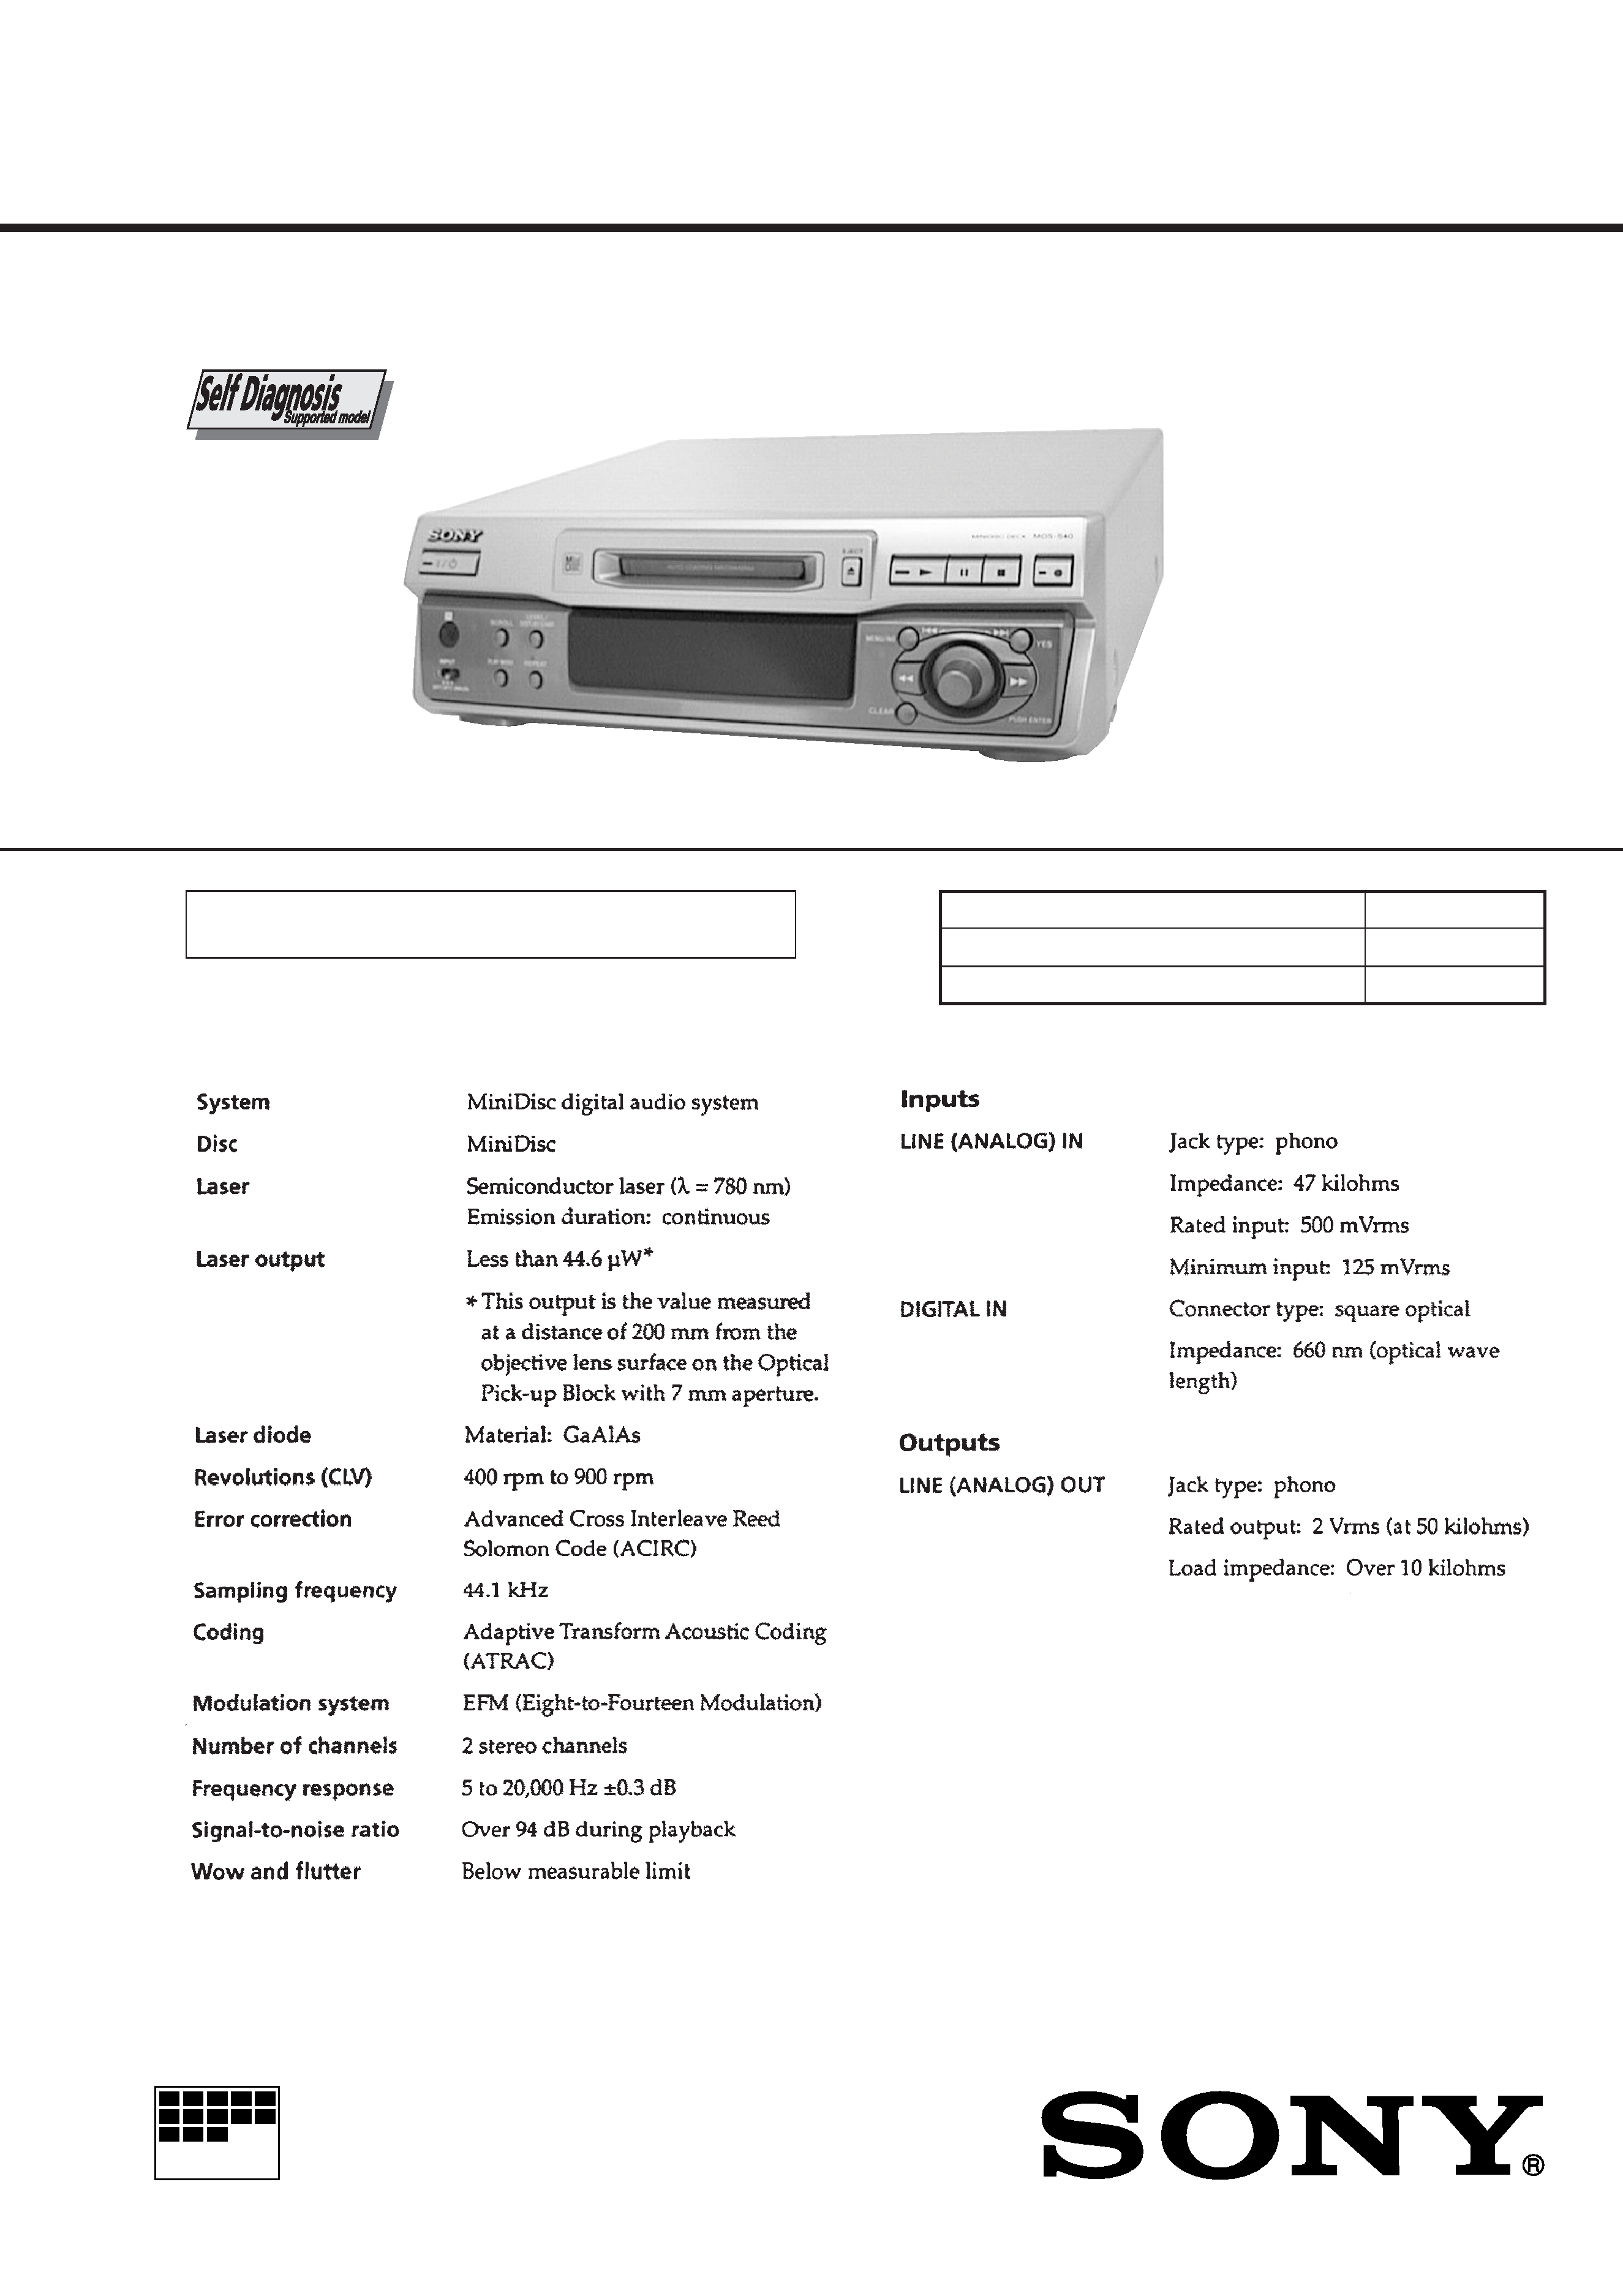
MINIDISC DECK
2000B001685-1
Printed in Japan ©2000.2
Published by Quality Assurance Dept.
· The mechanical and electrical specifications of MDS-41 is almost same as
MDS-S40 silver type.
So this manual contains only the points which differ from MDS-S40 silver type.
For the informations not contained in this manual, please refer to the
MDS-S40 service manual (9-928-838-
) previously issued.
9-929-090-11
US Model
Canadian Model
AEP Model
UK Model
E Model
Australian Model
MDS-S41
·
PARTS LIST (The difference between MDS-S40 and MDS-S41)
Page
MDS-S40 SILVER TYPE
MDS-S41
· Abbreviation
AED : North European
AR
: Argentine
AUS : Australian
CND : Canadian
HK
: Hong Kong
SP
: Singapore
· Items marked "*" are not stocked since they are
seldom required for routine service. Some delay
should be anticipated when ordering these items.

MICROFILM
SERVICE MANUAL
MINIDISC DECK
US Model
Canadian Model
AEP Model
UK Model
E Model
Australian Model
SPECIFICATIONS
MDS-S40
Model Name Using Similar Mechanism
MDS-JE520
MD Mechanism Type
MDM-5A
Optical Pick-up Type
KMS-260A/J1N
U.S. and foreign patents licensed form Dolby Laboratories
Licensing Corporation.
Photo: Silver model
Continued on next page

2
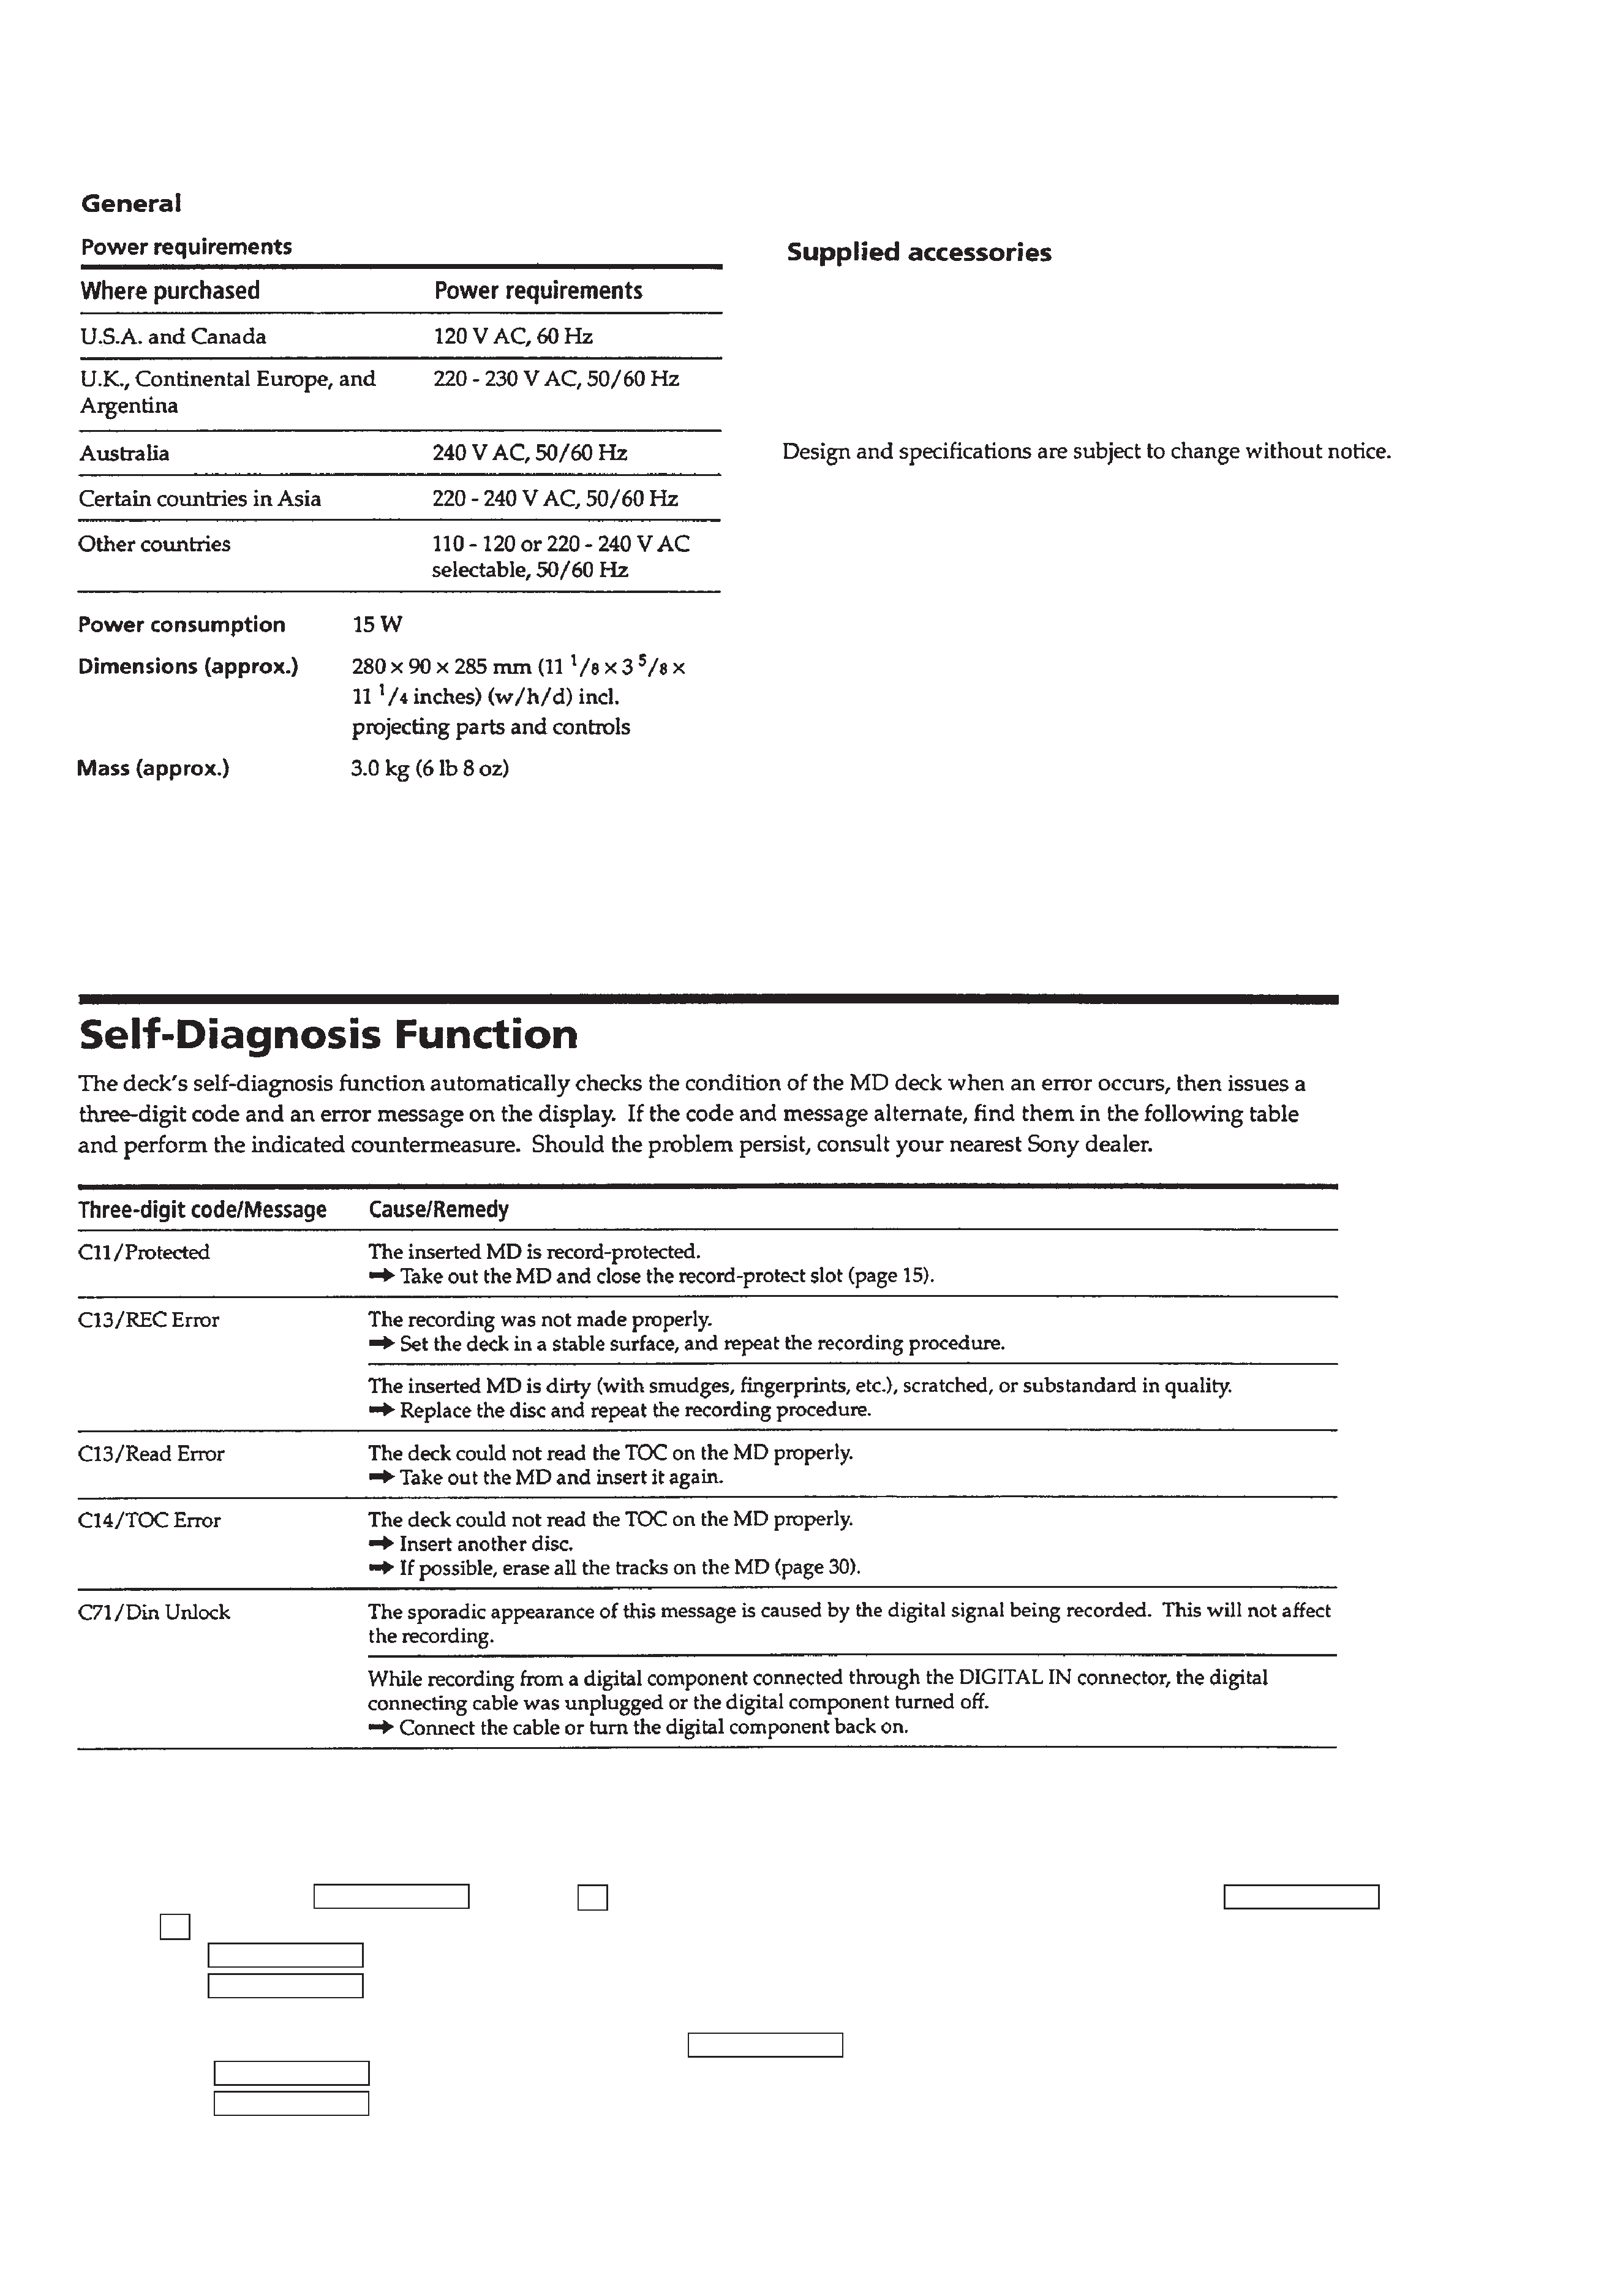
SELF-DIAGNOSIS FUNCTION
The self-diagnosis function consists of error codes for customers which are displayed automatically when errors occur, and error codes
which show the error history in the test mode during servicing. For details on how to view error codes for the customer, refer to the
following box in the instruction manual. For details on how to check error codes during servicing, refer to the following "Procedure for
using the Self-Diagnosis Function (Error History Display Mode)".
PROCEDURE FOR USING THE SELF-DIAGNOSIS FUNCTION (ERROR HISTORY DISPLAY MODE)
Note: Perform the self-diagnosis function in the "error history display mode" in the test mode. The following describes the least required procedure. Be
careful not to enter other modes by mistake. If you set other modes accidentally, press the MENU/NO button to exit the mode.
1. While pressing the
= ~ + knob and p button, connect the power plug to the outlet, and release the = ~ + knob
and p button.
2. Turn the
= ~ + knob and when "[Service]" is displayed, press the [YES] button.
3. Turn the
= ~ + knob to display "ERR DP MODE".
4. Press the [YES] button to sets the error history mode and displays "total rec".
5. Select the contents to be displayed or executed using the
= ~ + knob.
6. Press the
= ~ + knob to display or execute the contents selected.
7. Press the
= ~ + knob another time returns to step 4.
8. Press the [MENU/NO] button to display "ERROR DP MODE" and exits the error history mode.
9. To exit the test mode, press the [REPEAT] button. The unit sets into the STANDBY state, the disc is ejected, and the test mode ends.
· Audio connecting cords (2)
· Optical cable (1)
· Remote commander (remote) RM-D29M (1)
· R6 (size-AA) batteries (2)

3
Items of Error History Mode Items and Contents
Selecting the Test Mode
Display
Details of History
E00
No error
E01
Disc error. PTOC cannot be read
(DISC ejected)
E02
Disc error. UTOC error
(DISC not ejected)
E03
Loading error
E04
Address cannot be read (Servo has deviated)
Table of Error Codes
Error Code
Error Code
Details of Error
total rec
Displays the recording time.
Displayed as "rh".
The displayed time is the total time the laser is set to the high power state.
This is about 1/4 of the actual recording time.
The time is displayed in decimal digits from 0h to 65535h.
total play
Displays the play time.
Displayed as "ph". The time displayed is the total actual play time. Pauses are not counted.
The time is displayed in decimal digits from 0h to 65535h.
retry err
Displays the total number of retries during recording and number of retry errors during play.
Displayed as "r p".
"r" indicates the retries during recording while "p" indicates the retry errors during play.
The number of retries and retry errors are displayed in hexadecimal digits from 00 to FF.
total err
Displays the total number of errors.
Displayed as "total ".
The number of errors is displayed in hexadecimal digits from 00 to FF.
err history
Displays the 10 latest errors.
Displayed as "0 E@@".
indicates the history number. The smaller the number, the more recent is the error. (00 is the latest).
@@ indicates the error code.
Refer to the following table for the details. The error history can be switched by turning the
= ~ +
knob.
er refresh
Mode which erases the "retry err", "total err", and "err history" histories.
When returning the unit to the customer after completing repairs, perform this to erase the past error history.
After pressing the
= ~ + button and "er refresh?" is displayed, press the [YES] button to erase the
history.
"Complete!" will be displayed momentarily.
Be sure to check the following when this mode has been executed.
· The data has been erased.
· The mechanism operates normally when recording and play are performed.
tm refresh
Mode which erases the "total rec" and "total play" histories.
These histories serve as approximate indications of when to replace the optical pickup.
If the optical pickup has been replaced, perform this operation and erase the history.
After pressing the
= ~ + button and "tm refresh?" is displayed, press the [YES] button to erase the
history.
"Complete!" will be displayed momentarily.
Be sure to check the following when this mode has been executed.
· The data has been erased.
· The mechanism operates normally when recording and play are performed.
E05
FOK has deviated
E06
Cannot focus (Servo has deviated)
E07
Recording retry
E08
Recording retry error
E09
Playback retry error
(Access error)
E0A
Playback retry error (C2 error)
Details of Error

4
SECTION 1
SERVICING NOTES
TABLE OF CONTENTS
SELF-DIAGNOSIS FUNCTION .................................... 2
1.
SERVICING NOTES ............................................... 4
2.
GENERAL ................................................................... 11
3.
DISASSEMBLY ......................................................... 12
4.
TEST MODE .............................................................. 16
5.
ELECTRICAL ADJUSTMENTS ......................... 21
6.
DIAGRAMS
6-1. IC Pin Function Description ........................................... 30
6-2. Block Diagram SERVO Section ............................... 37
6-3. Block Diagram MAIN Section ................................. 39
6-4. Note for Printed Wiring Boards and
Schematic Diagrams ....................................................... 42
6-5. Printed Wiring Board BD Board ............................. 43
6-6. Schematic Diagram BD Board (1/2) ........................ 45
6-7. Schematic Diagram BD Board (2/2) ........................ 47
6-8. Schematic Diagram SW Board ................................. 49
6-9. Printed Wiring Board SW Board .............................. 49
6-10. Printed Wiring Boards PT/VOL SEL Boards ........... 53
6-11. Printed Wiring Board MAIN Board ......................... 55
6-12. Schematic Diagram MAIN Board (1/2) ................... 57
6-13. Schematic Diagram
MAIN Board (2/2), PT/VOL SEL Boards .............. 59
6-14. Printed Wiring Board PANEL Board ....................... 61
6-15. Schematic Diagram PANEL Board .......................... 63
7.
EXPLODED VIEWS ................................................ 66
8.
ELECTRICAL PARTS LIST ............................... 70
SAFETY CHECK-OUT
After correcting the original service problem, perform the follow-
ing safety check before releasing the set to the customer:
Check the antenna terminals, metal trim, "metallized" knobs,
screws, and all other exposed metal parts for AC leakage.
Check leakage as described below.
LEAKAGE TEST
The AC leakage from any exposed metal part to earth ground and
from all exposed metal parts to any exposed metal part having a
return to chassis, must not exceed 0.5 mA (500 microampers.).
Leakage current can be measured by any one of three methods.
1. A commercial leakage tester, such as the Simpson 229 or RCA
WT-540A. Follow the manufacturers' instructions to use these
instruments.
2. A battery-operated AC milliammeter. The Data Precision 245
digital multimeter is suitable for this job.
3. Measuring the voltage drop across a resistor by means of a
VOM or battery-operated AC voltmeter. The "limit" indica-
tion is 0.75 V, so analog meters must have an accurate low-
voltage scale. The Simpson 250 and Sanwa SH-63Trd are ex-
amples of a passive VOM that is suitable. Nearly all battery
operated digital multimeters that have a 2 V AC range are suit-
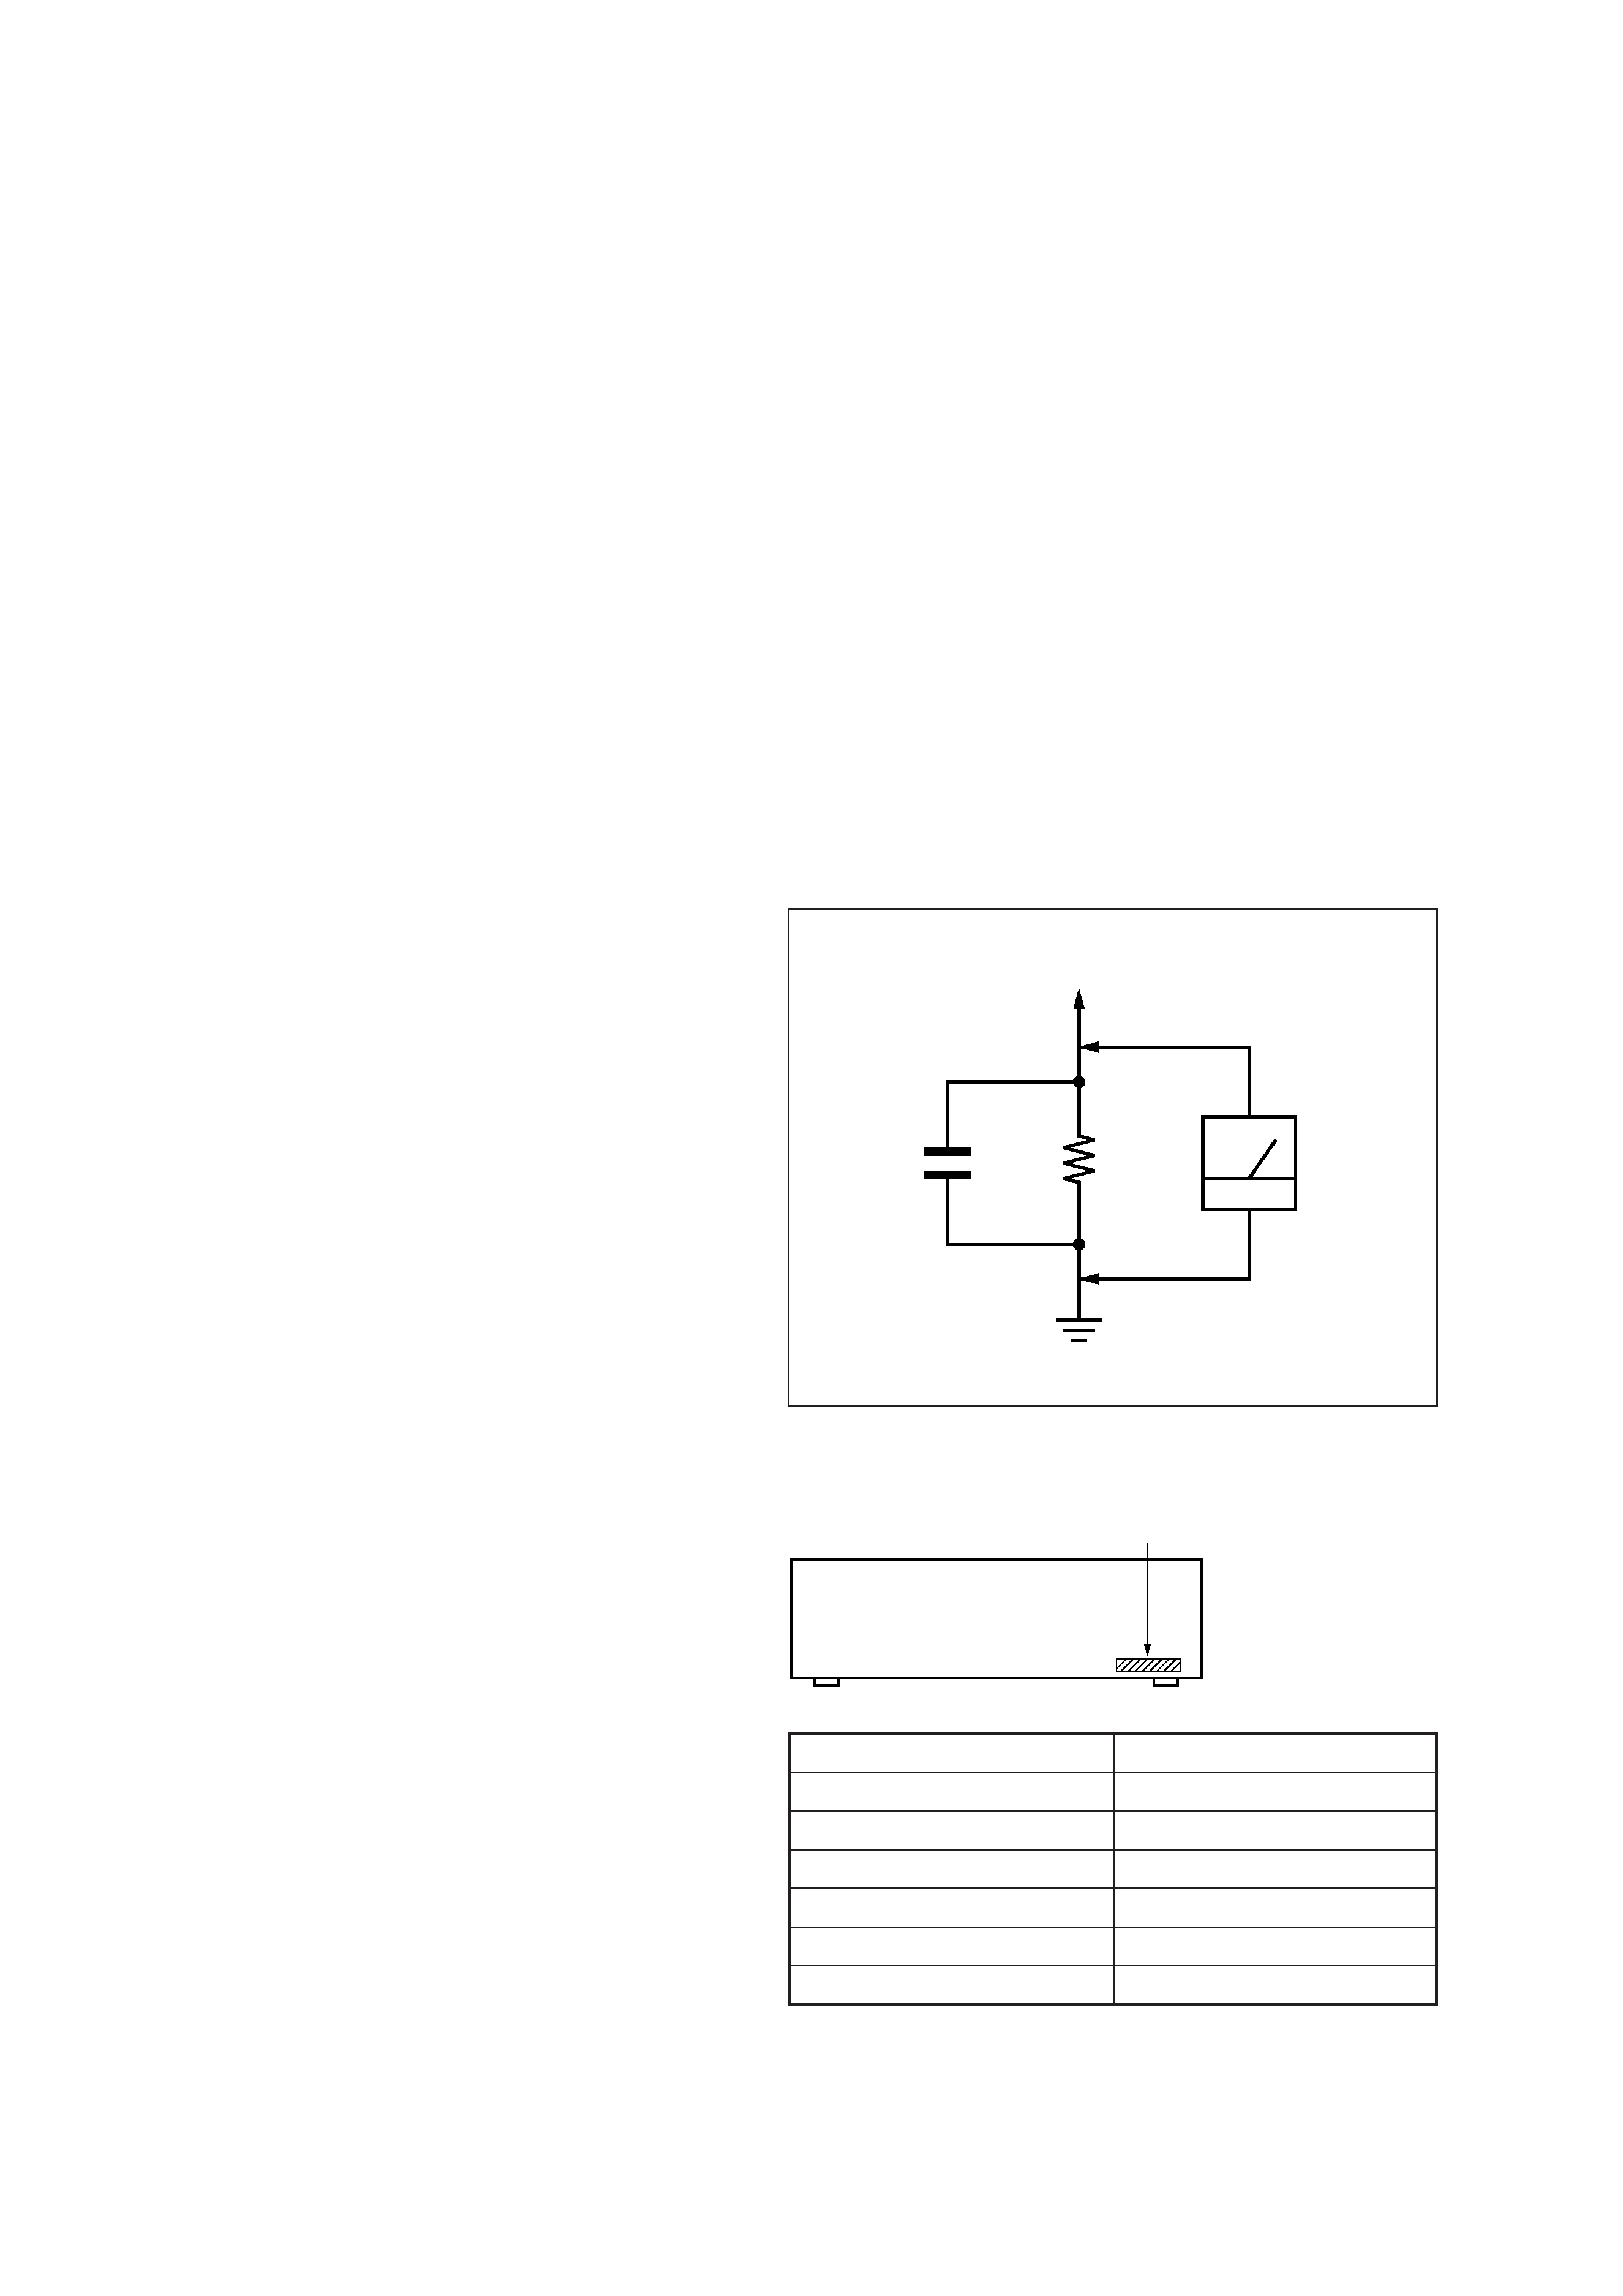
able. (See Fig. A)
Fig. A.
Using an AC voltmeter to check AC leakage.
1.5 k
0.15
µF
AC
voltmeter
(0.75 V)
To Exposed Metal
Parts on Set
Earth Ground
MODEL IDENTIFICATION
-- BACK PANEL --
Part No.
MODEL
Part No.
US model
4-216-765-1
Canadian model
4-216-765-2
AEP, UK, Argentine models
4-216-765-3
Singapore model
4-216-765-4
Hong Kong model
4-216-765-5
Australian model
4-216-765-6
