ENGLISH
ESPAÑOL
DEUTSCH
FRANÇAIS
ITALIANO
NEDERLANDS
Operating Instruction
Manual de Utilización
08600-00933
Bedienungsanleitung
Manuel d'utilisation

1
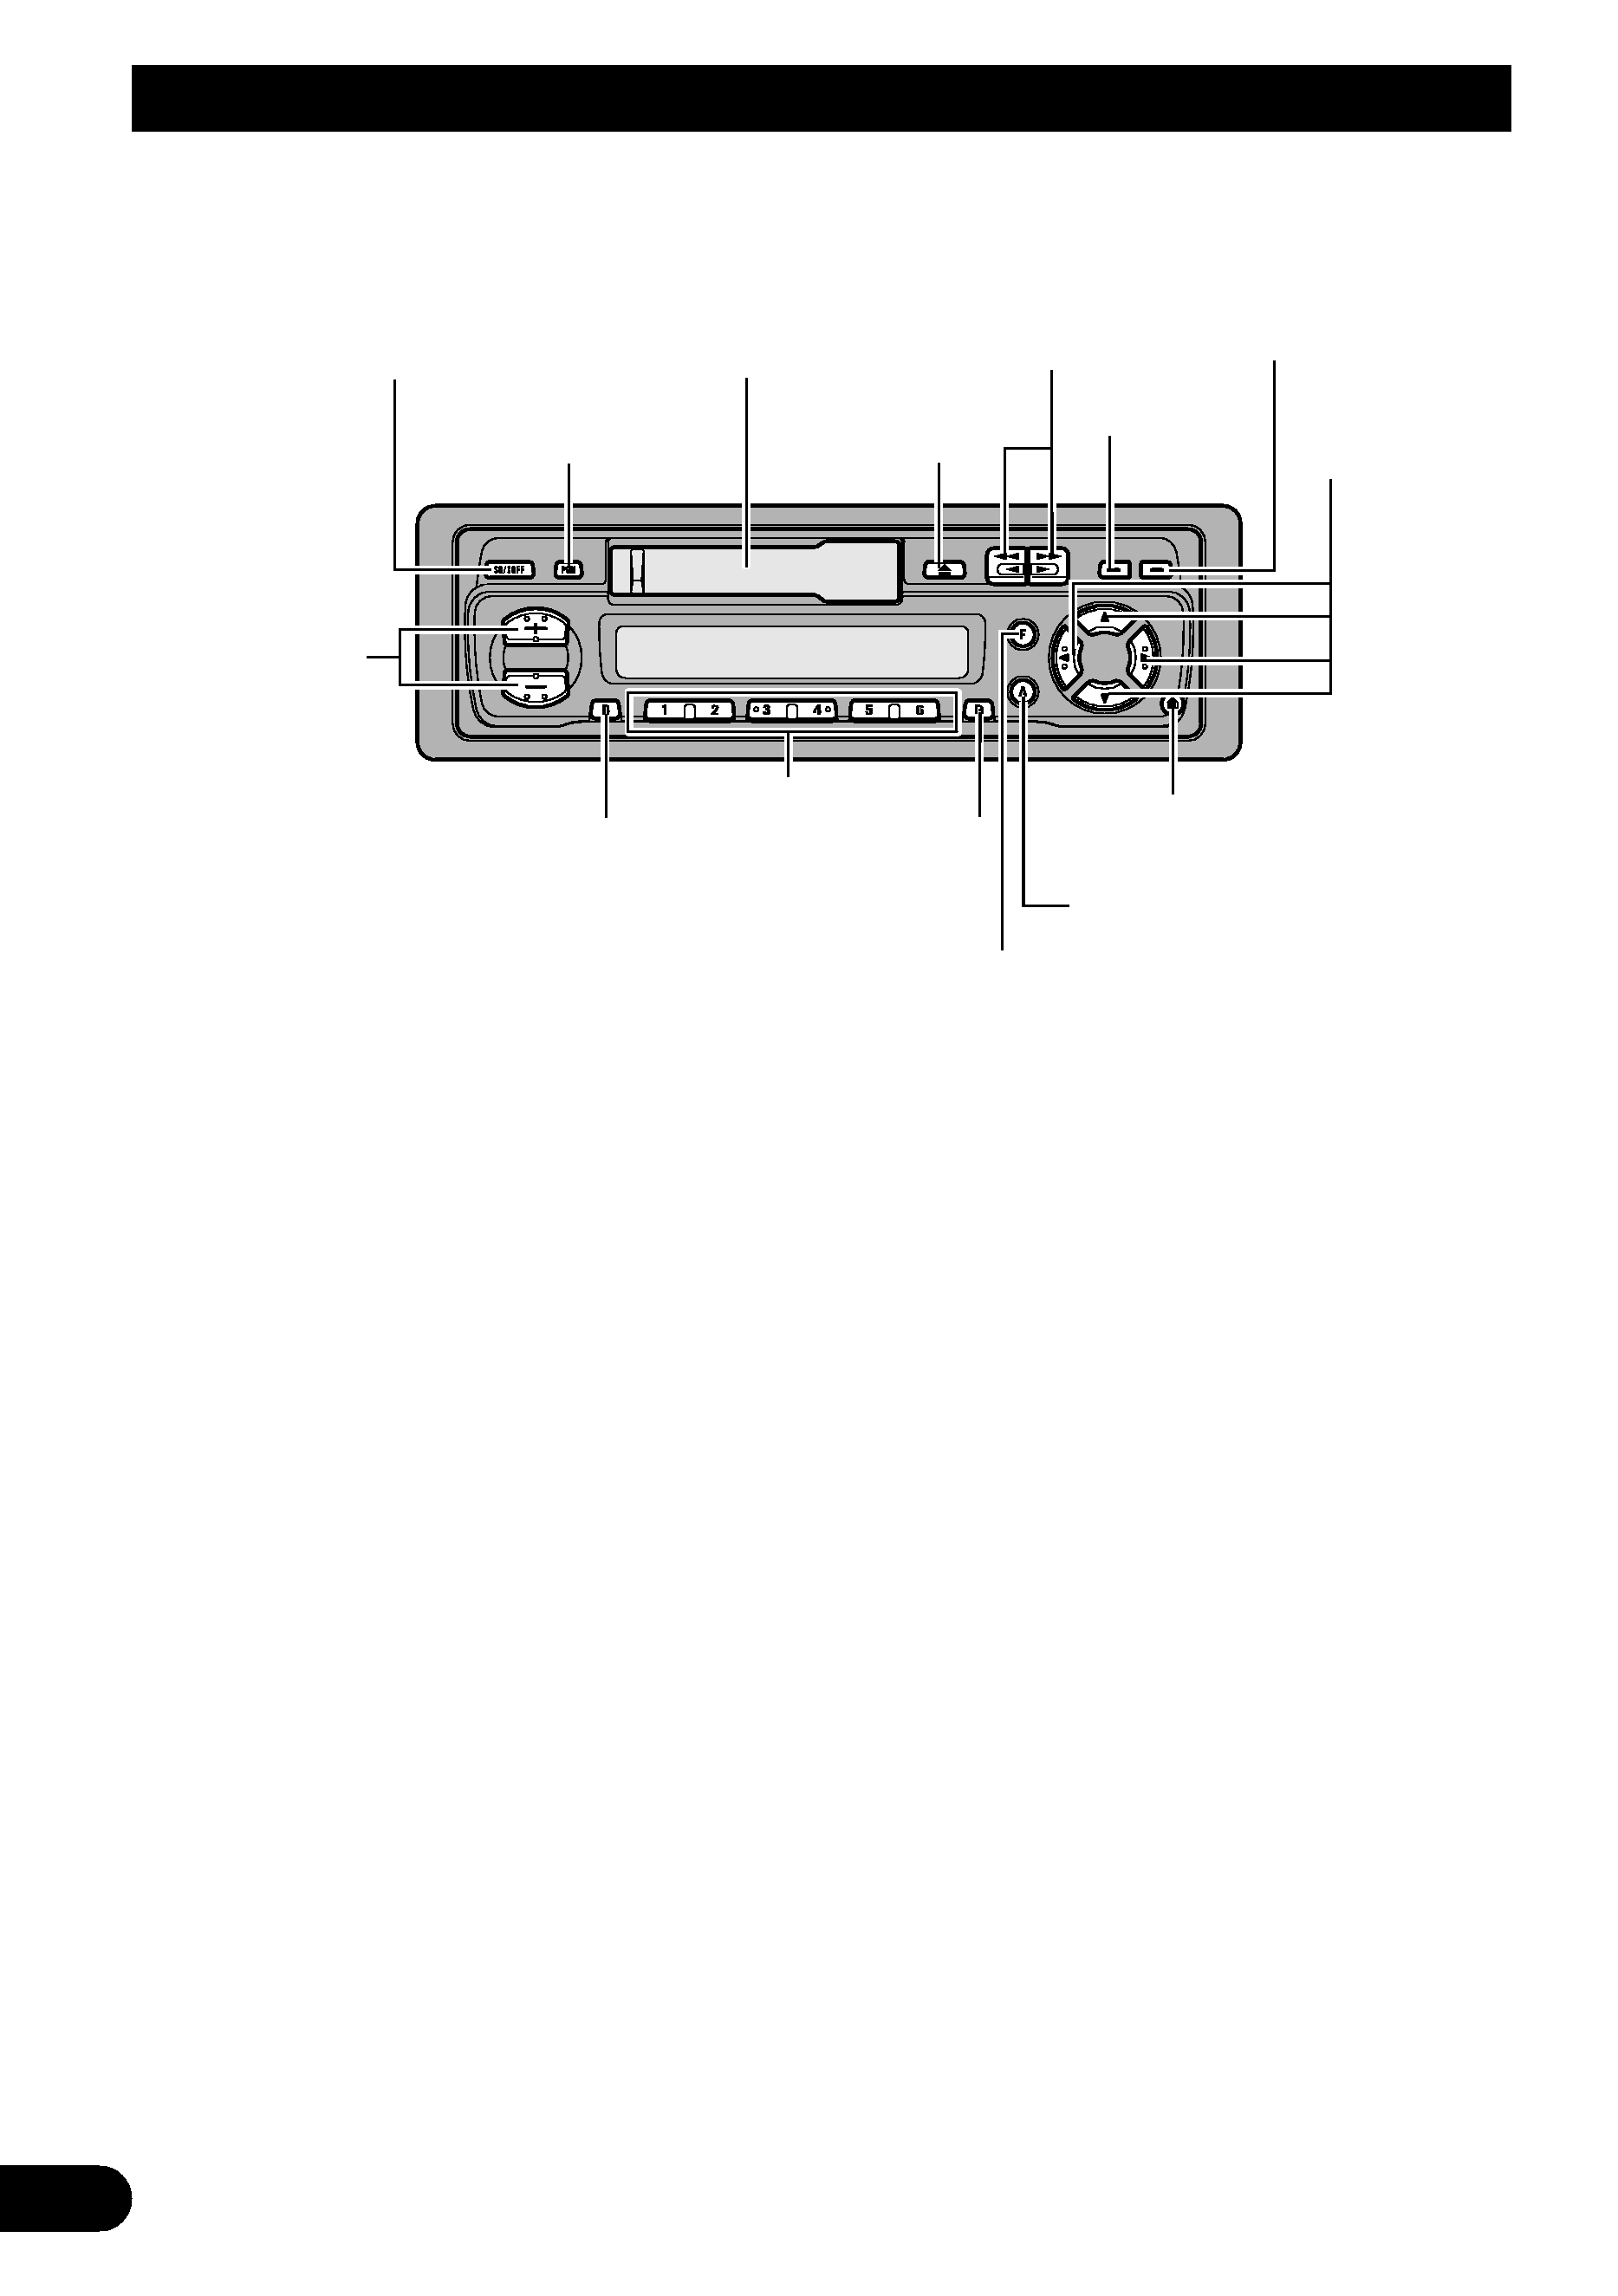
Key Finder
Cassette door
Eject
button
TA/AF button
PTY button
Function button
SOURCE
button
+/ buttons
AUDIO button
BAND button
Buttons 16
DISP/Clock button
Detach
button
Programmable
button
5//2/3
buttons
!// buttons

Before Using this Unit
2
ENGLISH
ESPAÑOL
DEUTSCH
FRANÇAIS
ITALIANO
NEDERLANDS
About This Unit
The tuner frequencies on this unit are allocated for use in Western Europe, Asia, the
Middle East, Africa and Oceania. Use in other areas may result in improper reception. The
RDS function operates only in areas with FM stations broadcasting RDS signals.
About this Manual
This unit features a number of sophisticated functions ensuring superior reception and
operation. All are designed for the easiest possible use, but many are not self-explanatory.
This operation manual is intended to help you benefit fully from their potential and to
maximise your listening enjoyment.
We recommend that your familiarise yourself with the functions and their operation by
reading through the manual before you begin using this unit. It is especially important that
you read and observe the "Precaution" on this page and in other sections.
In this Operating Manual, the Basic Operation for each sound source is outlined at the
beginning of its explanation, covering simple operation for that source, such as merely
playing music.
Precaution
· The Toyota CarStereo-Pass is for use only in Germany.
· Keep this manual handy as a reference for operating procedures and precautions.
· Always keep the volume low enough for outside sounds to be audible.
· Protect the unit from moisture.
· If the battery is disconnected, the preset memory will be erased and must be repro-
grammed.

3
Detaching and Replacing the Front Panel
Theft Protection
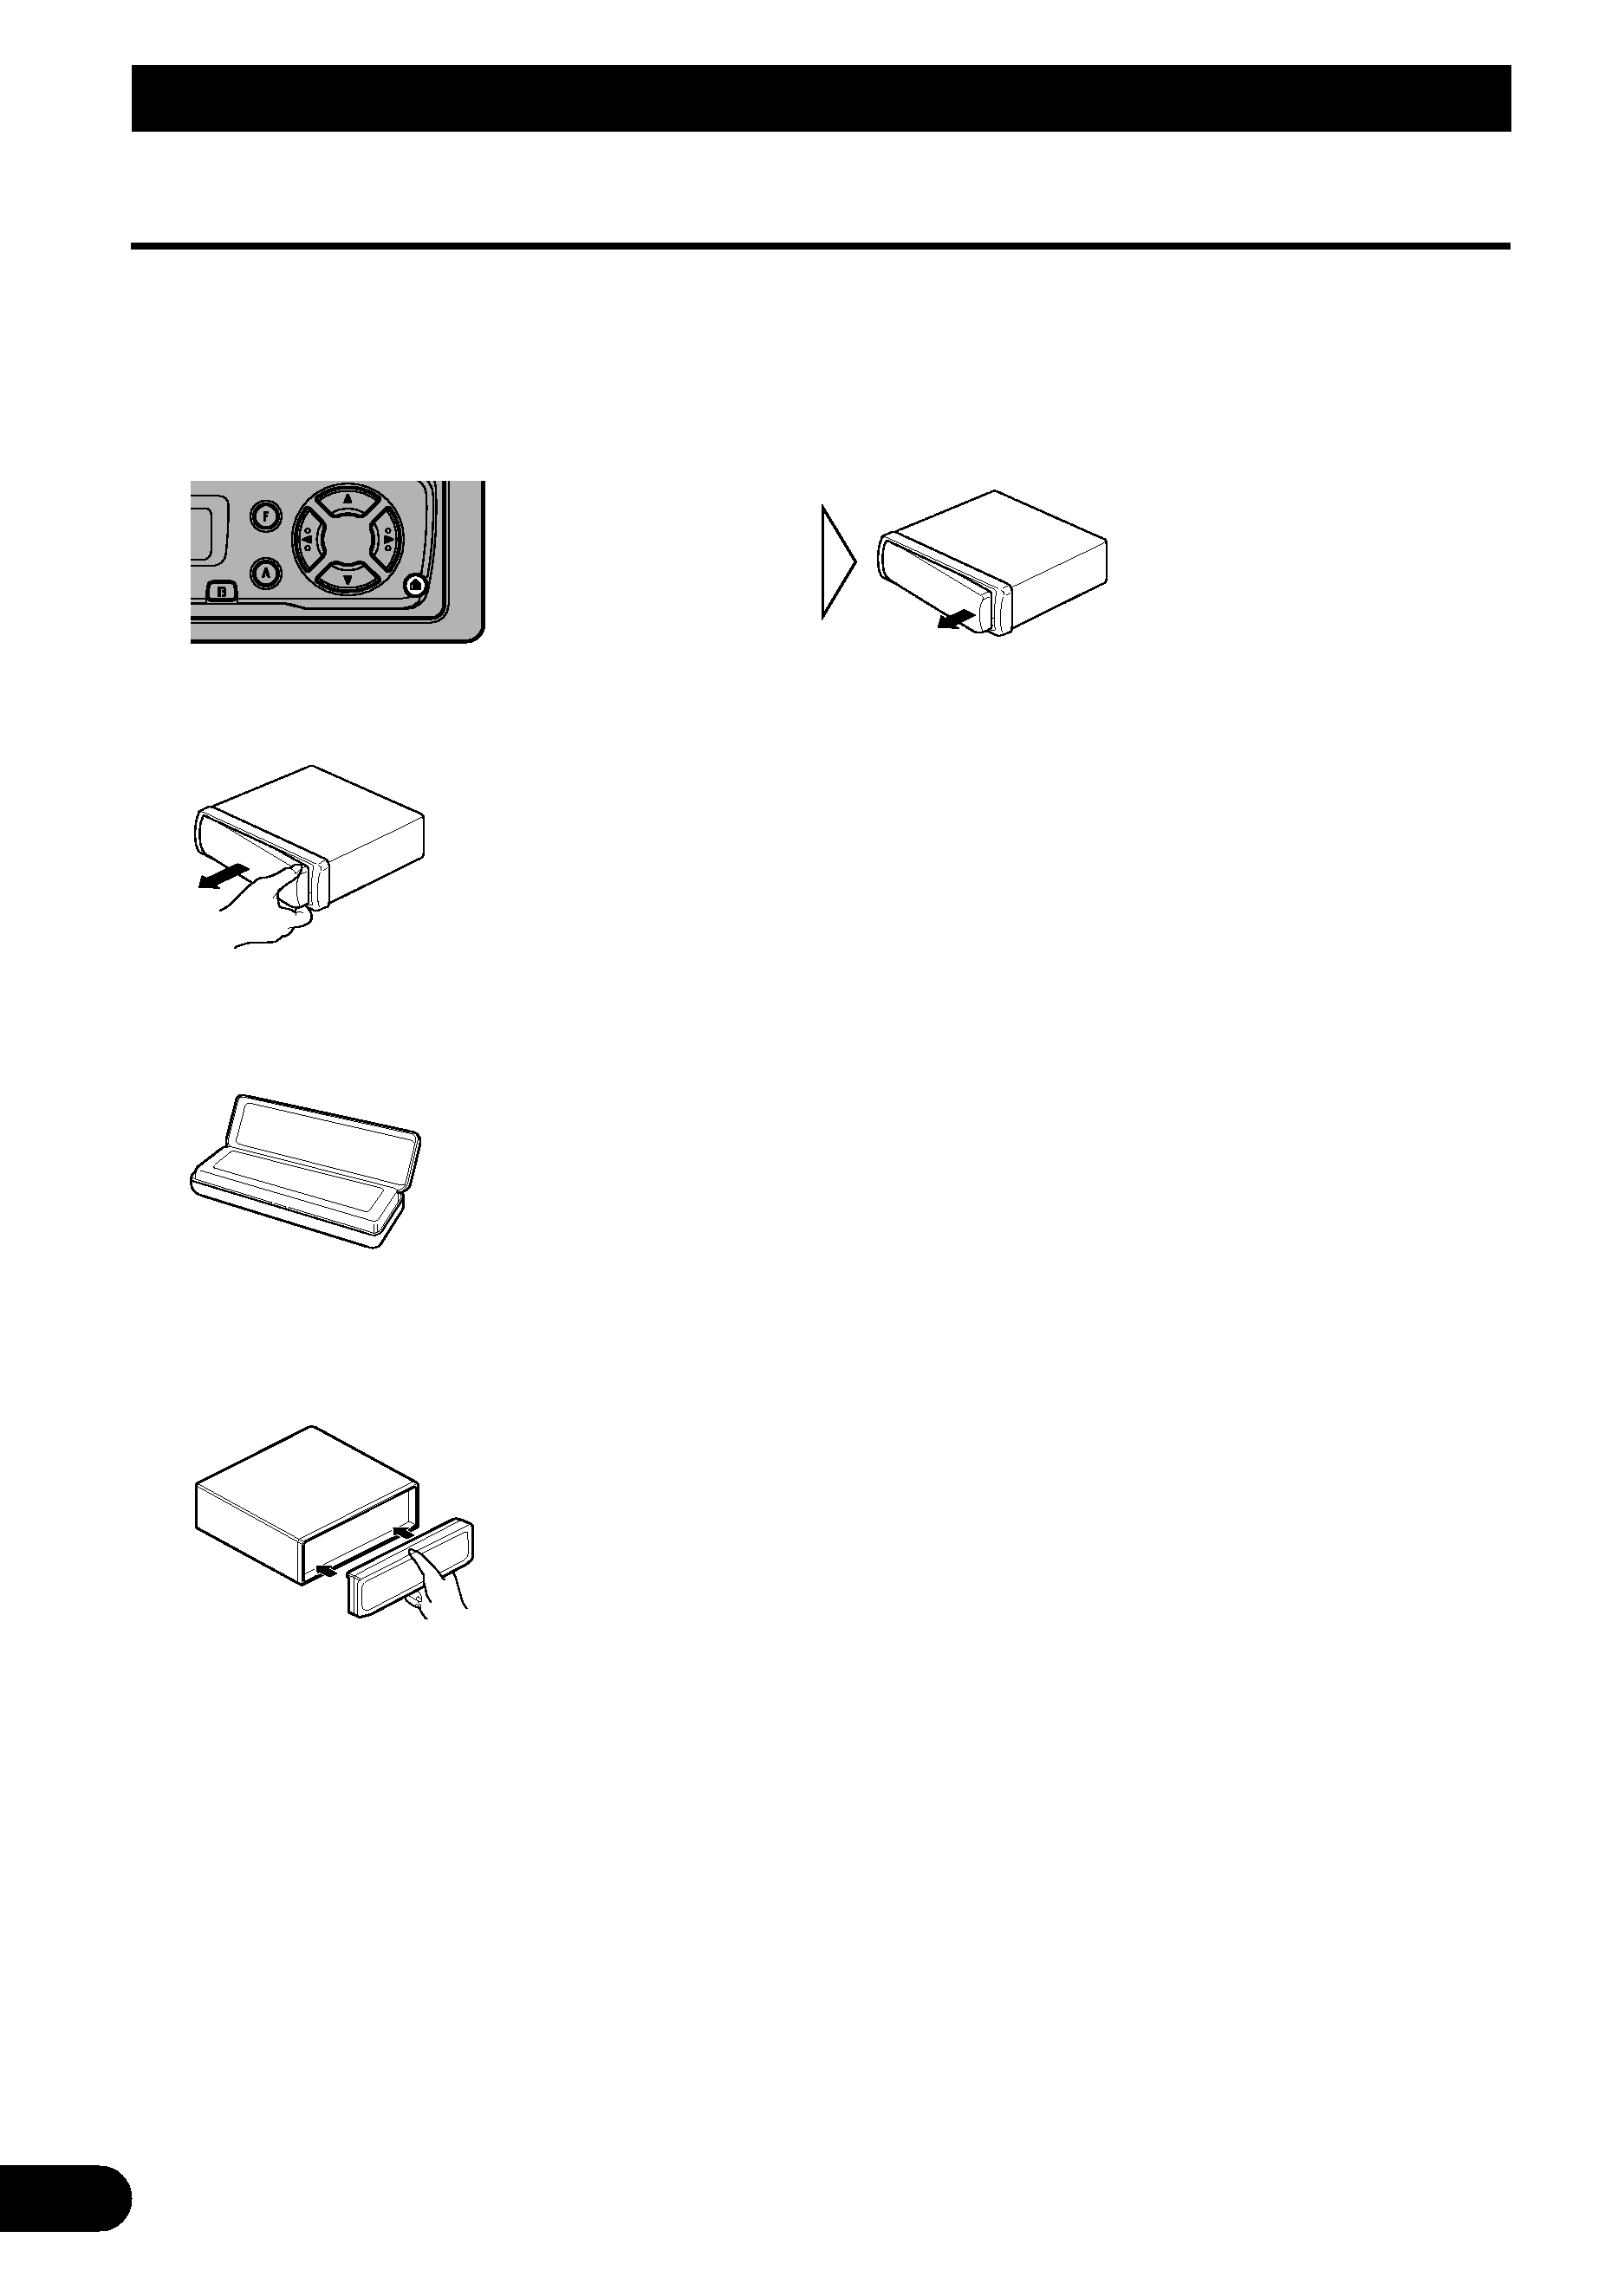
The front panel of the main body is detachable to discourage theft.
7 Detaching the front panel
1. Eject the front panel.
2. To remove the front panel, pull its right-hand side towards you.
Take care not to grip it tightly or drop it.
3. Use the protective case provided to store/carry the detached front panel.
7 Replacing the front panel
· Replace the front panel by clipping it into place.
Precaution:
· Never use force or grip the display tightly when removing or replacing the front panel.
· Avoid subjecting the front panel to excessive shocks.
· Keep the front panel out of direct sunlight and avoid high temperatures.

Initial Setting Menu
With this menu you can perform initial settings for the unit. Setting options cover every-
thing from tuning steps for the tuner to auto PI seek ON/OFF switching.
Entering the Initial Setting Menu
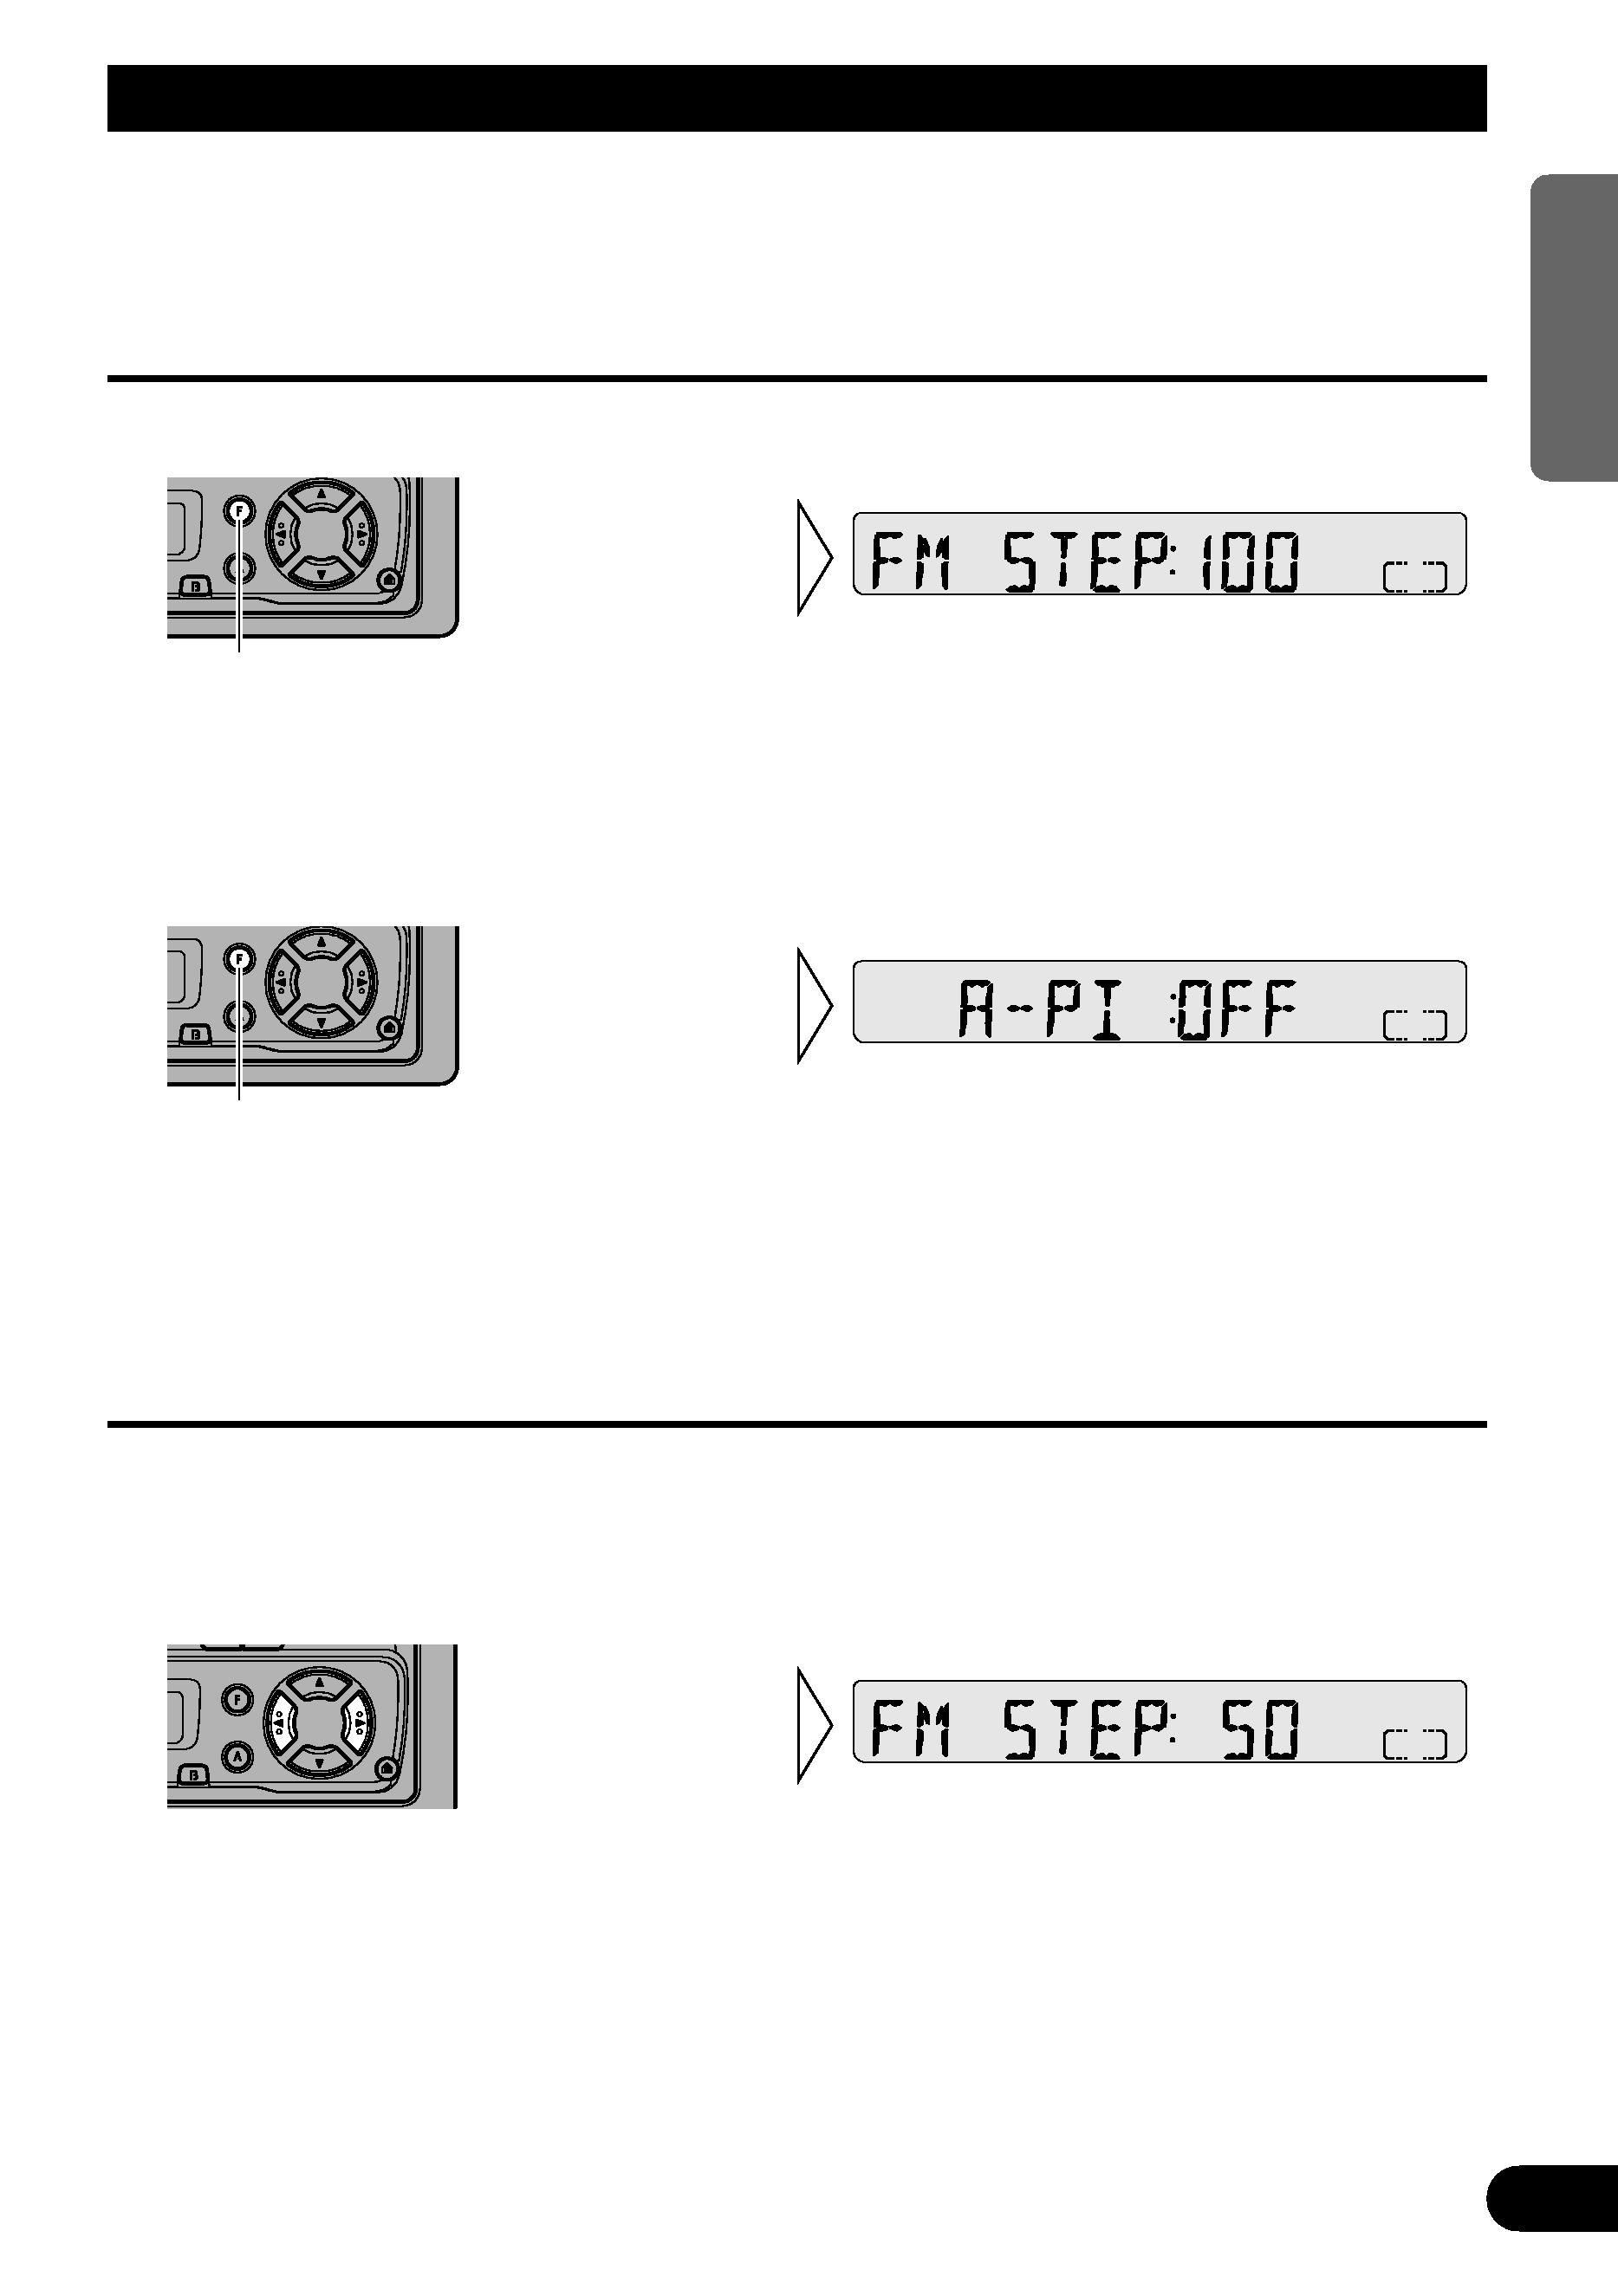
1. Enter the Initial Setting Menu with the sources off.
To cancel the Initial Setting Menu, press the BAND button.
Note:
· Holding down the Function button for 2 seconds also cancels the Initial Setting Menu.
2. Select the desired mode.
Each time the Function button is pressed the mode changes in the order shown below:
FM STEP
= A-PI
Changing the FM Tuning Step
Normally set at 50 kHz during Seek tuning in the FM mode, the tuning step changes to
100 kHz when the AF or TA mode is activated.
It may be preferable to set tuning step to 50 kHz in the AF mode.
· Select the desired tuning step.
Note:
· The tuning step remains set at 50 kHz during manual tuning.
· The tuning step returns to 100 kHz if the battery is temporarily disconnected.
Each time the button is
pressed the Mode is
changed ...
Hold for 2 seconds
4
ENGLISH
ESPAÑOL
DEUTSCH
FRANÇAIS
ITALIANO
NEDERLANDS
