Operating Instructions
Mode d'emploi
Bedienungsanleitung
Istruzioni per l'uso
Gebruiksaanwijzing
Manual de instrucciones
DJ MIXER
TABLE DE MIXAGE
DJ-MISCHPULT
MIXER PER DJ
DJ MENGPANEEL
MESA DE MEZCLAS DJ
DJM-600

2
<DRB1252>
En/Fr
IMPORTANT
The lightning flash with arrowhead symbol, within an
equilateral triangle, is intended to alert the user to the
presence of uninsulated "dangerous voltage" within the
product's enclosure that may be of sufficient magnitude
to constitute a risk of electric shock to persons.
The exclamation point within an equilateral triangle is
intended to alert the user to the presence of important
operating and maintenance (servicing) instructions in
the literature accompanying the appliance.
CAUTION:
TO PREVENT THE RISK OF ELECTRIC SHOCK, DO
NOT REMOVE COVER (OR BACK).
NO USER-
SERVICEABLE PARTS INSIDE. REFER SERVICING TO
QUALIFIED SERVICE PERSONNEL.
CAUTION
RISK OF ELECTRIC SHOCK
DO NOT OPEN
Information to User
Alteration or modifications carried out without appropriate authorization may invalidate the user's right to operate the
equipment.
POWER-CORD CAUTION
Handle the power cord by the plug. Do not pull out the plug
by tugging the cord and never touch the power cord when
your hands are wet as this could cause a short circuit or
electric shock. Do not place the unit, a piece of furniture, etc.,
on the power cord, or pinch the cord. Never make a knot in
the cord or tie it with other cords. The power cords should
be routed in such a way that they are not likely to be stepped
on. A damaged power cord can cause fire or give you an
electrical shock. Check the power cord once in a while.
When you find it damaged, ask your nearest PIONEER
authorized service center or your dealer for a replacement.
This product complies with the Low Voltage Directive
(73/23/EEC), EMC Directives (89/336/EEC, 92/31/EEC) and
CE Marking Directive (93/68/EEC).
Ce produit est conforme à la directive relative aux appareils
basse tension (73/23/CEE), aux directives relatives à la
compatibilité électromagnétique (89/336/CEE, 92/31/CEE)
et à la directive CE relative aux marquages (93/68/CEE).
NOTE IMPORTANTE SUR LE CABLE
D'ALIMENTATION
Tenir le câble d'alimentation par la fiche. Ne pas débrancher
la prise en tirant sur le câble et ne pas toucher le câble avec
les mains mouilées. Cela risque de provoquer un court-
circuit ou un choc électrique. Ne pas poser l'appareil ou un
meuble sur le câble. Ne pas pincer le câble. Ne pas faire de
noeud avec le câble ou l'attacher à d'autres câbles. Les
câbles d'alimentation doivent être posés de façóon à ne pas
être écrasés. Un câble abîmé peut provoquer un risque
d'incendie ou un choc électrique. Vérifier le câble
d'alimentation de temps en temps. Contacter le service
après-vente ou le revendeur PIONEER le plus proche pour
un remplacement.
ATTENTION: AFIN DE PREVENIR TOURS RISQUES DE
CHOC ELECTRIQUE OU DE DEBUT D'ENCENDIE, NE PAS EXPOSER
CET APPAREIL A L'HUMIDITE OU A LA PLUIE.
WARNING: TO PREVENT FIRE OR SHOCK HAZARD, DO
NOT EXPOSE THIS APPLIANCE TO RAIN OR MOISTURE.

3
<DRB1252>
En/Fr
English
Français
Thank you for buying this Pioneer product.
Please read through these operating instructions so you will
know how to operate your model properly.
After you have finished reading the instructions, put them away
in a safe place for future reference.
Nous vous remercions pour cet achat d'un produit PIONEER.
Nous vous demandons de lire soigneusement ce mode
d'emploi; vous serez ainsi à même de faire correctement
fonctionner l'appareil.
Après avoir bien lu le mode d'emploi, le ranger dans un endroit
sûr pour pouvoir s'y référer ultérieurement.
CAUTIONS REGARDING HANDLING .................... 4
Location ....................................................................... 4
Condensation ............................................................... 4
Cleaning the Unit ......................................................... 4
CHECKING ACCESSORIES .................................... 4
FEATURES .............................................................. 5
CONNECTIONS ...................................................... 6
PART NAMES AND FUNCTIONS .......................... 9
USING THE EFFECT/SAMPLER FUNCTIONS ..... 14
Features of Various Effectors ..................................... 14
Measuring BPM ......................................................... 18
Delay, Echo, Auto Pan, Auto Trans, Filter,
and Flanger Operations .............................................. 21
Operating Reverb and Pitch Shifter ............................ 24
Using an External Effector .......................................... 26
Using Sampler Recording ........................................... 27
Using Sampler Playback Functions ............................. 29
Using Sampler Edit Function ...................................... 30
USING THE FADER START FUNCTION .............. 31
Starting with the Channel Fader ................................. 32
Starting with the Cross Fader ..................................... 33
TROUBLESHOOTING ........................................... 34
SPECIFICATIONS ................................................. 36
CONTENTS
AVERTISSEMENTS CONCERNANT L'USAGE ...... 4
Emplacement .............................................................. 4
Condensation ............................................................... 4
Nettoyer l'appareil ........................................................ 4
VERIFIER LES ACCESSOIRES ................................ 4
CARACTERISTIQUES ............................................. 5
RACCORDEMENTS ................................................ 6
NOMS ET FONCTIONS DES ELEMENTS .............. 9
UTILISER LES FONCTIONS
EFFET/ECHANTILLONNAGE ............................... 14
Caractéristiques des divers effecteurs ....................... 14
Mesurer la valeur BPM .............................................. 18
Opérations retard, écho, balance automatique,
coupure automatique, filtre et oscillation. ................... 21
Opérations réverbération et changement de ton ........ 24
Utiliser un effecteur externe ...................................... 26
Utiliser la fonction Enregistrement
par l'échantillonneur ................................................... 27
Utiliser les fonctions Lecture échantillonneur ............. 29
Utilisation de la fonction EDIT de l`échantillonneur ..... 30
UTILISER LA FONCTION DEMARRAGE
PAR VARIATEUR .................................................. 31
Démarrage par le variateur de canal ........................... 32
Démarrage par le variateur de son ............................. 33
DEPANNAGE ........................................................ 35
CARACTERISTIQUES TECHNIQUES ................... 37
TABLE DES MATIERES

4
<DRB1252>
En/Fr
CHECKING ACCESSORIES
÷ 6 short-circuit pin plugs
These are inserted in the PHONO 1, PHONO 2, and PHONO
3 terminals on the back.
÷ Operating instructions
CAUTIONS REGARDING
HANDLING
Location
Install the unit in a well-ventilated location where it will not
be exposed to high temperatures or humidity.
÷ Do not install the unit in a location which is exposed to direct
rays of the sun, or near stoves or radiators. Excessive heat can
adversely affect the cabinet and internal components.
Installation of the unit in a damp or dusty environment may
also result in a malfunction or accident. (Avoid installation near
cookers etc., where the unit may be exposed to oily smoke,
steam or heat.)
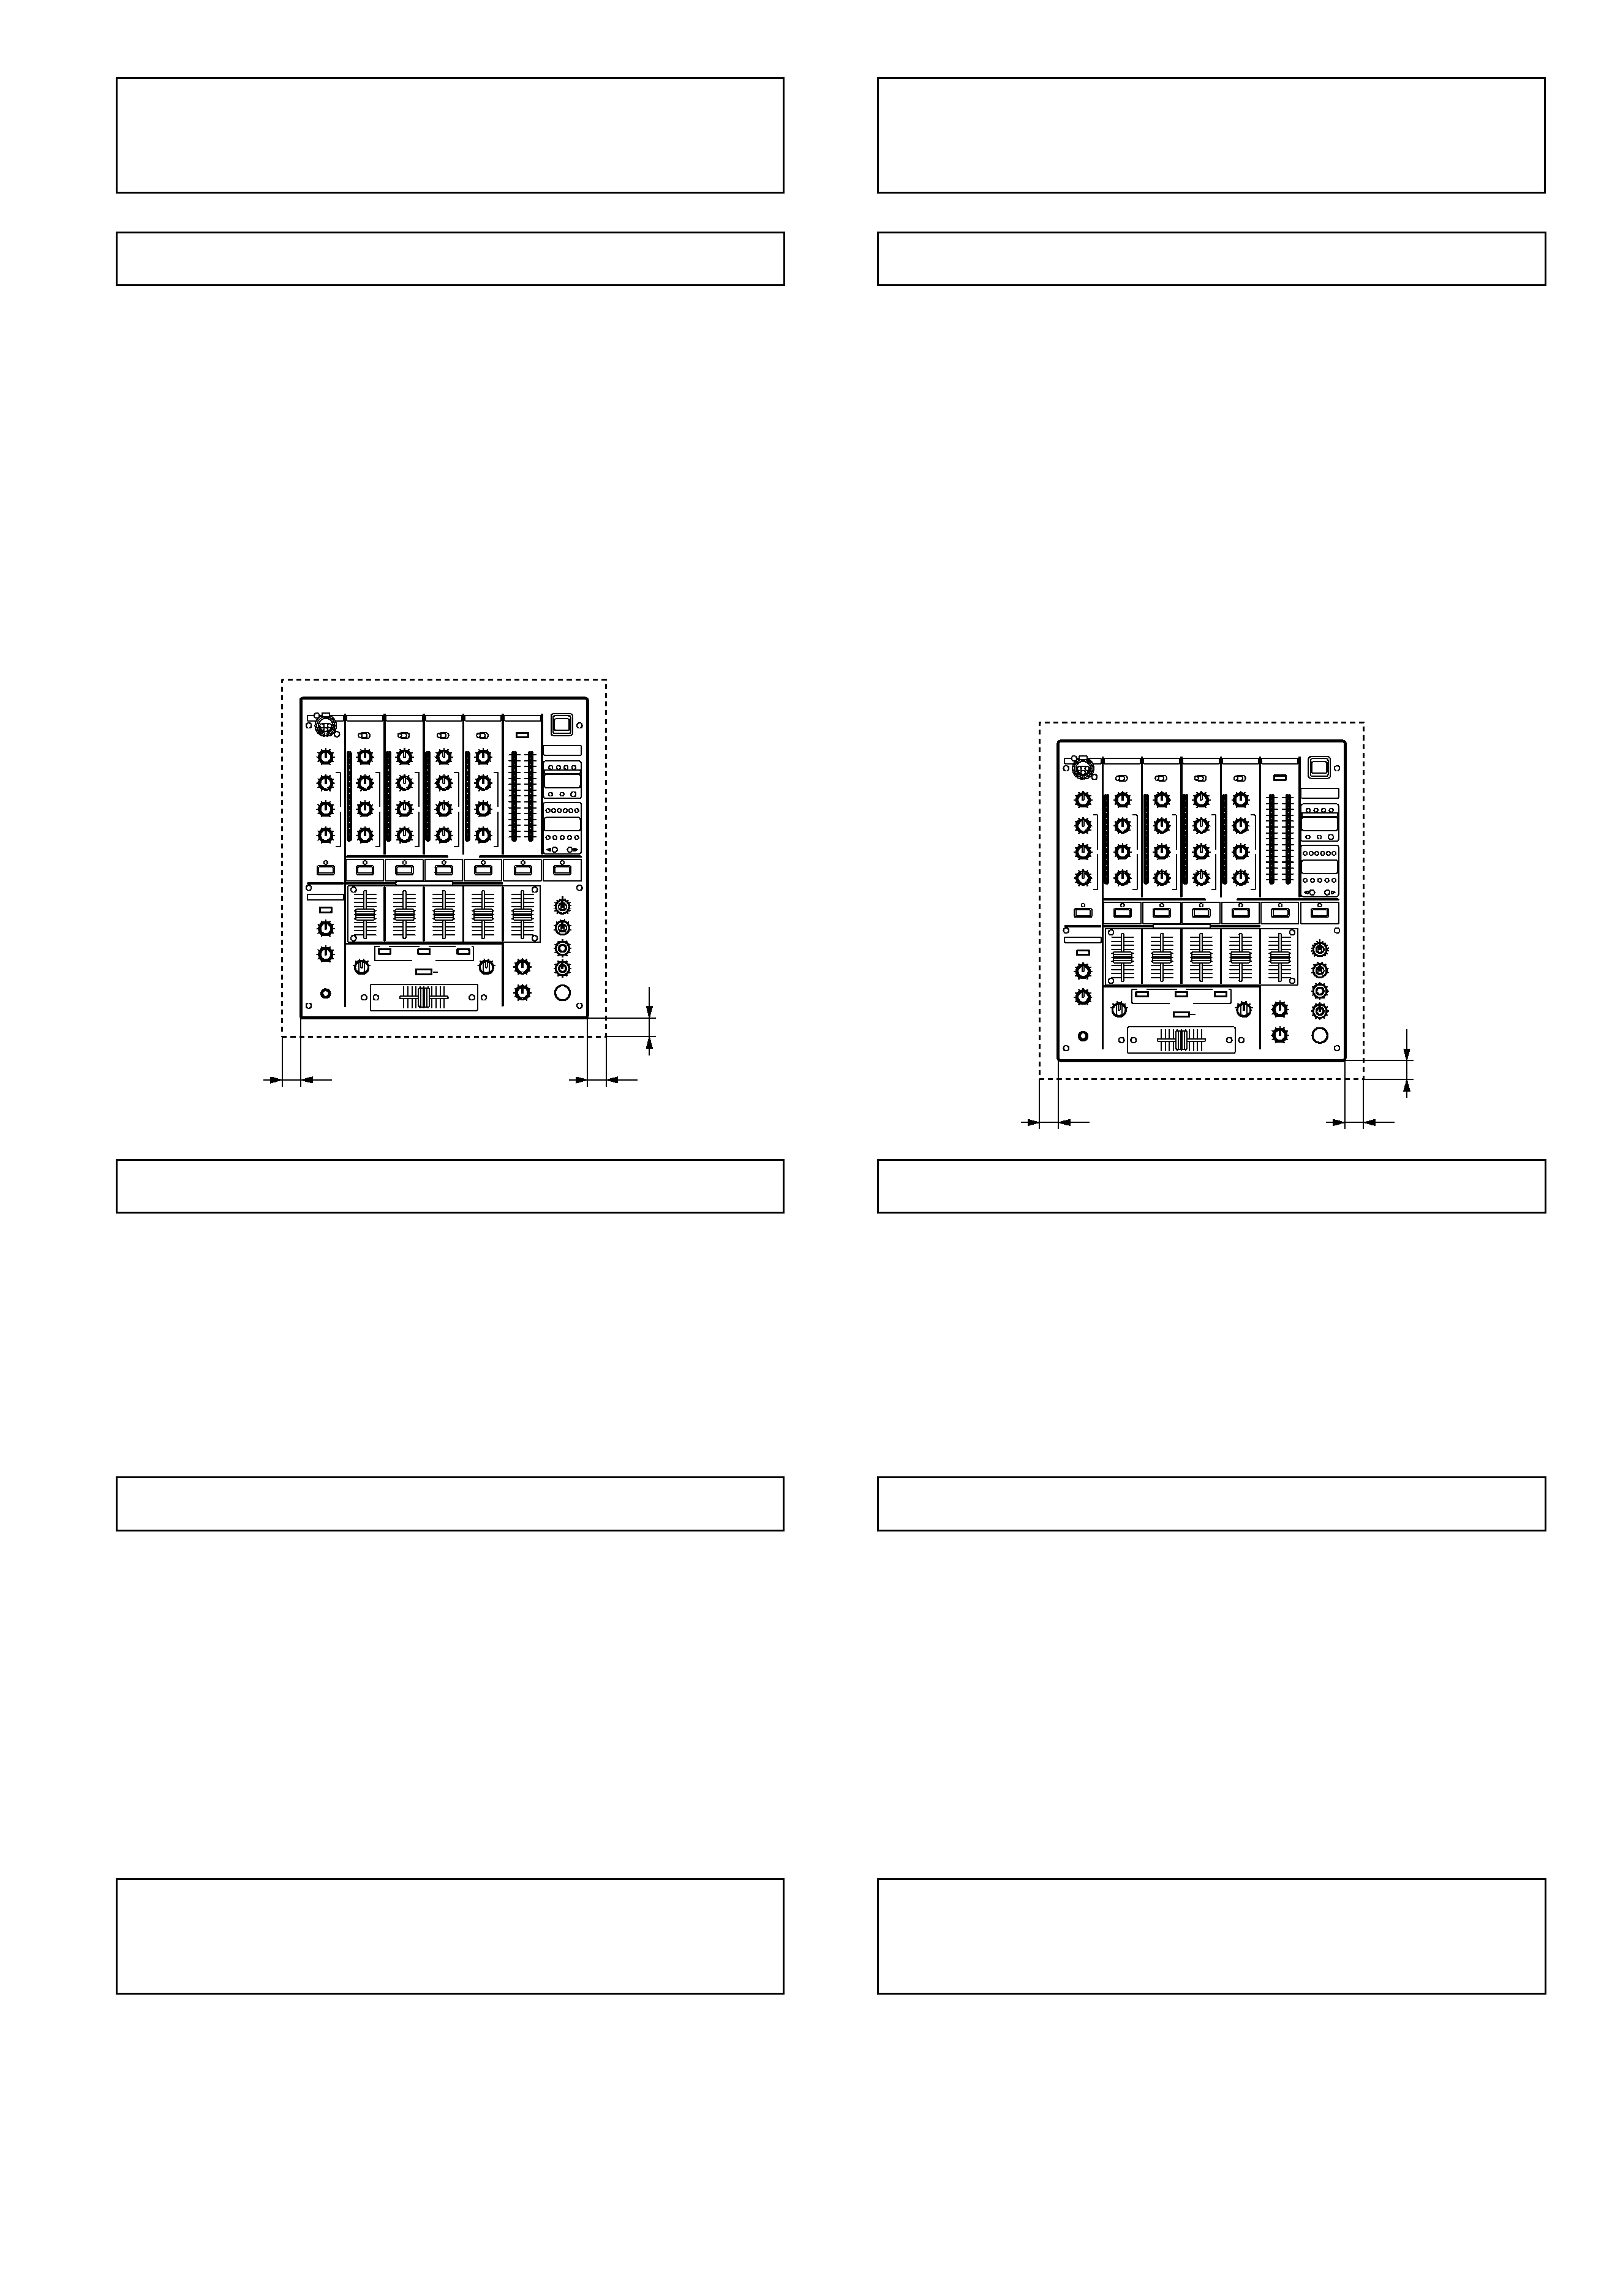
÷ When the unit is used inside a carrying case or DJ booth,
separate it from the walls or other equipment to improve heat
radiation.
Condensation
When this unit is brought into a warm room from previously cold
surroundings or when the room temperature rises sharply,
condensation may form inside, and the unit may not be able to
attain its full performance. In cases like this, allow the unit to
stand for about an hour or raise the room temperature gradually.
Cleaning the Unit
÷ Use a polishing cloth to wipe off dust and dirt.
÷ When the surfaces are very dirty, wipe with a soft cloth
dipped in some neutral cleanser diluted five or six times with
water and wrung out well, then wipe again with a dry cloth.
Do not use furniture wax or cleaners.
÷ Never use thinners, benzene, insecticide sprays or other
chemicals on or near this unit, since these will corrode the
surfaces.
VERIFIER LES ACCESSOIRES
÷ 6 fiches à circuit court
Celles-ci sont introduites dans les bornes PHONO 1,
PHONO 2 et PHONO 3 à l'arrière.
÷ Mode d'emploi
AVERTISSEMENTS
CONCERNANT L'USAGE
Emplacement
Installez l'appareil dans un endroit bien aéré, où il ne sera
pas exposé à de hautes températures ou à l'humidité.
÷ N'installez pas l'appareil dans un endroit exposé aux rayons de
soleil directs, ni à proximité de poêles ou de radiateurs. Le
boîtier et les parties internes peuvent être endommagés par
de fortes chaleurs. L'installation de l'appareil dans un
environnement humide ou poussiéreux peut entraîner un
dysfonctionnement ou un accident. (Evitez d'installer
l'appareil à proximité de cuisinières etc., où il pourrait être
exposé à des fumées grasses, à des vapeurs ou à la chaleur.)
÷ Si l`appareil est utilisé dans une mallette ou dans une cabine
de DJ, éloignez-le des parois ou d`autres appareils afin de
favoriser l`évacuation de la chaleur.
Condensation
Lorsque cet appareil est déplacé d'un endroit froid vers une
pièce chaude, ou si la température de la pièce monte
subitement, il se peut qu'il y ait formation de condensation à
l'intérieur de l'appareil et qu'il subisse des baisses de
performance. Dans ce cas, laissez l'appareil se réchauffer
pendant environ une heure ou faites monter progressivement la
température de la pièce.
Nettoyer l'appareil
÷ Utilisez un chiffon à poussière pour enlever la poussière et les
saletés.
÷ Si les surfaces sont très sales, nettoyez avec un chiffon doux
trempé dans un détergent neutre, dilué dans cinq ou six fois
plus d'eau, essorez bien et repassez avec un chiffon sec.
N'utilisez pas de cire à meubles ou de détachants.
÷ N'utilisez jamais de diluants, de benzène, d'insecticides ou
d'autres produits chimiques sur ou à proximité de l'appareil,
car ceux-ci abîment les surfaces.
Min. 3cm.
Min.
3cm.
Min. 3cm.
Min. 3cm.
Min.
3cm.
Min. 3 cm.

5
<DRB1252>
En/Fr
English
Français
FEATURES
BPM Sampler
Recognizes music BPM and records the set number of beats,
making loop play possible that matches the BPM of the music
being played.
BPM Counter
The auto BPM counter provided makes music tempo visible to
the eye.
Peak Level Meter
The peak level meter provided is equipped with 15-bit LED
indicators for all channels.
Fader Start/Stop
The CD player can be started or stopped simply by increasing or
decreasing the level of the cross fader or channel fader. (This
function can only be used when the Pioneer CD player series
CDJ-100S, CDJ-700S or CDJ-500 II is connected.)
The sampler can also be started with the cross fader.
3-Band Equalizer and Kill
This 3-band equalizer corresponds to the HI, MID, and LOW
channels. The attenuation level also serves as a kill function,
which can decrease the level to 26dB.
Variety of Effects
Both internal and external effects can be applied to all channels,
the microphone, and master.
A variety of effects can be enjoyed, including delay, echo, auto
pan, auto trans, filter, flanger, reverb and pitch shifter.
Enhanced Input/Output Terminals
In addition to the 10 inputs for the 2 CD, 3 LINE, 3 PHONO (for
MM only) and 2 microphone systems, outputs for 2 systems,
including the pro-specification XLR output, booth monitor output
and recording output are provided independently. SEND/
RETURN terminals are also provided for external effectors.
CARACTERISTIQUES
Echantillonneur BPM
Reconnaît le nombre de Battements (mesures) Par Minute
(BPM) et l'enregistre, ce qui permet de reproduire en continu de
la musique ayant la même valeur BPM.
Compteur BPM
Le compteur automatique BPM intégré visualise le tempo du
morceau de musique.
Indicateur de crête
L'indicateur de crête fourni est équipé de voyants LED à 15 bits
pour chaque canal.
Démarrage/arrêt par variateur
Le lecteur de CD peut être démarré ou arrêté en augmentant ou
diminuant simplement le niveau du variateur de son ou du
variateur de canal. (Cette fonction ne peut être utilisée que si un
lecteur de CD Pioneer de la série CDJ-100S, CDJ-700S ou CDJ-
500 II est raccordé.)
L'échantillonneur peut également être démarré à l'aide du
variateur de son.
Egaliseur 3 bandes et arrêt manuel
Cet égaliseur correspond aux canaux HI, MID et LOW. Le
niveau d'atténuation sert aussi d'arrêt manuel, ce qui permet de
diminuer le niveau jusqu'à 26 dB.
Nombreux effets
Des effets internes et externes peuvent être appliqués à tous
les canaux, au microphone et au son final.
Vous pouvez obtenir des effets très divers: retard, écho, balance
automatique, coupure automatique, filtre, oscillation,
réverbération et changement de ton.
Bornes d'entrée/de sortie améliorées
En plus de 10 entrées 2 CD, 3 LINE, 3 PHONO (uniquement
pour MM) et 2 systèmes de microphone, l'appareil est équipé
de sorties indépendantes pour 2 systèmes, dont la sortie XRL
de pro-spécification, la sortie de moniteur de cabine et la sortie
d'enregistrement. L'appareil est également équipé de bornes
SEND/RETURN pour effecteurs externes.
