
SAFETY PRECAUTIONS
2
SAFETY PRECAUTIONS
Thank you for buying this Pioneer product.
Please read through these operating instructions so
you will know how to operate your model properly.
After you have finished reading the instructions, put

Contents
3
Contents
01 Getting ready.....................4
Included accessories .............................. 4
Front view .............................................. 5
Rear view ............................................... 5
Remote control....................................... 6
Putting batteries in the remote............... 7
Setting TV codes .................................... 7
Caring for the remote ............................. 8
Remote operation range......................... 8
02 Connections ......................9
Television and VCR with SCART
sockets................................................ 9
Television and VCR with only standard
coaxial aerial input ............................. 10
Connecting to a digital audio device ..... 11
03 Starting up the first
time..............................12
04 Basic operation................14
Turning on/off ....................................... 14
Changing channels ............................... 14
Selecting TV/DTV.................................. 15
Using the Info banner ........................... 15
Using Teletext....................................... 16
05 Advanced operation ........17
Using the on-screen programme
guide ................................................. 17
Using the timer..................................... 19
Freezing a frame................................... 20
Taking snapshots .................................. 21
Viewing snapshots ............................... 21
06 Using parental lock .........23
Set your PIN ......................................... 23
Turning parental lock on/off .................. 24
Locking/unlocking channels.................. 25
Watching locked channels.................... 25
07 Channel management......26
Favourites............................................. 26
Channel Skip......................................... 27
Channel Sort......................................... 28
Channel Options................................... 29
08 Other options ..................30
User Preferences.................................. 30
TV Setup............................................... 31
Installation ............................................ 33
Software Update .................................. 34
Quick User Guide ................................. 35
Restore System Defaults ..................... 36
09 TV brand code .................37
10 Troubleshooting ..............41
11 Specifications..................43
En
gli
sh

Getting ready
01
4
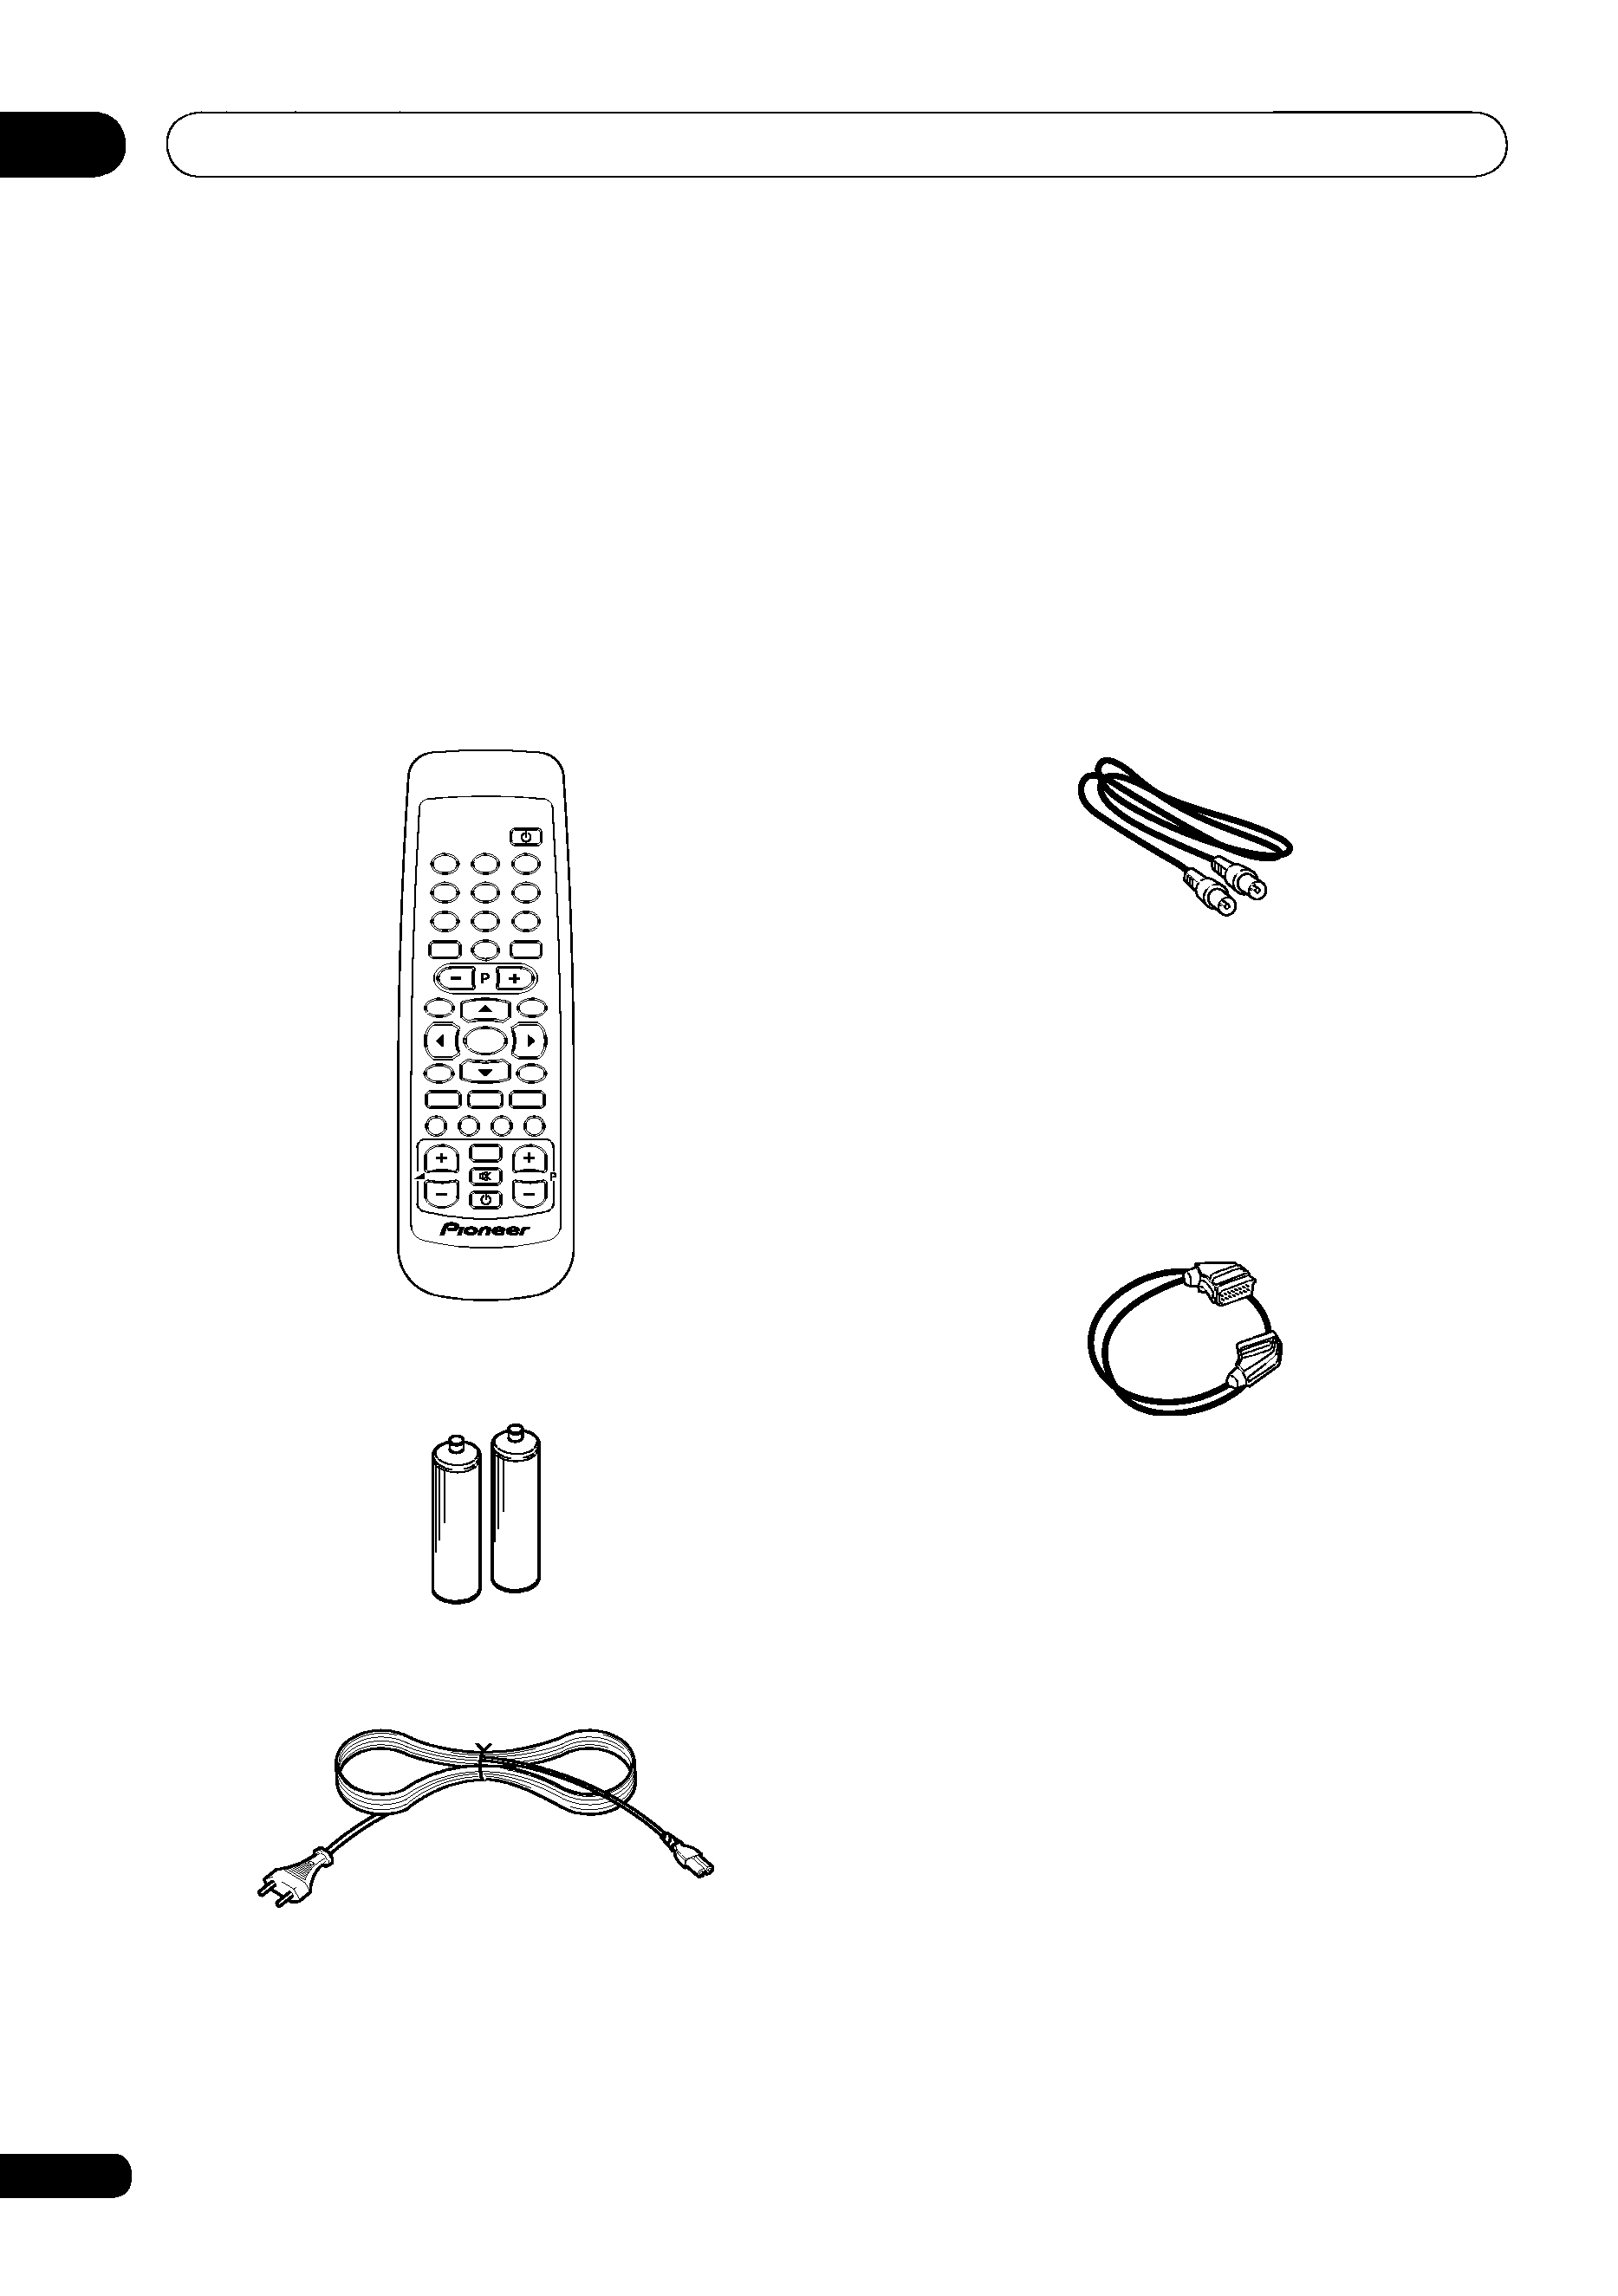
& Aerial/RF lead
Connects the Digital Terrestrial Receiver
(DTR) box to the video or TV. (Refer to the
illustrations on the following pages.)
& SCART lead
Connects the DTR SCART socket to the TV
SCART socket. (TV SCART sockets are usu-
ally labelled EXT or AV.)
& Instruction manual
This document.
& Warranty card
Included accessories
& Remote control
1
TV/DTV
RETURN
GUIDE
2
3
4
5
6
7
MENU
INFO
TEXT
WIDE
SUBTITLE
AV
TV
EXIT
SELECT
8
9
0
& Two AA/R06 Batteries
& Mains lead
This is provided separately. Plug it into the
mains power supply.
Chapter 1:
Getting ready
Throughout this manual your Digital Terrestrial Receiver is abbreviated as DTR.

Getting ready
01
5
En
gli
sh
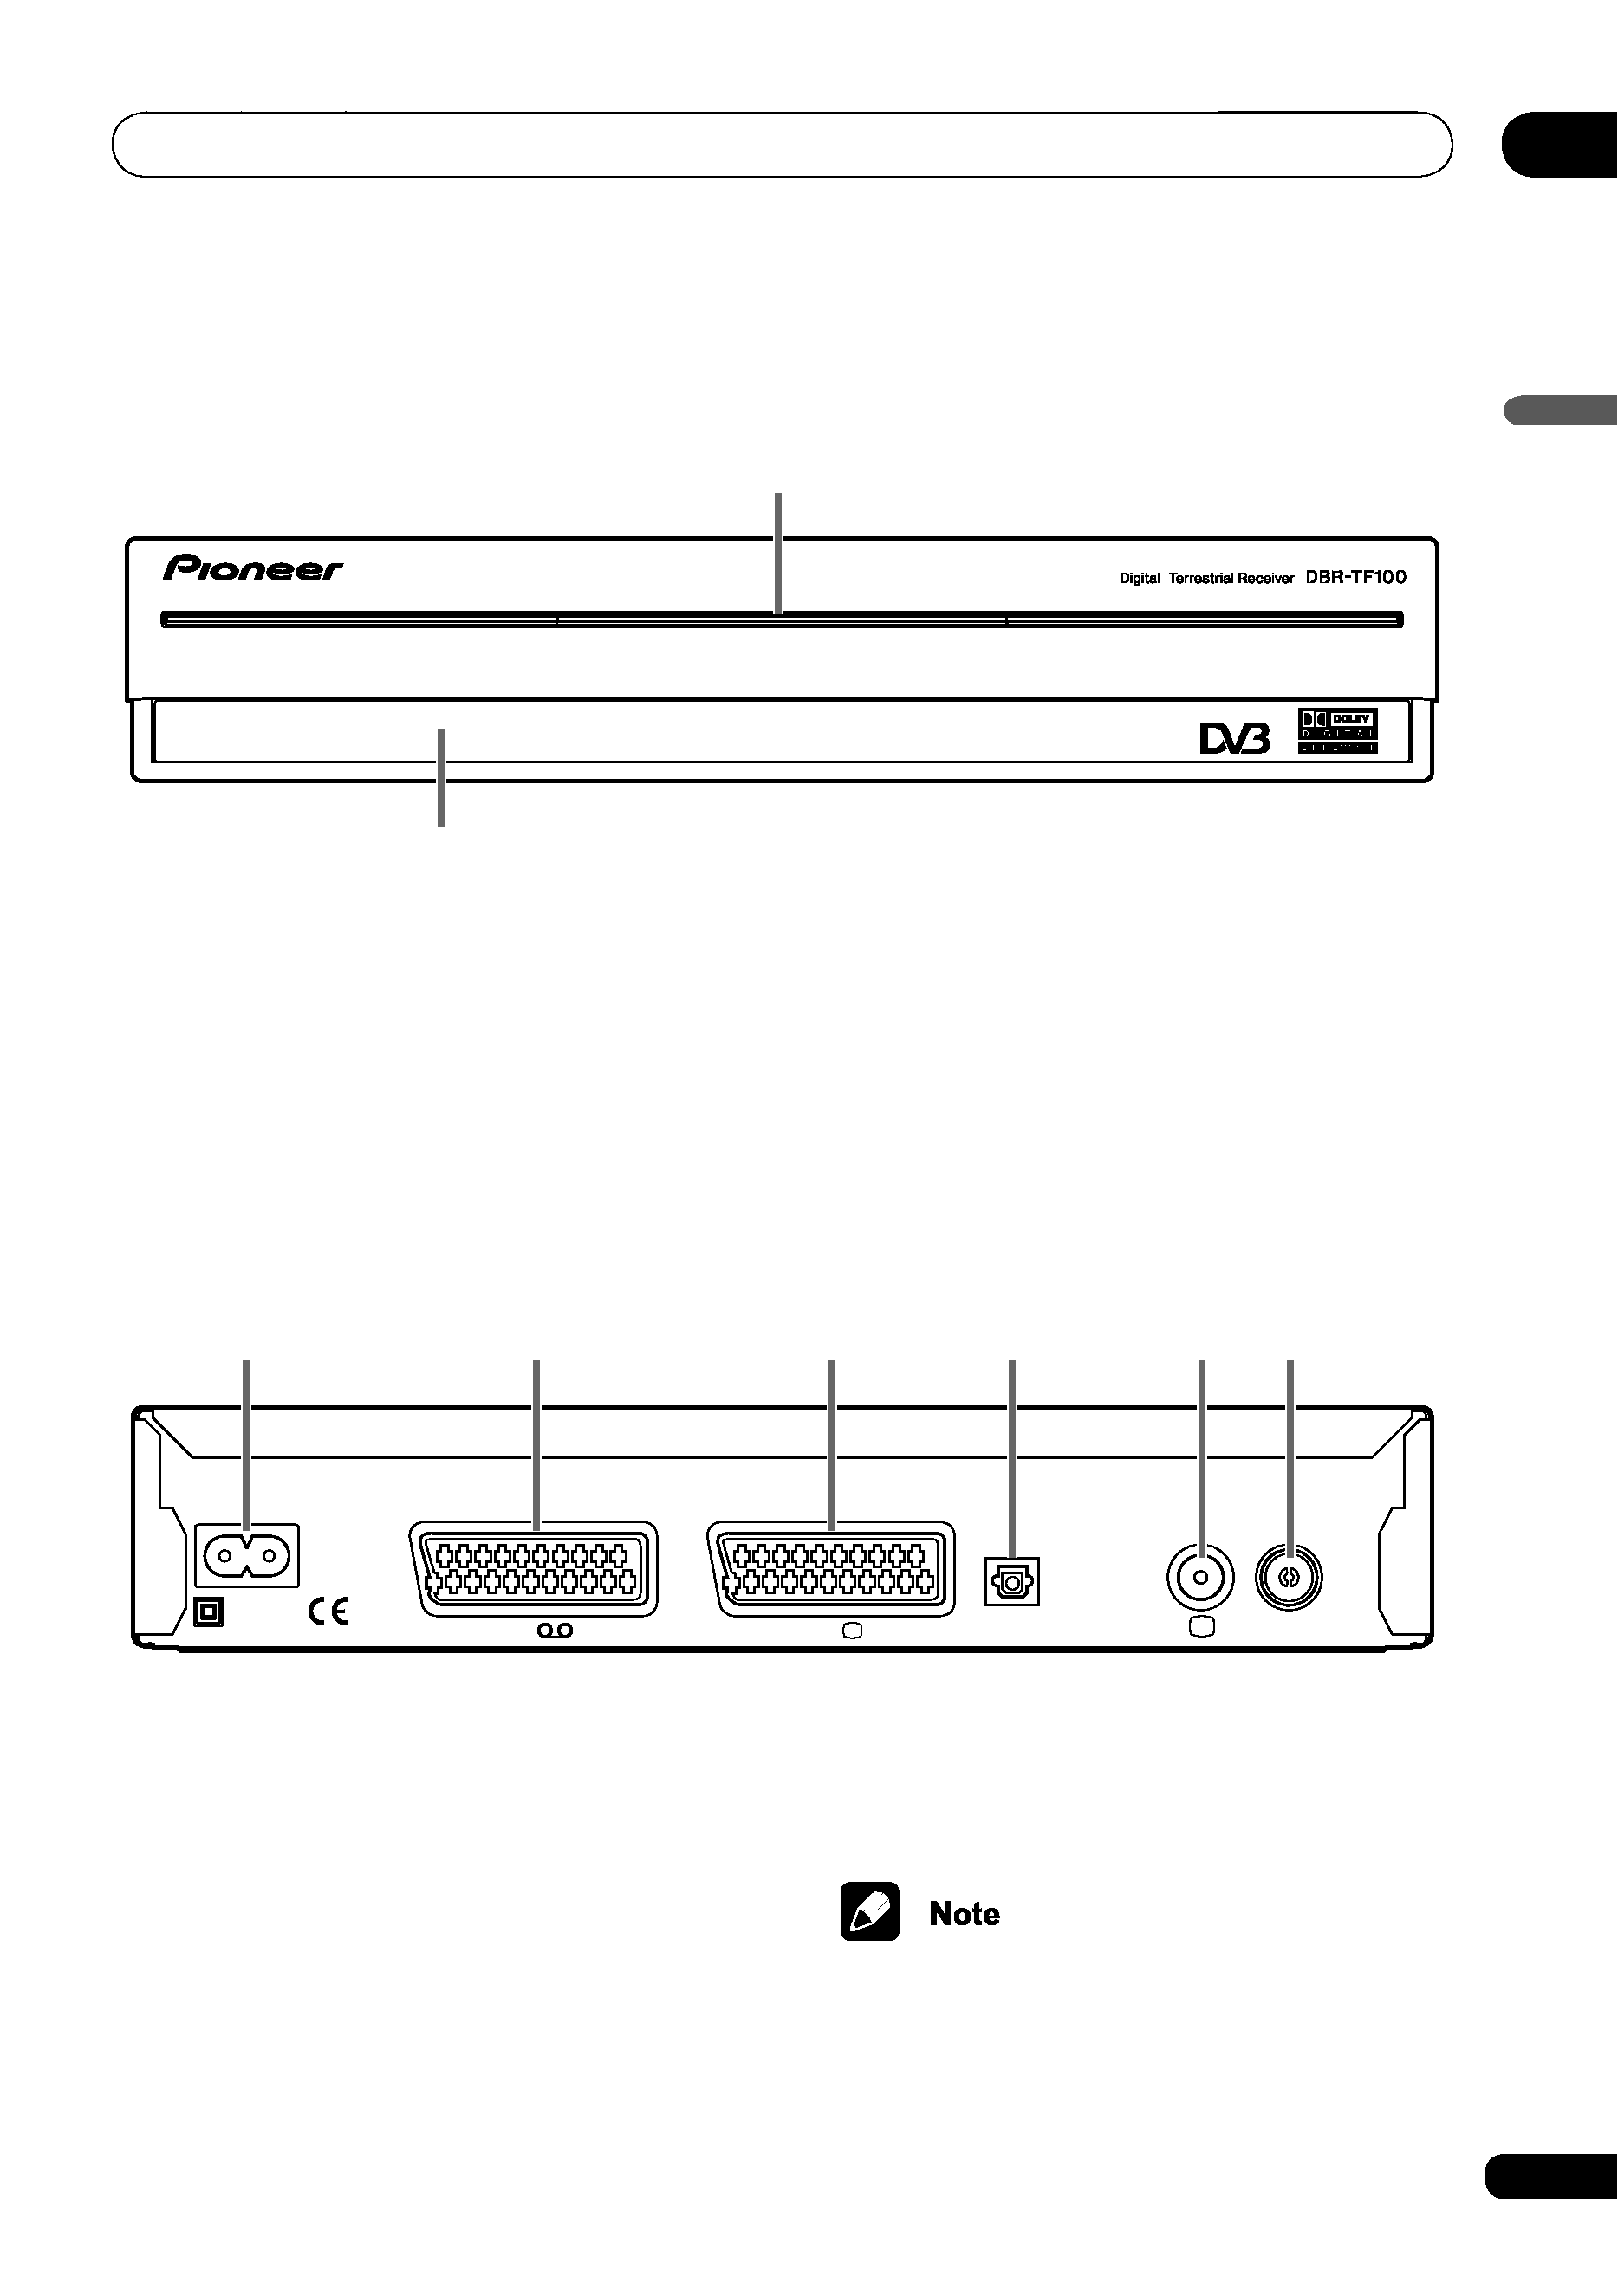
Front view
1
LED (standby/on)
Shows the power status of the DTR; Red =
Standby, Green = On. When a programme
set by the timer is playing, the LED turns
orange and it blinks when the remote is
operated.
1
2
Rear view
1
Mains lead socket
2
SCART1 socket for VCR
3
SCART1 socket for TV
4
Optical digital audio output socket
VCR
TV
OPTICAL
AERIAL
TV
1
2
3
4
5
6
2
Infrared sensor
Receives the signal emitted from the remote
control.
5
VHF2 and UHF3 aerial output for TV
6
VHF2 and UHF3 aerial input
1.
SCART: Euroconnector
2.
VHF: Very High Frequency
3.
UHF: Ultra High Frequency
* Dolby and the double-D symbol are trademarks of Dolby Laboratories.
*
