Z919
INSTRUCTION MANUAL
MULTI CONTROL CD-RECEIVER
© PRINTED IN JAPAN B64-1687-00 (KJ) (+)
01/12 11 10 9 8 7 6 5 4 3 2 1 00/12 11 10 9 8 7 6 5 4
Take the time to read through this instruction manual.
Familiarity with installation and operation procedures will help you obtain the
best performance from your new CD-receiver.
For your records
Record the serial number, found on the back of the unit, in the spaces designated on
the warranty card, and in the space provided below. Refer to the model and serial
numbers whenever you call upon your KENWOOD dealer for information or service on
the product.
Model Z919 Serial number

-- 2 --
English
Contents
Before use
Warning........................................................................................................3
Safety precautions .......................................................................................3
Notes on playing MP3 files ..........................................................................5
Handling Compact discs ..............................................................................8
General features
Power...........................................................................................................9
Switching Modes .........................................................................................9
Volume .......................................................................................................10
Loudness ...................................................................................................10
Panel Angle Adjustment ............................................................................10
Clock Adjustment.......................................................................................10
Stopwatch ..................................................................................................11
Timer ..........................................................................................................11
Alarm..........................................................................................................12
Automatic Dimmer Function ......................................................................12
Display Font Setting ...................................................................................12
Switching the Round Indicator for the Sound Level ..................................12
Audio Control Setting .................................................................................13
Digital Crossover Network .........................................................................15
Tuner features
Tuning ........................................................................................................16
Station Preset Memory ..............................................................................16
Auto Memory Entry ...................................................................................17
Preset Tuning .............................................................................................17
Clean Reception System Circuit (CRSC) ....................................................17
Switching Display for Tuner .......................................................................17
Station Name Preset (SNPS)......................................................................18
Station Name Preset Play (SBF).................................................................19
Direct Access Tuning .................................................................................19
CD/External disc control features
Playing CDs ................................................................................................20
Playing Other Disc Mode ...........................................................................21
Fast Forwarding and Reversing Disc Play ..................................................21
Track Search ..............................................................................................21
Disc Search ................................................................................................22
Track Repeat ..............................................................................................22
Disc Repeat................................................................................................22
Track Scan..................................................................................................22
Disc Scan ...................................................................................................22
Random Play ..............................................................................................23
Magazine Random Play..............................................................................23
Text Scroll ..................................................................................................23
Direct Track Search ....................................................................................23
Direct Disc Search .....................................................................................24
Presetting Disc Names ..............................................................................24
Switching Display for Discs .......................................................................25
Switching Playing Time Display .................................................................25
Search on Initials ........................................................................................26
MP3 features
Playing MP3 files .......................................................................................28
File Search .................................................................................................28
Folder Search .............................................................................................29
File Repeat .................................................................................................29
Folder Repeat.............................................................................................29
Random Play ..............................................................................................29
Name Scroll for MP3..................................................................................29
Presetting Disc Names (DNPS)..................................................................29
Direct File Search .......................................................................................30
Switching Display for MP3.........................................................................30
Folder Select ..............................................................................................30
External TV control features
Tuning ........................................................................................................32
Station Preset Memory ..............................................................................32
Auto Memory Entry ...................................................................................32
Preset Tuning .............................................................................................32
Direct Access Tuning .................................................................................33
Function set system
Function Set System..................................................................................34
Touch Sensor Tone ....................................................................................34
Dimmer ......................................................................................................34
Silent Display .............................................................................................34
KEX (Sound Coordinate system) ................................................................35
SP (Speaker selector) .................................................................................35
Basic operations of remote ....................................35
Installation
Accessories................................................................................................39
Installation Procedure ................................................................................39
Connecting Wires to Terminals..................................................................40
System Connection....................................................................................41
Installation ..................................................................................................42
Removing the Unit .....................................................................................44
Troubleshooting guide ...........................................45
Specifications ........................................................48

-- 3 --
Use of controls or adjustments or
performance of procedures other than those
specified herein may result in hazardous
radiation exposure.
In compliance with Federal Regulations,
following are reproductions of labels on, or
inside the product relating to laser product
safety.
Location : Bottom Panel
FCC WARNING
This equipment may generate or use radio
frequency energy. Changes or modifications
to this equipment may cause harmful
interference unless the modifications are
expressly approved in the instruction manual.
The user could lose the authority to operate
this equipment if an unauthorized change or
modification is made.
2CAUTION
This equipment has been tested and found to
comply with the limits for a Class B digital
device, pursuant to Part 15 of the FCC Rules.
These limits are designed to provide
reasonable protection against harmful
interference in a residential installation. This
equipment may cause harmful interference
to radio communications, if it is not installed
and used in accordance with the instructions.
However, there is no guarantee that
interference will not occur in a particular
installation. If this equipment does cause
harmful interference to radio or television
reception, which can be determined by
turning the equipment off and on, the user is
encouraged to try to correct the interference
by one or more of the following measures:
· Reorient or relocate the receiving antenna.
· Increase the separation between the
equipment and receiver.
· Connect the equipment into an outlet on a
circuit different from that to which the
receiver is connected.
· Consult the dealer or an experienced radio/TV
technician for help.
This Class B digital apparatus complies with
Canadian ICES-003.
NOTE
NOTE
Safety precautions
To prevent injury or fire, take the
following precautions:
· Insert the unit all the way in until it is fully
locked in place. Otherwise it may fall out of
place when jolted.
· When extending the ignition, battery, or
ground wires, make sure to use automotive-
grade wires or other wires with a 0.75mm2
(AWG18) or more to prevent wire
deterioration and damage to the wire coating.
· To prevent a short circuit, never put or leave
any metallic objects (such as coins or metal
tools) inside the unit.
· If the unit starts to emit smoke or strange
smells, turn off the power immediately and
consult your Kenwood dealer.
· Make sure not to get your fingers caught
between the faceplate and the unit.
· Be careful not to drop the unit or subject it to
strong shock.
The unit may break or crack because it
contains glass parts.
2WARNING
2Warning
KENWOOD CORPORATION
2967-3, ISHIKAWA-CHO,
HACHIOJI-SHI
TOKYO, JAPAN
KENWOOD CORP. CERTIFIES THIS EQUIPMENT
CONFORMS TO DHHS REGULATIONS N0.21 CFR
1040. 10, CHAPTER 1, SUBCHAPTER J.

· The illustrations of the display and the panel
appearing in this manual are examples used
to explain more clearly how the controls are
used. Therefore, what appears on the display
in the illustrations may differ from what
appears on the display on the actual
equipment, and some of the illustrations on
the display may represent something
impossible in actual operation.
· If you experience problems during
installation, consult your Kenwood dealer.
· If the unit does not seem to be working right,
try pressing the reset button first. If that does
not solve the problem, consult your Kenwood
dealer.
· The functions that can be used and the
information that can be displayed will differ
depending on the external disc players being
connected.
NOTE
-- 4 --
English
To prevent damage to the machine,
take the following precautions:
· Make sure to ground the unit to a negative
12V DC power supply.
· Do not open the top or bottom covers of the
unit.
· Do not install the unit in a spot exposed to
direct sunlight or excessive heat or humidity.
Also avoid places with too much dust or the
possibility of water splashing.
· Do not subject the faceplate to excessive
shock, as it is a piece of precision equipment.
· When replacing a fuse, only use a new one
with the prescribed rating. Using a fuse with
the wrong rating may cause your unit to
malfunction.
· To prevent a short circuit when replacing a
fuse, first disconnect the wiring harness.
· Do not place any object between the
faceplate and the unit.
· Do not use your own screws. Use only the
screws provided. If you use the wrong
screws, you could damage the unit.
2CAUTION
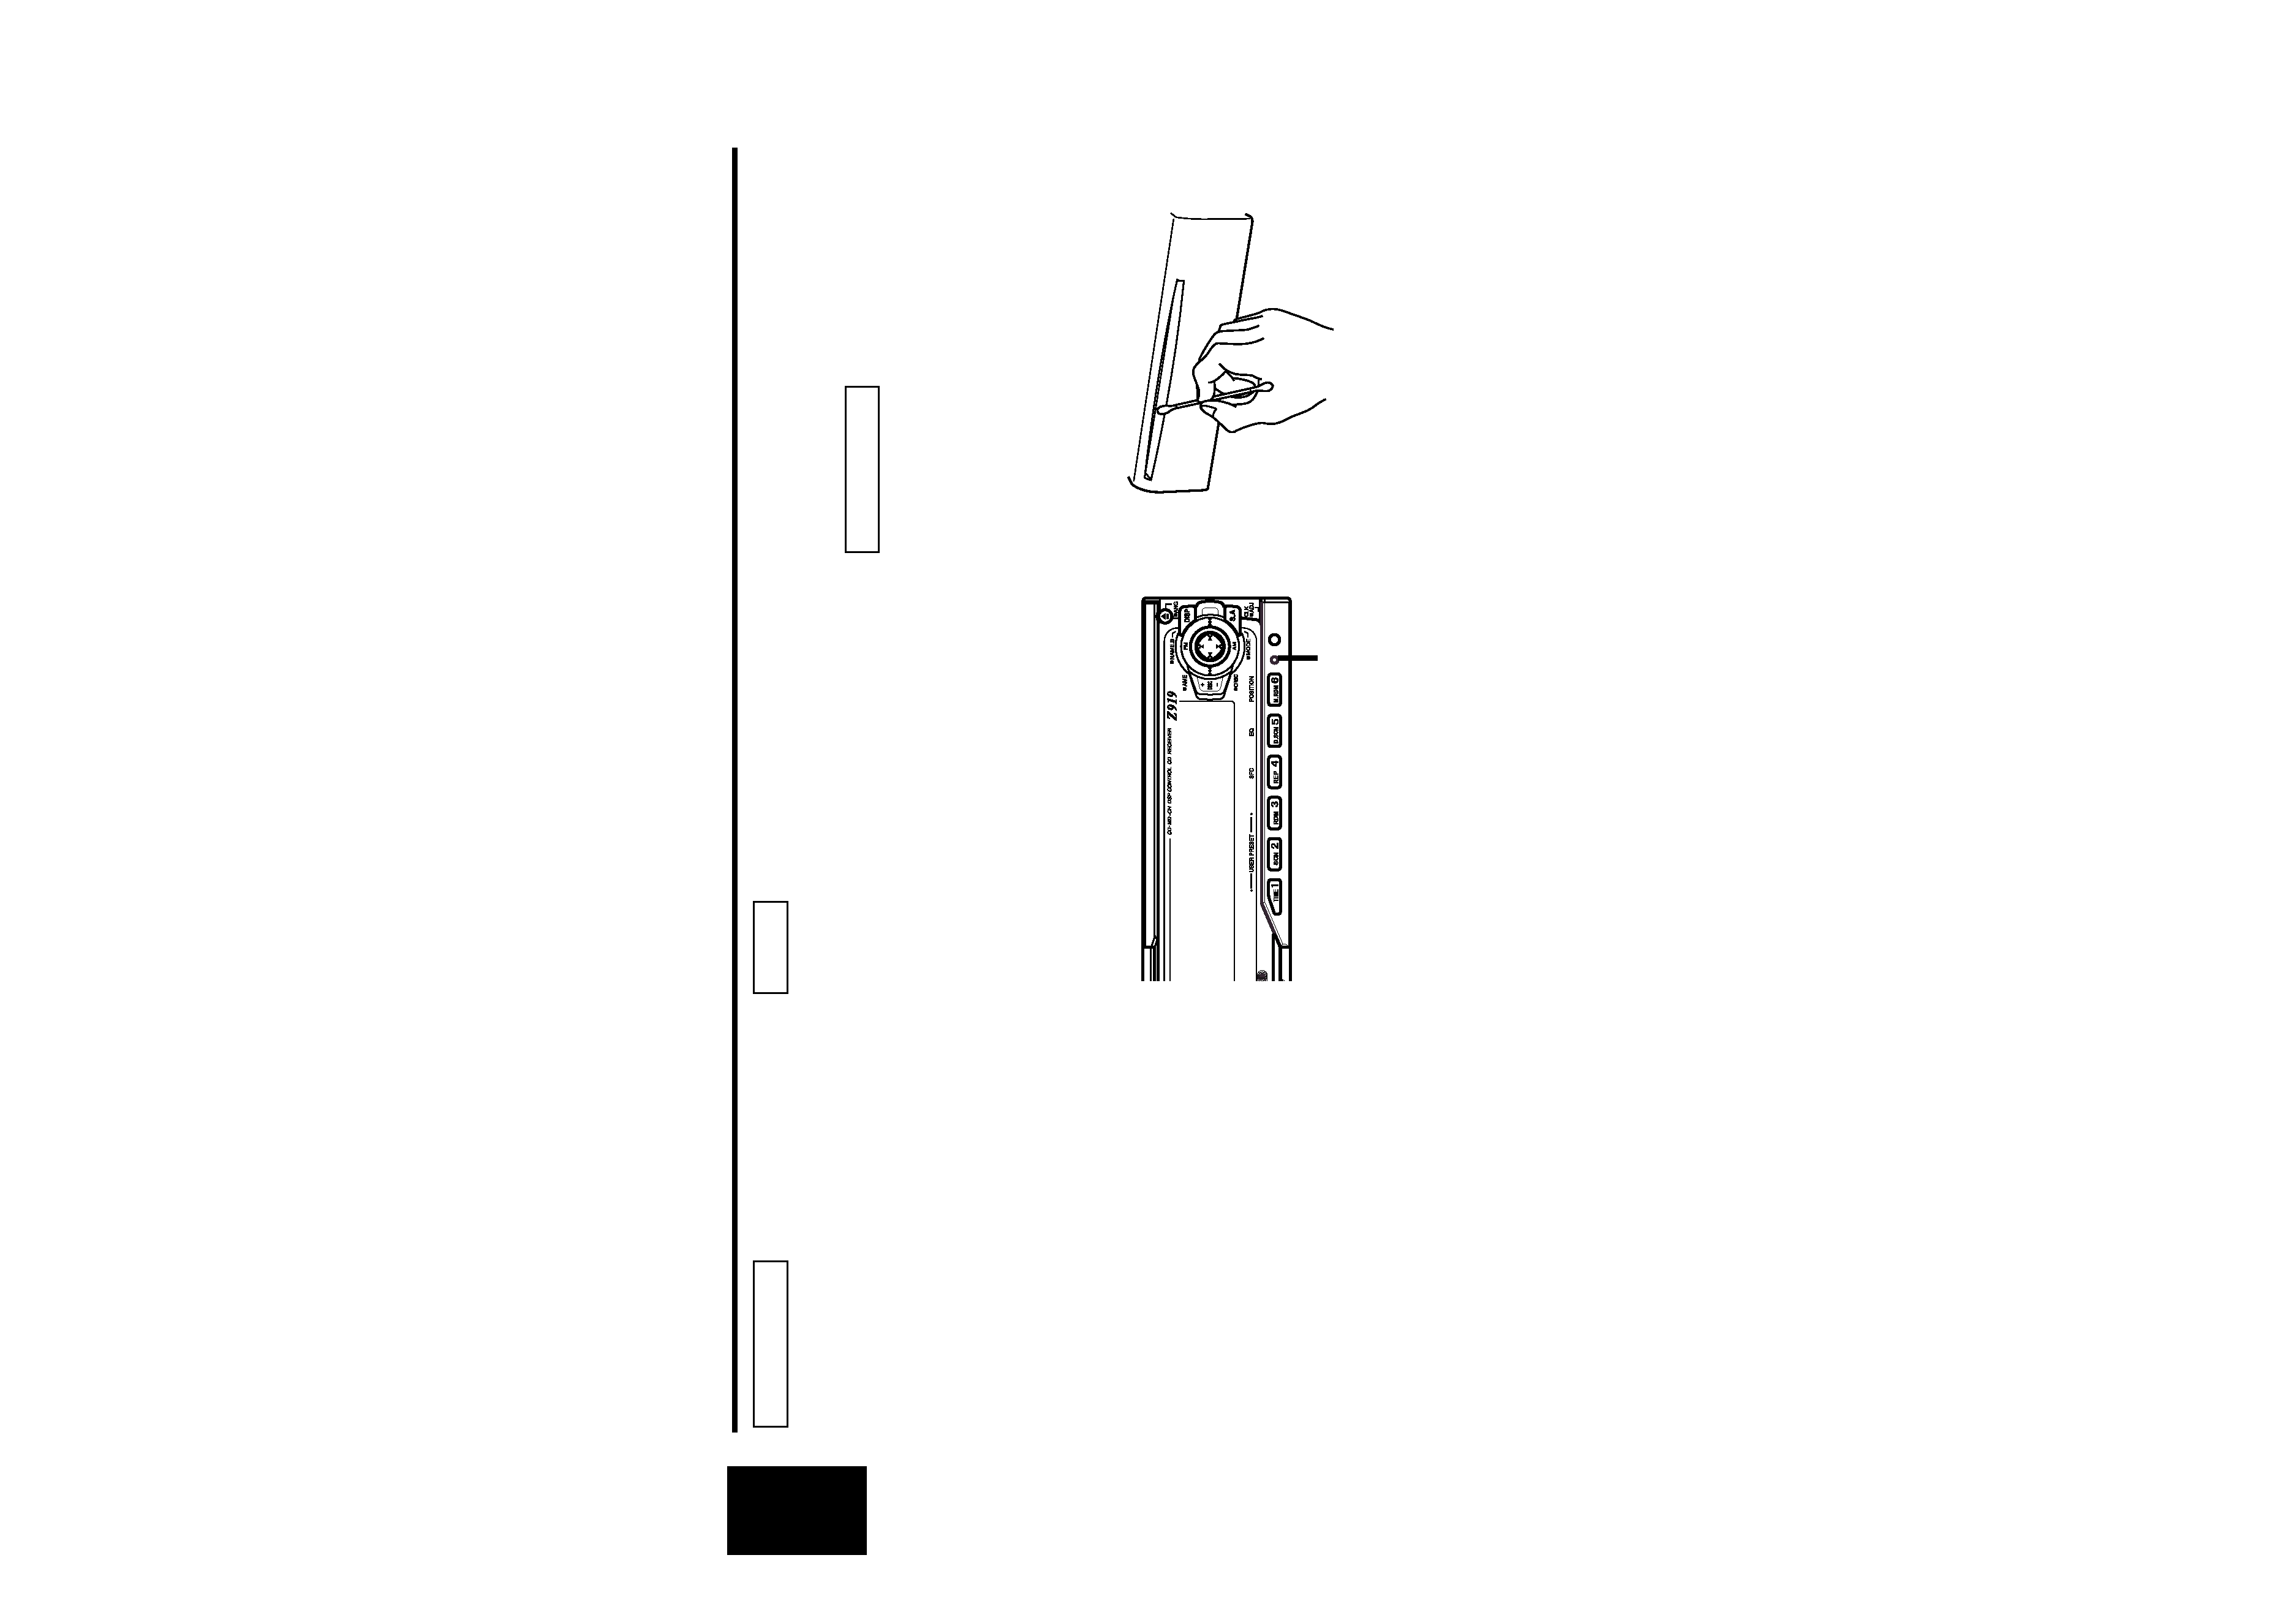
Reset button
Safety precautions
Cleaning the Unit
If the front panel gets dirty, turn off the
power and wipe the panel with a dry silicon
cloth or soft cloth.
Do not wipe the panel with a hard cloth or a
cloth dampened by volatile solvents such as
paint thinner and alcohol. They can scratch
the surface of the panel and/or cause the
indicator letters to peel off.
Cleaning the CD Slot
As dust tends to accumulate in the CD slot,
clean it every once in a while. Your CDs can
get scratched if you put them in a dusty CD
slot.
Lens Fogging
Right after you turn on the car heater in cold
weather, dew or condensation may form on
the lens in the CD player of the unit. Called
lens fogging, CDs may be impossible to play.
In such a situation, remove the disc and wait
for the condensation to evaporate. If the unit
still does not operate normally after a while,
consult your Kenwood dealer.
2CAUTION

-- 5 --
Notes on playing MP3 files
This unit can play MP3 files.
Note, however, that the MP3 file recording media and
formats acceptable are limited.
When writing MP3 files, pay attention to the following
restrictions.
Acceptable media
The MP3 file recording media acceptable to this unit are CD-ROM,
CD-R, and CD-RW.
Acceptable medium formats
The medium formats acceptable to this unit are ISO 9660 Level 1 and
Level 2 excluding the extended formats. When reading an MP3 file
written in a format other than ISO 9660 Level 1 or Level 2, the unit
may fail to play the file normally or display the file or folder name
correctly.
The major specifications of ISO 9660 Level 1 and Level 2 are as
follows:
· Maximum number of directory levels: 8
· Maximum number of files and folders per directory level:
253 (files and folders in total)
· Characters available to file and folder names:
A - Z, 0 - 9, _(underscore)
· Maximum number of characters in file names:
Level 1 : 12 (including a separator "." and a 3-character extension)
Level 2 : 31 (including a separator "." and a 3-character extension)
Settings for your MP3 encoder and CD writer
When you use your MP3 encoder to compress audio data to an MP3
file, set the transfer bit rate of the encoder to fixed 128 kbps.
When you use your CD writer to record MP3 files up to the maximum
disc capacity, disable additional writing. For recording on an empty
disk up to the maximum capacity at once, check Disc at Once.
Entering file and folder names
When entering file and folder names, use alphanumeric characters
only. If entered with any other character, the file and folder names are
not displayed correctly. They may neither be displayed correctly
depending on the CD writer used.
Note that the unit cannot display ID tags even though they have been
embedded in MP3 files.
The unit recognizes and plays only those MP3 files which have the
MP3 filename extension (.MP3). MP3 files should therefore be saved
with the MP3 extension.
Writing files into a medium
When a medium containing MP3 data is loaded, the unit checks all
the files on the medium. If the medium contains a lot of folders or
non-MP3 files, therefore, it takes a long time until the unit starts
playing MP3 files.
In addition, it may take time for the unit to move to the next MP3 file
or a file search or folder search may not be performed smoothly.
You should not write non-MP3 files or unneeded folders along with
MP3 files on the medium.
When playing MP3 files on a medium which also contains non-
MP3 files or folders, observe the following precautions. Loading
such a medium may produce loud noise to break the speakers.
· Do no attempt to play a medium containing a non-MP3 file
with the MP3 extension.
The unit mistakes non-MP3 files for MP3 files as long as they
have the MP3 extension.
· Do not attempt to play a medium containing non MP3 file.
2CAUTION
