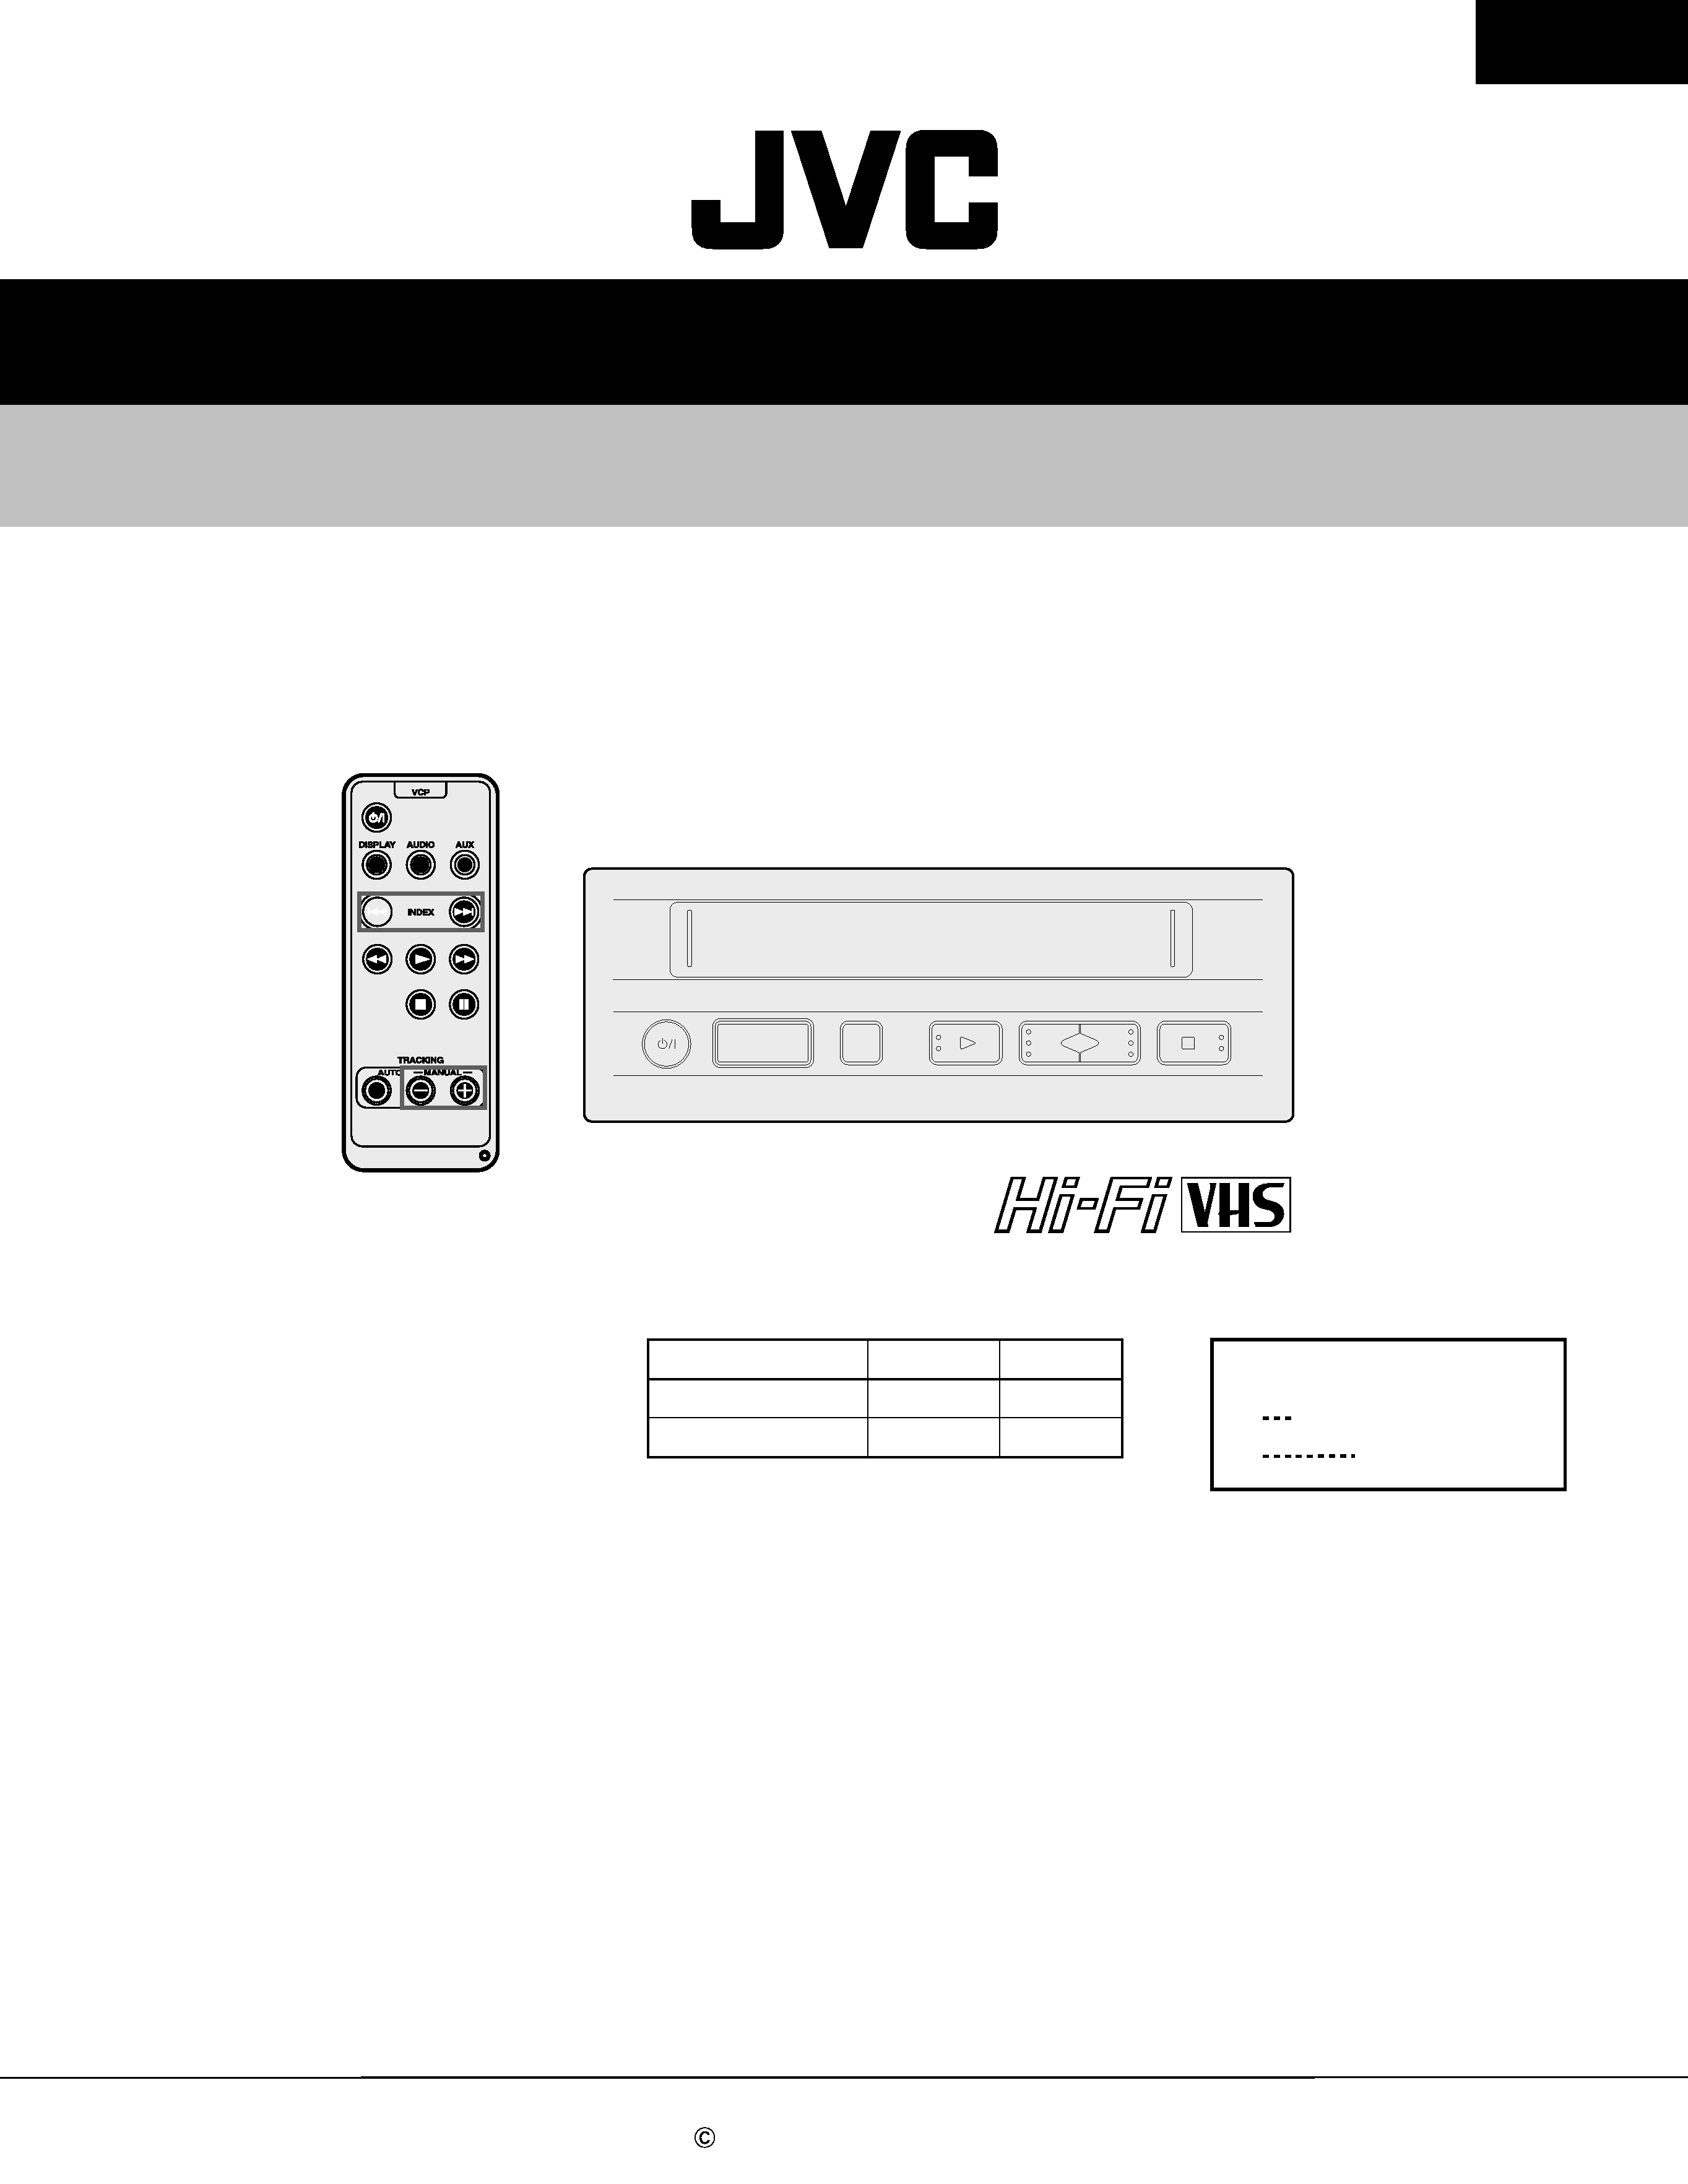
MOBILE VIDEO CASSETTE PLAYER
No.49625
Feb. 2001
COPYRIGHT
2001 VICTOR COMPANY OF JAPAN, LTD.
KV-V8
Area Suffix
E
J
Continental Europe
North America
Contents
q Specifications
q CAUTION
q Instructions
1. DISASSEMBLY
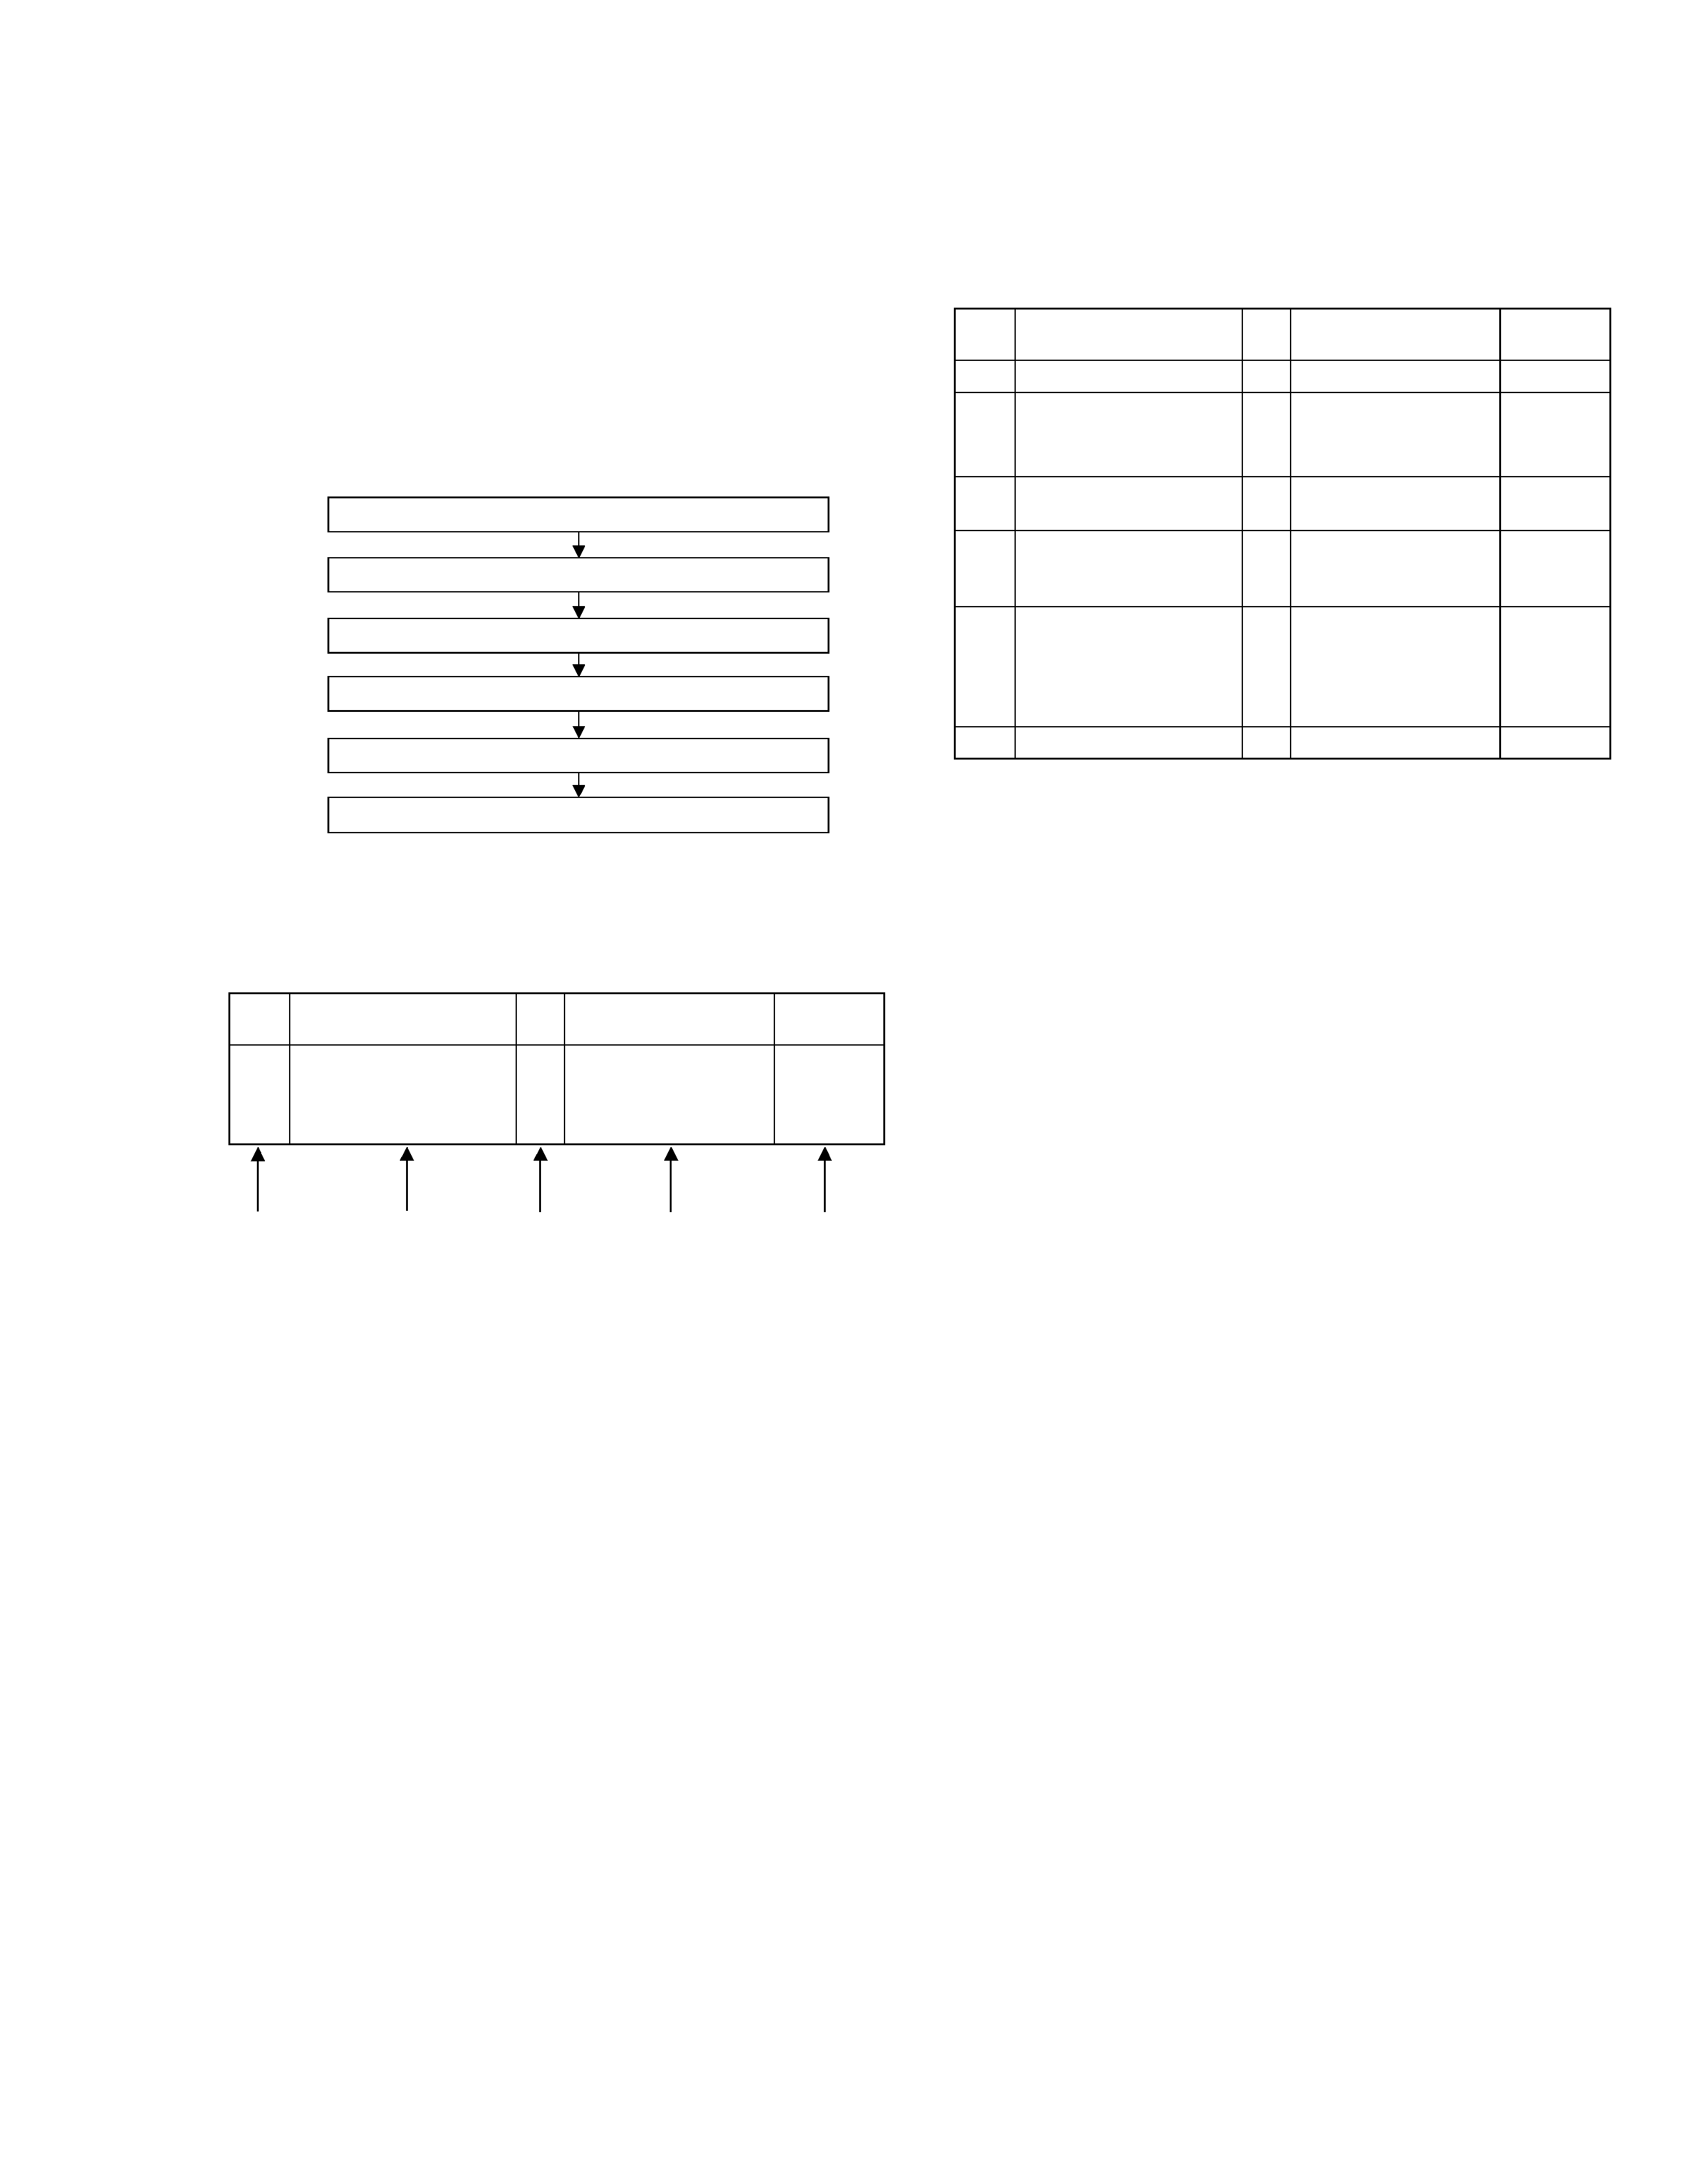
1.1 Disassembly flow chart
1-1
1.2 How to read the disassembly and assembly
1-1
1.3 Disassembly/assembly method
1-1
1.4 Service position
1-4
1.5 Mechanism service mode
1-4
1.6 Emergency display function
1-5
2. MECHANISM ADJUSTMENT
2.1 Before starting repair and adjustment
2-1
2.2 Replacement of major parts
2-4
2.3 Installation of major parts (Mechanism phase alignment)
2-9
2.4 Mechanism timing chart
2-11
2.5 Compatibility adjustment
2-12
3. ELECTRICAL ADJUSTMENT
3.1 Precaution
3-1
3.2 Servo circuit
3-1
5. PARTS LIST
5.1 PACKING AND ACCESSORY ASSEMBLY <M1>
5-1
5.2 FINAL ASSEMBLY <M2>
5-2
5.3 MECHANISM ASSEMBLY <M4>
5-4
5.4 ELECTRICAL PARTS LIST
5-6
....................................................
..................................................
...........
...................................
............................
...................................
......................................
.................
..............................
..............................................
...................................
.................................
.....................
.................................
.....
....................................
...................................
SERVICE MANUAL
KV-V8
Item
KV-V8E
KV-V8J
Signal system
PAL
NTSC
Area Continental
Europe
U.S.A.
Comparison table

Specificatios (KV-V8J)
General
·Power supply
: DC12 V (11V-16V allowable)Negative ground
·Dimensions
: 259 mm x 94 mm x 270 mm (10-1/4"x 3-3/4"x 10-11/16")
(width x height x depth)
·Mass
: 3.2 kg (7.1 lbs)
·Allowable working temperature
: 0 °C to +40 °C (32 °F to104 °F)
·Allowable relative humidity
: 35%to 80%
·Allowable conservation temperature
: -20 °C to +60 °C (-4 °F to 140 °F)
Video
·Playback system
: VHS format,Hi-Fi 4-heads helical scan
·Video signal
: VHS NTSC standard
Audio
·Playback system
: VHS stereo Hi-Fi audio
·Audio track
: 2 Hi-Fi audio channels and 1 normal audio channel
·Remote control unit
: A code
(A code and B code are switchable automatically in the main unit.)
Design and specifications subject to change without notice.
Specificatios (KV-V8E)
General
·Power supply
: DC12 V (11V-16V allowable)Negative ground
·Dimensions
: 259 mm x 94 mm x 270 mm
(width x height x depth)
·Mass
: 3.2 kg
·Allowable working temperature
: 0 °C to +40 °C
·Allowable relative humidity
: 35%to 80%
·Allowable conservation temperature
: -20 °C to +60 °C
Video
·Playback system
: VHS format,Hi-Fi 4-heads helical scan
·Video signal
: VHS PAL standard
Audio
·Playback system
: VHS stereo Hi-Fi audio
·Audio track
: 2 Hi-Fi audio channels and 1 normal audio channel
·Remote control unit
: A code
(A code and B code are switchable automatically in the main unit.)
Design and specifications subject to change without notice.
! CAUTION Burrs formed during molding may be left over on some parts of the chassis. Therefore,
pay attention to such burrs in the case of preforming repair of this system.

1-1
[1]
Top cover
D1 2(S1a), (S1b), 2(S1c)
[2]
SW board assembly,
D2 2(S2a), (WR2a), stay <Note 2a>
Front panel assembly
4(L2a), 3(L2b),
<Note 2b>
CN3006(WR2b)
[3]
Cassette housing
D3a, 2(S3a), 2(L3a)
<Note 3a>
assembly
D3b
[4]
Drum assembly
D4 CN1(WR4a),
<Note 2a>
CN1(WR4b),
(S4a), (S4b), (S4c)
[5]
Mechanism assembly D5 CN1(WR5a),
<Note 2a>
CN3003(WR5b),
<Note 5a>
CN3005(WR5c),
2(S5a), (S5b),
2(L5a)
[6]
Main board assembly
D6 (S6a), (S6b)
SECTION 1
DISASSEMBLY
1.3 Disassembly/assembly method
1.1 Disassembly flow chart
This flowchart lists the disassembling steps for the cabinet
parts and P.C. boards in order to gain access to item(s)
to be serviced. When reassembling, perform the step(s) in
reverse order. Bend, route and dress the flat cables as they
were originally laid.
1.2 How to read the disassembly and assembly
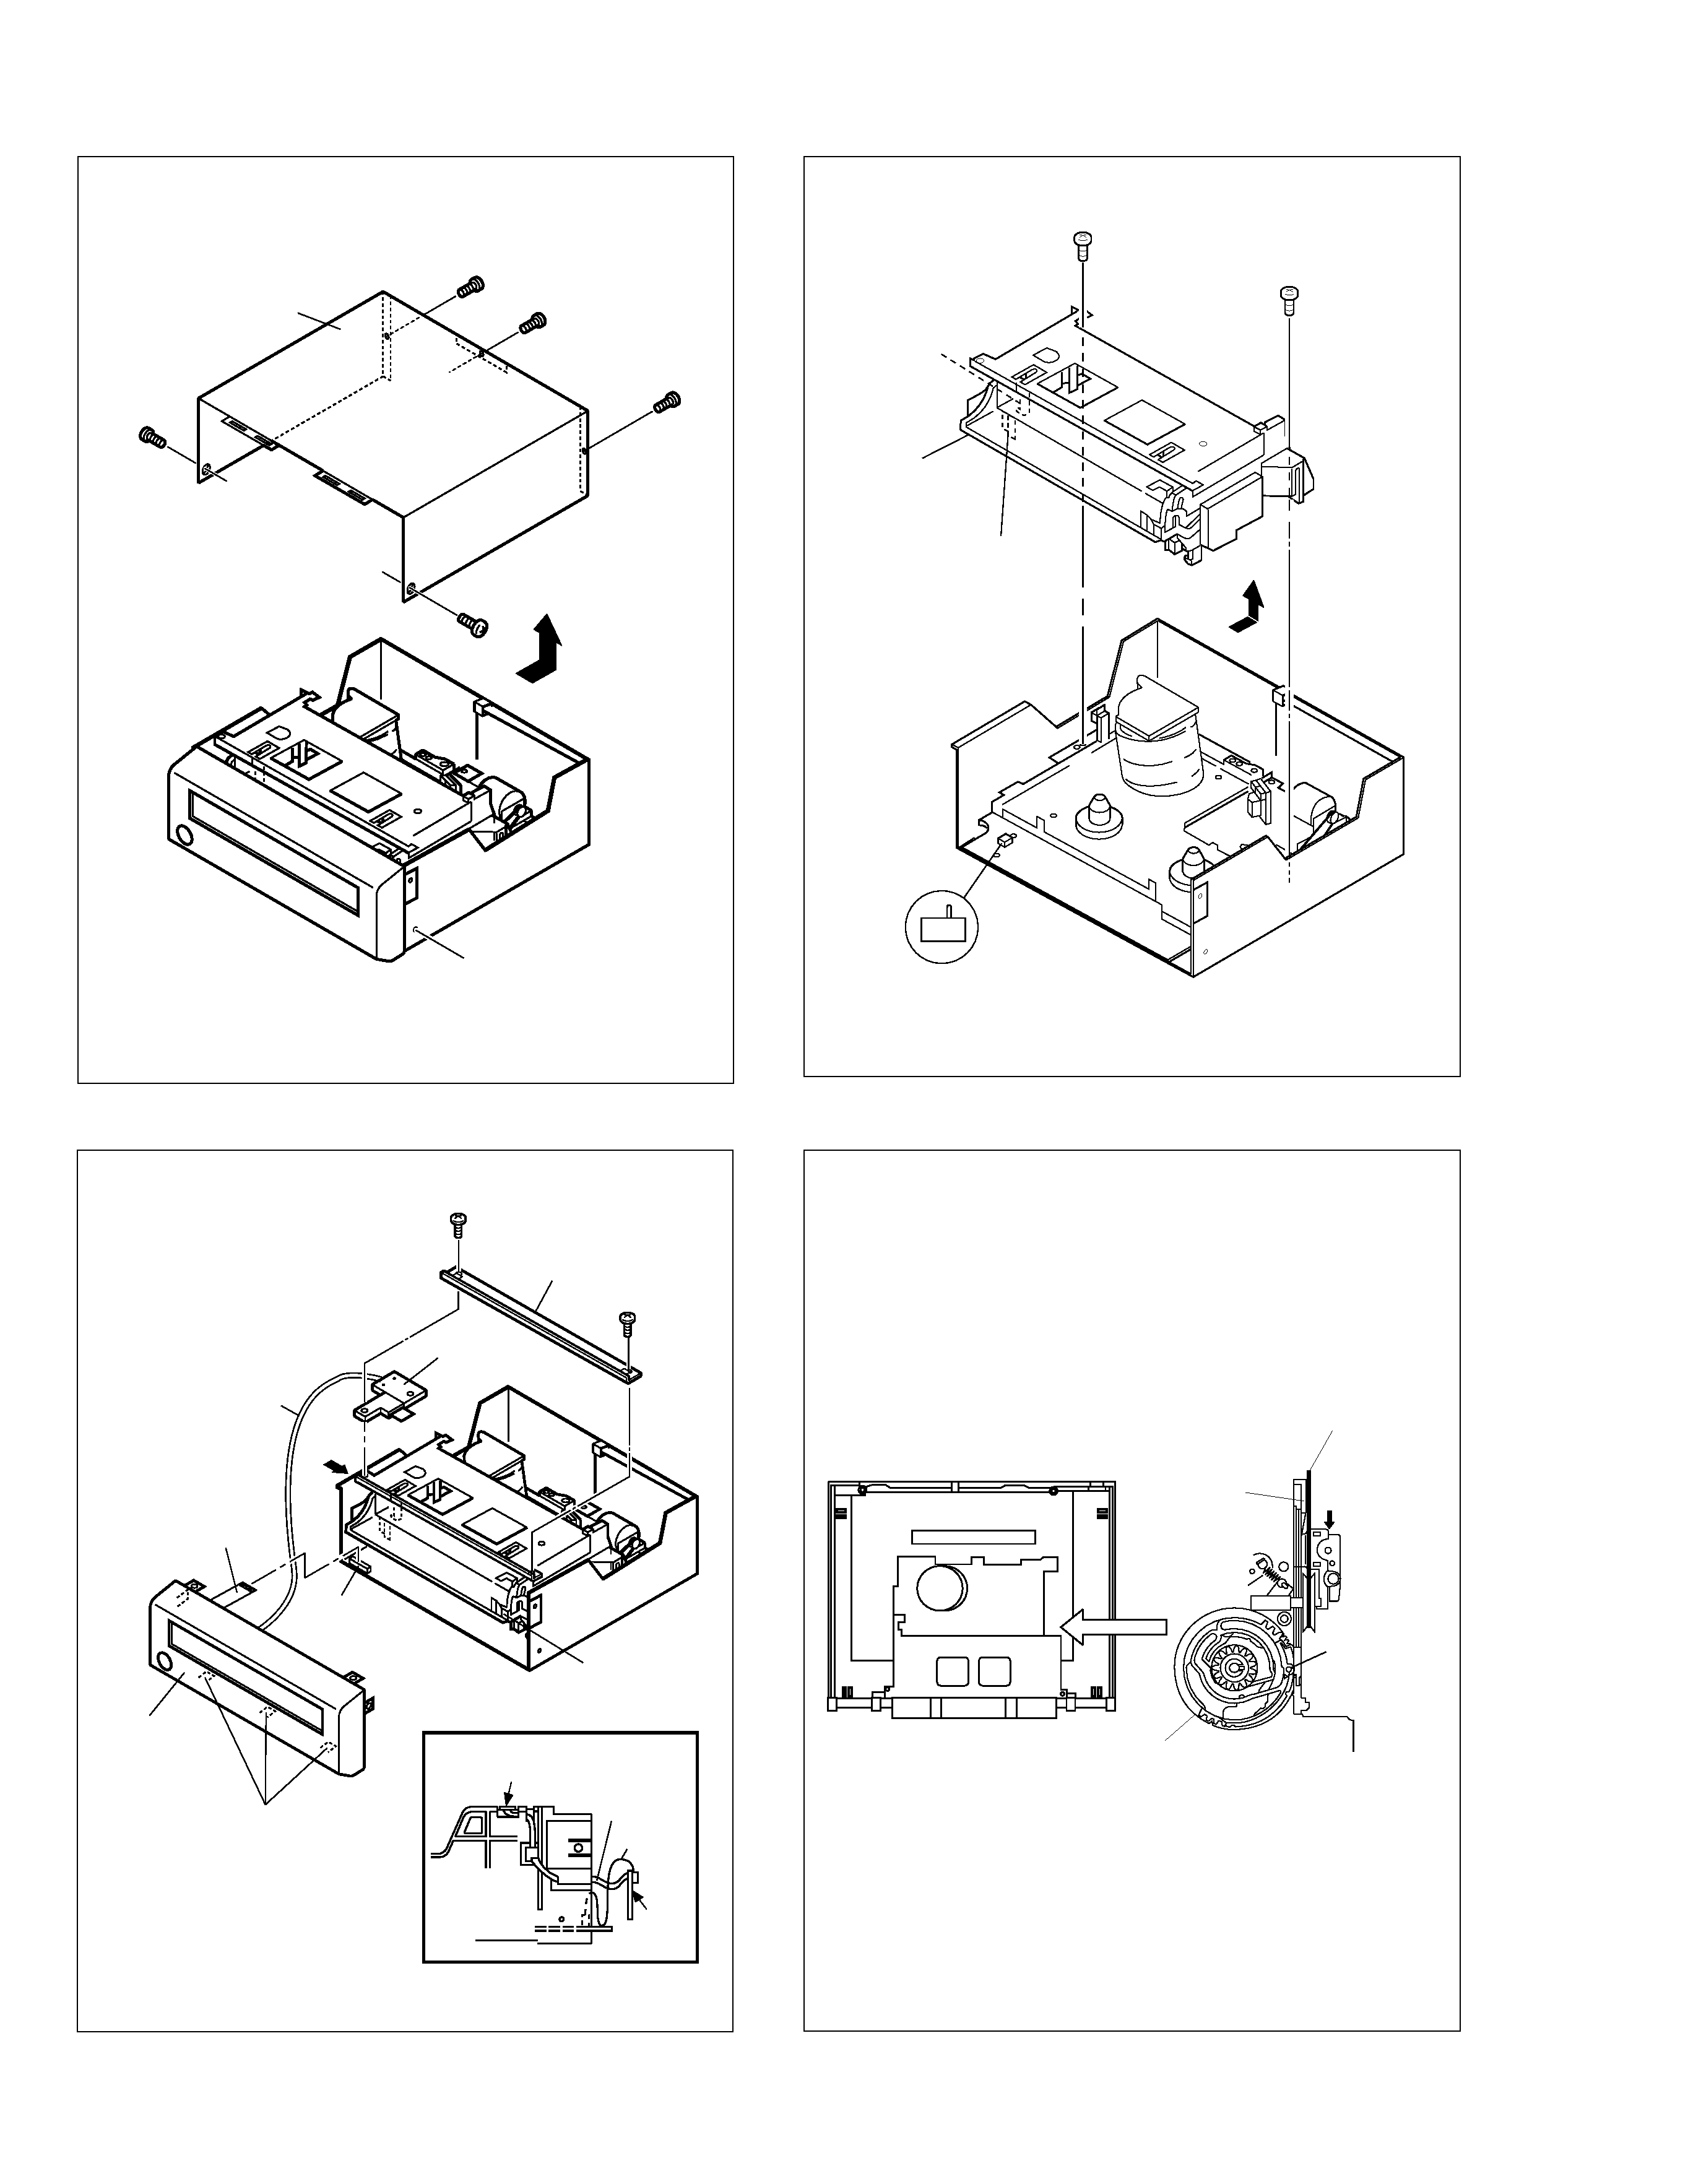
<Note 2a>
· Be careful not to damage the connector and wire etc. during connec-
tion and disconnection. When connecting the wire to the connector, be
careful with the wire direction.
<Note 2b>
· When reattaching the Front panel assembly, make sure that the door
opener "a" of the Cassette housing assembly is lowered in position
prior to the reinstallation.
<Note 3a>
· When installing the Cassette housing assembly, make sure that the
Control cam and the Main deck alignment holes are aligned. if they
are not, rotate the Loading motor belt to the front align the holes.
· When installing the Cassette housing assembly, be careful not to dam-
age the parts of the Main board and Mechanism assemblies.
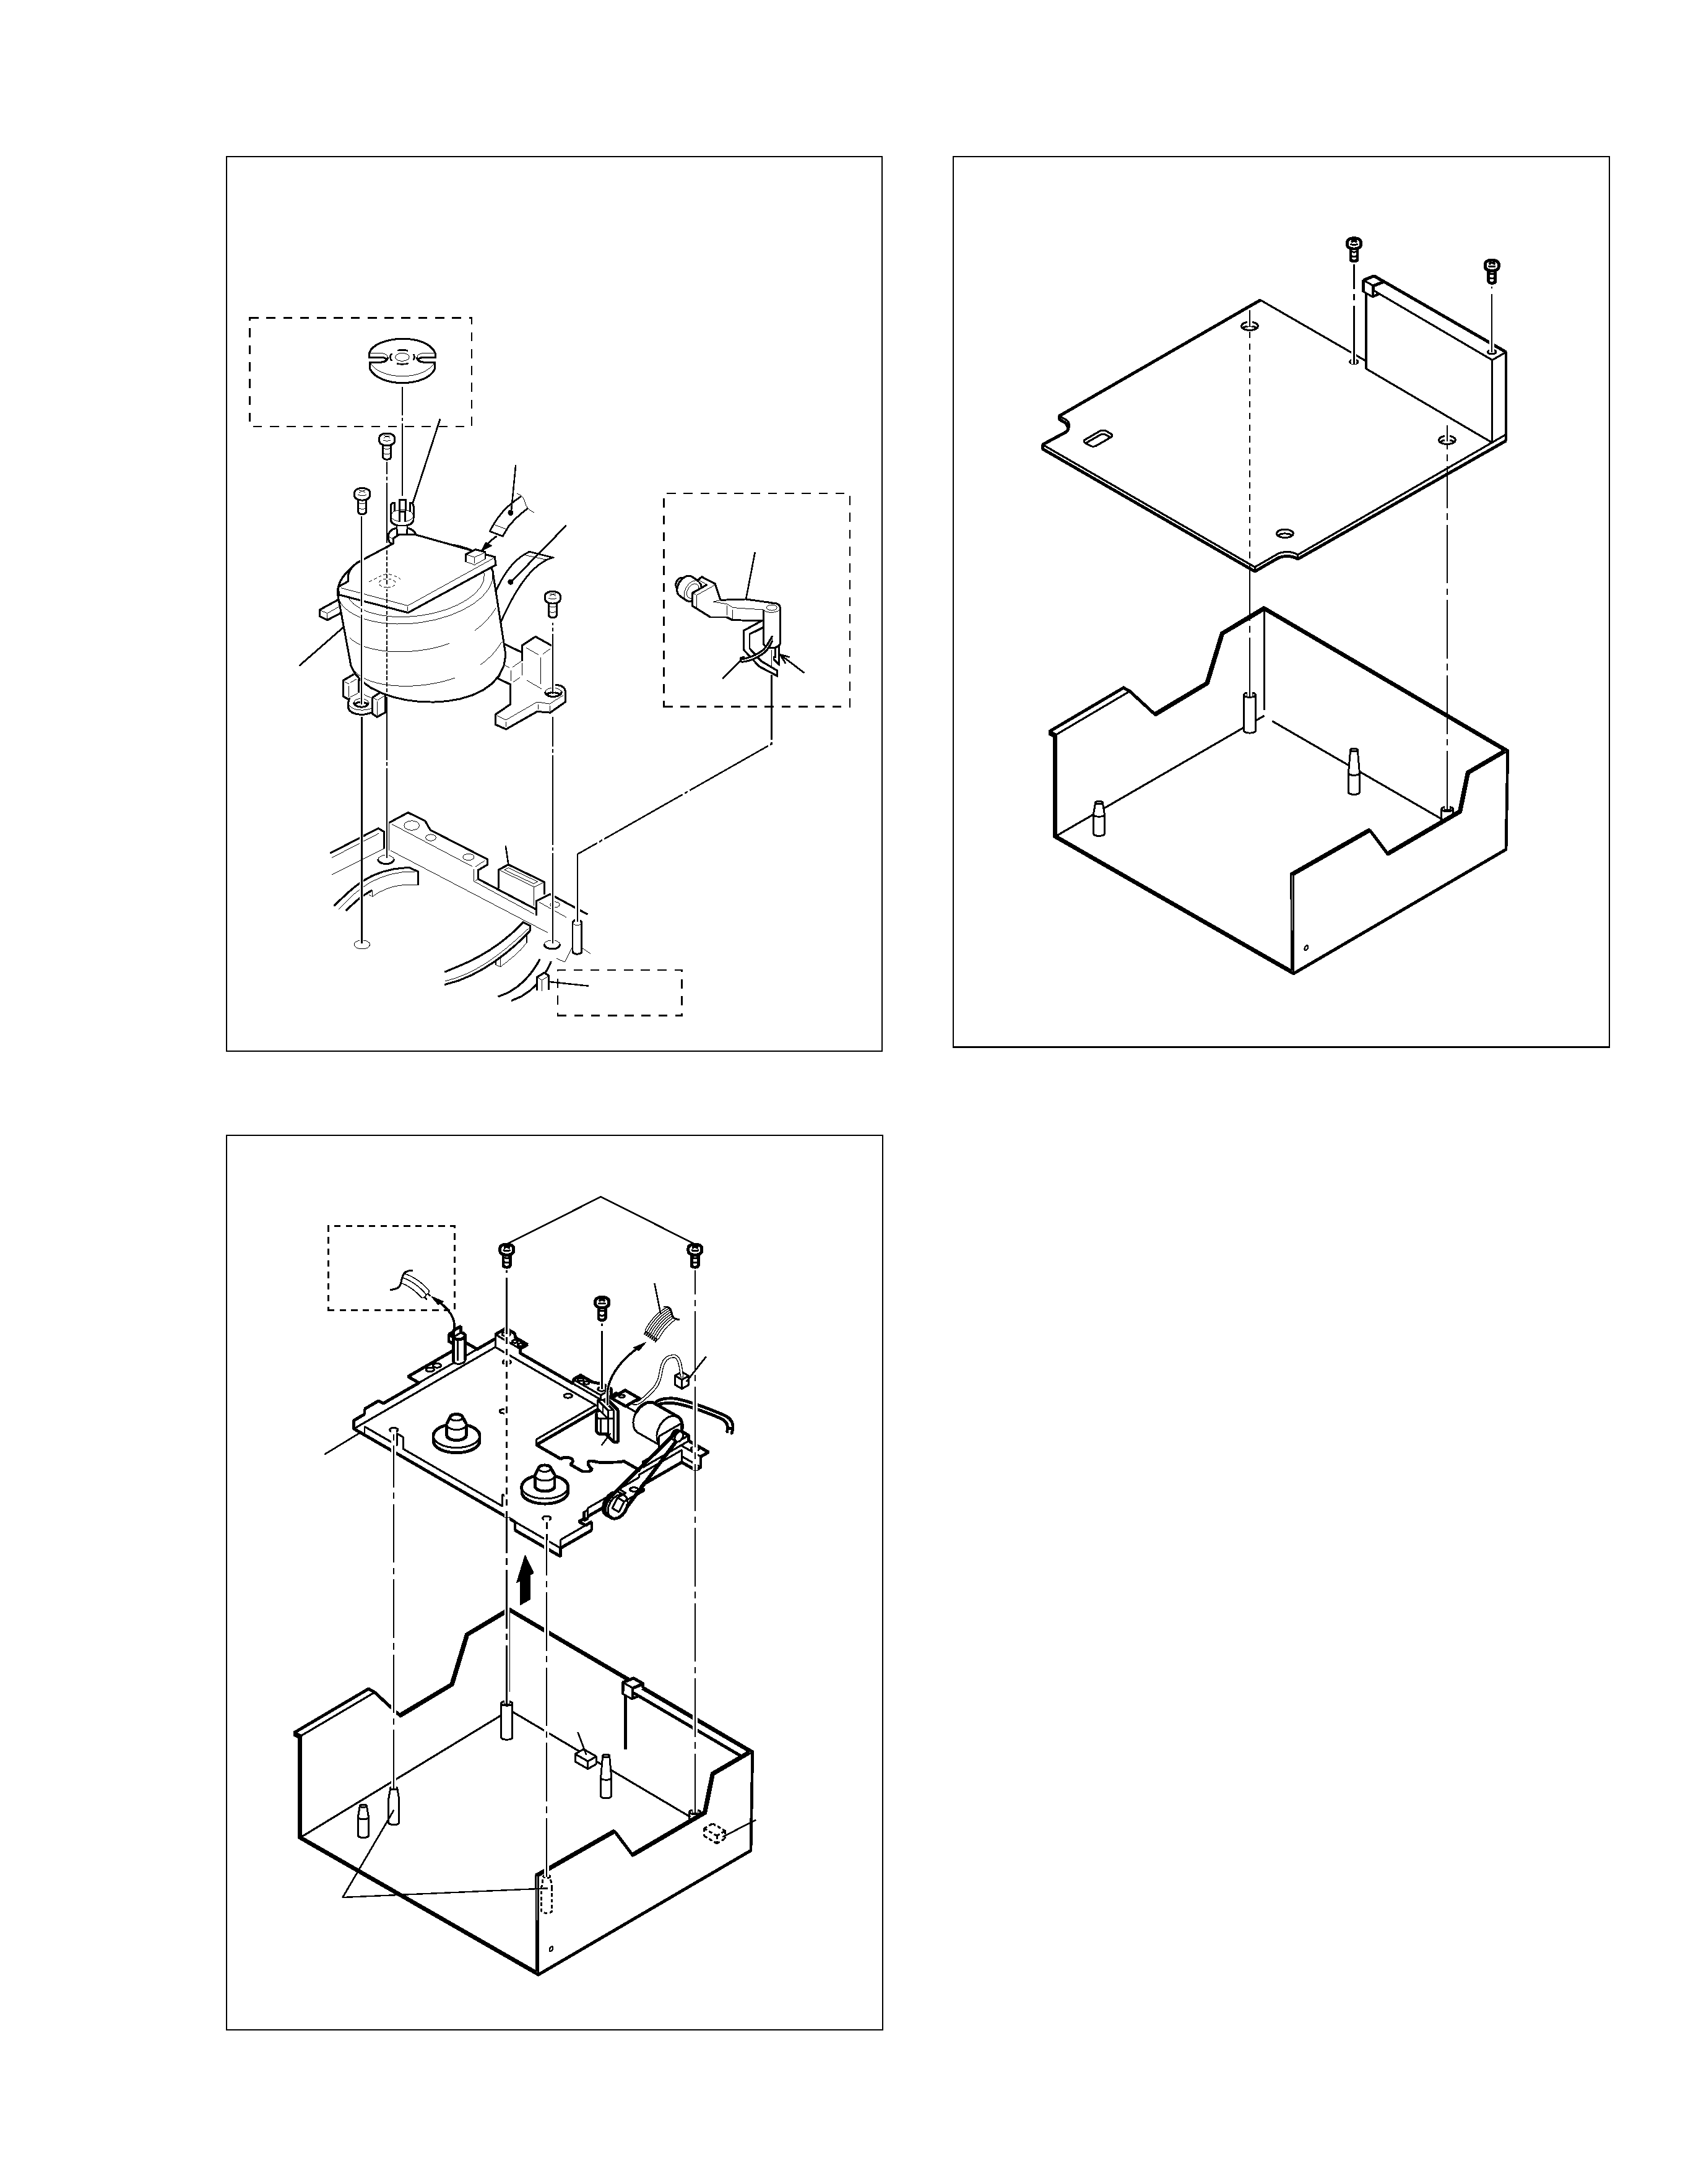
<Note 5a>
· When removing the Mechanism assembly only, unhook the two spacers
connecting it with the Main board assembly with pliers from the back
side of the Main board assembly first, and then remove the Mecha-
nism assembly.
· When reattaching the Mechanism assembly to the Main board as-
sembly, take care not to damage the sensors on the Main board as-
sembly.
Top cover
SW board assembly, Front panel assembly
Cassette housing assembly
Drum assembly
Mechanism assembly
Main board assembly
[1]
[2]
[3]
[4]
[5]
[6]
Step/
LocNo.
Part Name
Fig.
No.
Point
Note
Note:
· The bracketed ( ) WR of the connector symbol are as-
signed nos. in priority order and do not correspond to
those on the spare parts list.
(5) Adjustment information for installation
(1)
(2)
(3)
(4)
(5)
<Example>
(1) Order of steps in Procedure
When reassembling, perform the step(s) in the reverse order.
These numbers are also used as the identification (location) No.
of parts Figures.
(2) Part name to be removed or installed.
(3) Fig. No. showing procedure or part location.
(4) Identification of part to be removed, unhooked, unlocked,
released, unplugged, unclamped or unsoldered.
P= Spring, W= Washer, S= Screw, L= Locking tab, SD= Solder,
CN**(WR**)= Remove the wire (WR**) from the connector
(CN**).
-------------------
[1]
Top cover
D1 4(S1a),(S1b),3(L1a), <Note 1>
2(SD1a), (P1a),
CN1(WR1a),
Bracket
2(S1c)
Step/
LocNo.
Part Name
Fig.
No.
Point
Note

1-2
Fig. D2
Fig. D3b
Fig. D3a
Fig. D1
Rear side
Pinch plate
Loading motor belt
Control cam
Hole align
with hole in
deck
<Note 3a>
(S3a)
(L3a)
(L3a)
[3] Cassette
housing
assembly
Switch lever
REC safety switch
<Note 3a>
(S3a)
A
(S1a)
(S1c)
(S1b)
(S1c)
(S1a)
A
[1] Top cover
Detail "G"
SW board
Chassis
Main board
CN3006
Front
board
(L2a)
(S2a)
(S2a)
Stay
(L2a)
(L2b)
CN3006
[2] Front panel
assembly
[2] SW board
assembly
WR2b
Foil side
<Note 2a>
Door opener
"a" <Note 2b>
WR2a
G
WR2a
WR2b

1-3
Fig. D4
Fig. D6
Fig. D5
Not used
Inertia plate
[4]
Drum
assembly
(S4b)
< e >
(L5a)
WR4a
Supporting
tape side
<Note 2a>
WR4b
Supporting
tape side
<Note 2a>
CN1
Not used
(S4a)
(S4c)
(L5b)
CN1
Not used
Cleaner assembly
<Note 5>
< d >
Note:
When installing the Drum assembly, secure the screws (S4a S4c)
in the order of a , b , c .
[6] Main board
assembly
(S6a)
(S6b)
(S5a)
(S5b)
CN1
WR5a
Not used
WR4
[5] Mechanism
assembly
WR5c
WR5b
Red line:
CN3003 pin1
CN3005
CN3003
(L5a)
Spacer
<Note5a>
