SERVICE MANUAL
DA
TA
MINIDISC PLAYER
AM-HX100 AHK
S/M Code No. 09-018-446-0R2
REVISION
BASIC MD MECHANISM: BZG-8 A
· This Service Manual is the "Revision Publishing" and replaces
"Simple Manual" of AM-HX100 <AHK>, (S/M Code No. 09-015-446-0T2).

2
SPECIFICATIONS
Main unit
Playback system
MiniDisc digital audio system
Encoding methods
ATRAC, ATRAC 3 LP2, ATRAC 3 LP4
Laser pickup
Semiconductor laser
Sampling Frequency
44.1kHz
Number of channels
Stereo: 2 channels
Monaural: 1 channel
D/A converter
1-bit
Frequency response
40 20,000 Hz ± 4dB
20 20,000 Hz ± 1dB (10 kohms)
Wow and Flutter
Below measurable limit
(± 0.001 % W.PEAK)
Output
Phone jack
Maximum output level
8 mW + 8 mW (16 ohms)
Power requirements
DC 1.2 V using the supplied Ni-MH
rechargeable battery
DC 1.5 V using an LR6 (size AA) dry
cell battery
AC house current using the supplied AC
adaptor and charger
Battery life
POWER SAVE switch set to ON
(approx. hours)
SP
LP2
LP4
Rechargeable
29
38
45
battery
LR6 (size AA)
40
72
75
alkaline battery
Rechargeable
75
107
125
battery and LR6
alkaline battery
POWER SAVE switch set to OFF
(approx. hours)
SP
LP2
LP4
Rechargeable
22
24
27
battery
LR6 (size AA)
31
40
43
alkaline battery
Rechargeable
55
66
68
battery and LR6
alkaline battery
Maximum outside
Approx. 71.1 (W) X 12.6 (H) X 77.2 (D) mm
dimensions
(excluding projecting parts and controls)
Weight
Approx. 56g, excluding batteries
<AC adaptor AC-D401 K>
Rated voltage
AC 230 V, 50 Hz
Design and specifications are subject to change without notice.

3
CLASS 1
LASER PRODUCT
KLASSE 1
LASER PRODUKT
LUOKAN 1
LASER LAITE
KLASS 1
LASER APPARAT
This set employs laser. Therefore, be sure to follow carefully
the instructions below when servicing.
WARNING!!
WHEN SERVICING, DO NOT APPROACH THE LASER
EXIT WITH THE EYE TOO CLOSELY. IN CASE IT IS
NECESSARY TO CONFIRM LASER BEAM EMISSION.
BE SURE TO OBSERVE FROM A DISTANCE OF MORE
THAN 30cm FROM THE SURFACE OF THE OBJEC-
TIVE LENS ON THE OPTICAL PICK-UP BLOCK.
s Caution: Invisible laser radiation when
open and interlocks defeated avoid
exposure to beam.
s Advarsel: Usynlig laserståling ved åbning,
når sikkerhedsafbrydere er ude af funktion.
Undgå udsættelse for stråling.
VAROITUS!
Laiteen Käyttäminen muulla kuin tässä käyttöohjeessa
mainitulla
tavalla
saataa
altistaa
käyt-täjän
turvallisuusluokan 1 ylittävälle näkymättömälle
lasersäteilylle.
VARNING!
Om apparaten används på annat sätt än vad som
specificeras i denna bruksanvising, kan användaren
utsättas för osynling laserstrålning, som överskrider
gränsen för laserklass 1.
PROTECTION OF EYES FROM LASER BEAM DURING SERVICING
CAUTION
Use of controls or adjustments or performance of proce-
dures other than those specified herin may result in
hazardous radiation exposure.
ATTENTION
L'utillisation de commandes, réglages ou procédures
autres que ceux spécifiés peut entraîner une dangereuse
exposition aux radiations.
ADVARSEL
Usynlig laserståling ved åbning, når sikkerhedsafbrydereer
ude af funktion. Undgå udsættelse for stråling.
This Compact Disc player is classified as a CLASS 1
LASER product.
The CLASS 1 LASER PRODUCT label is located on the
rear exterior.
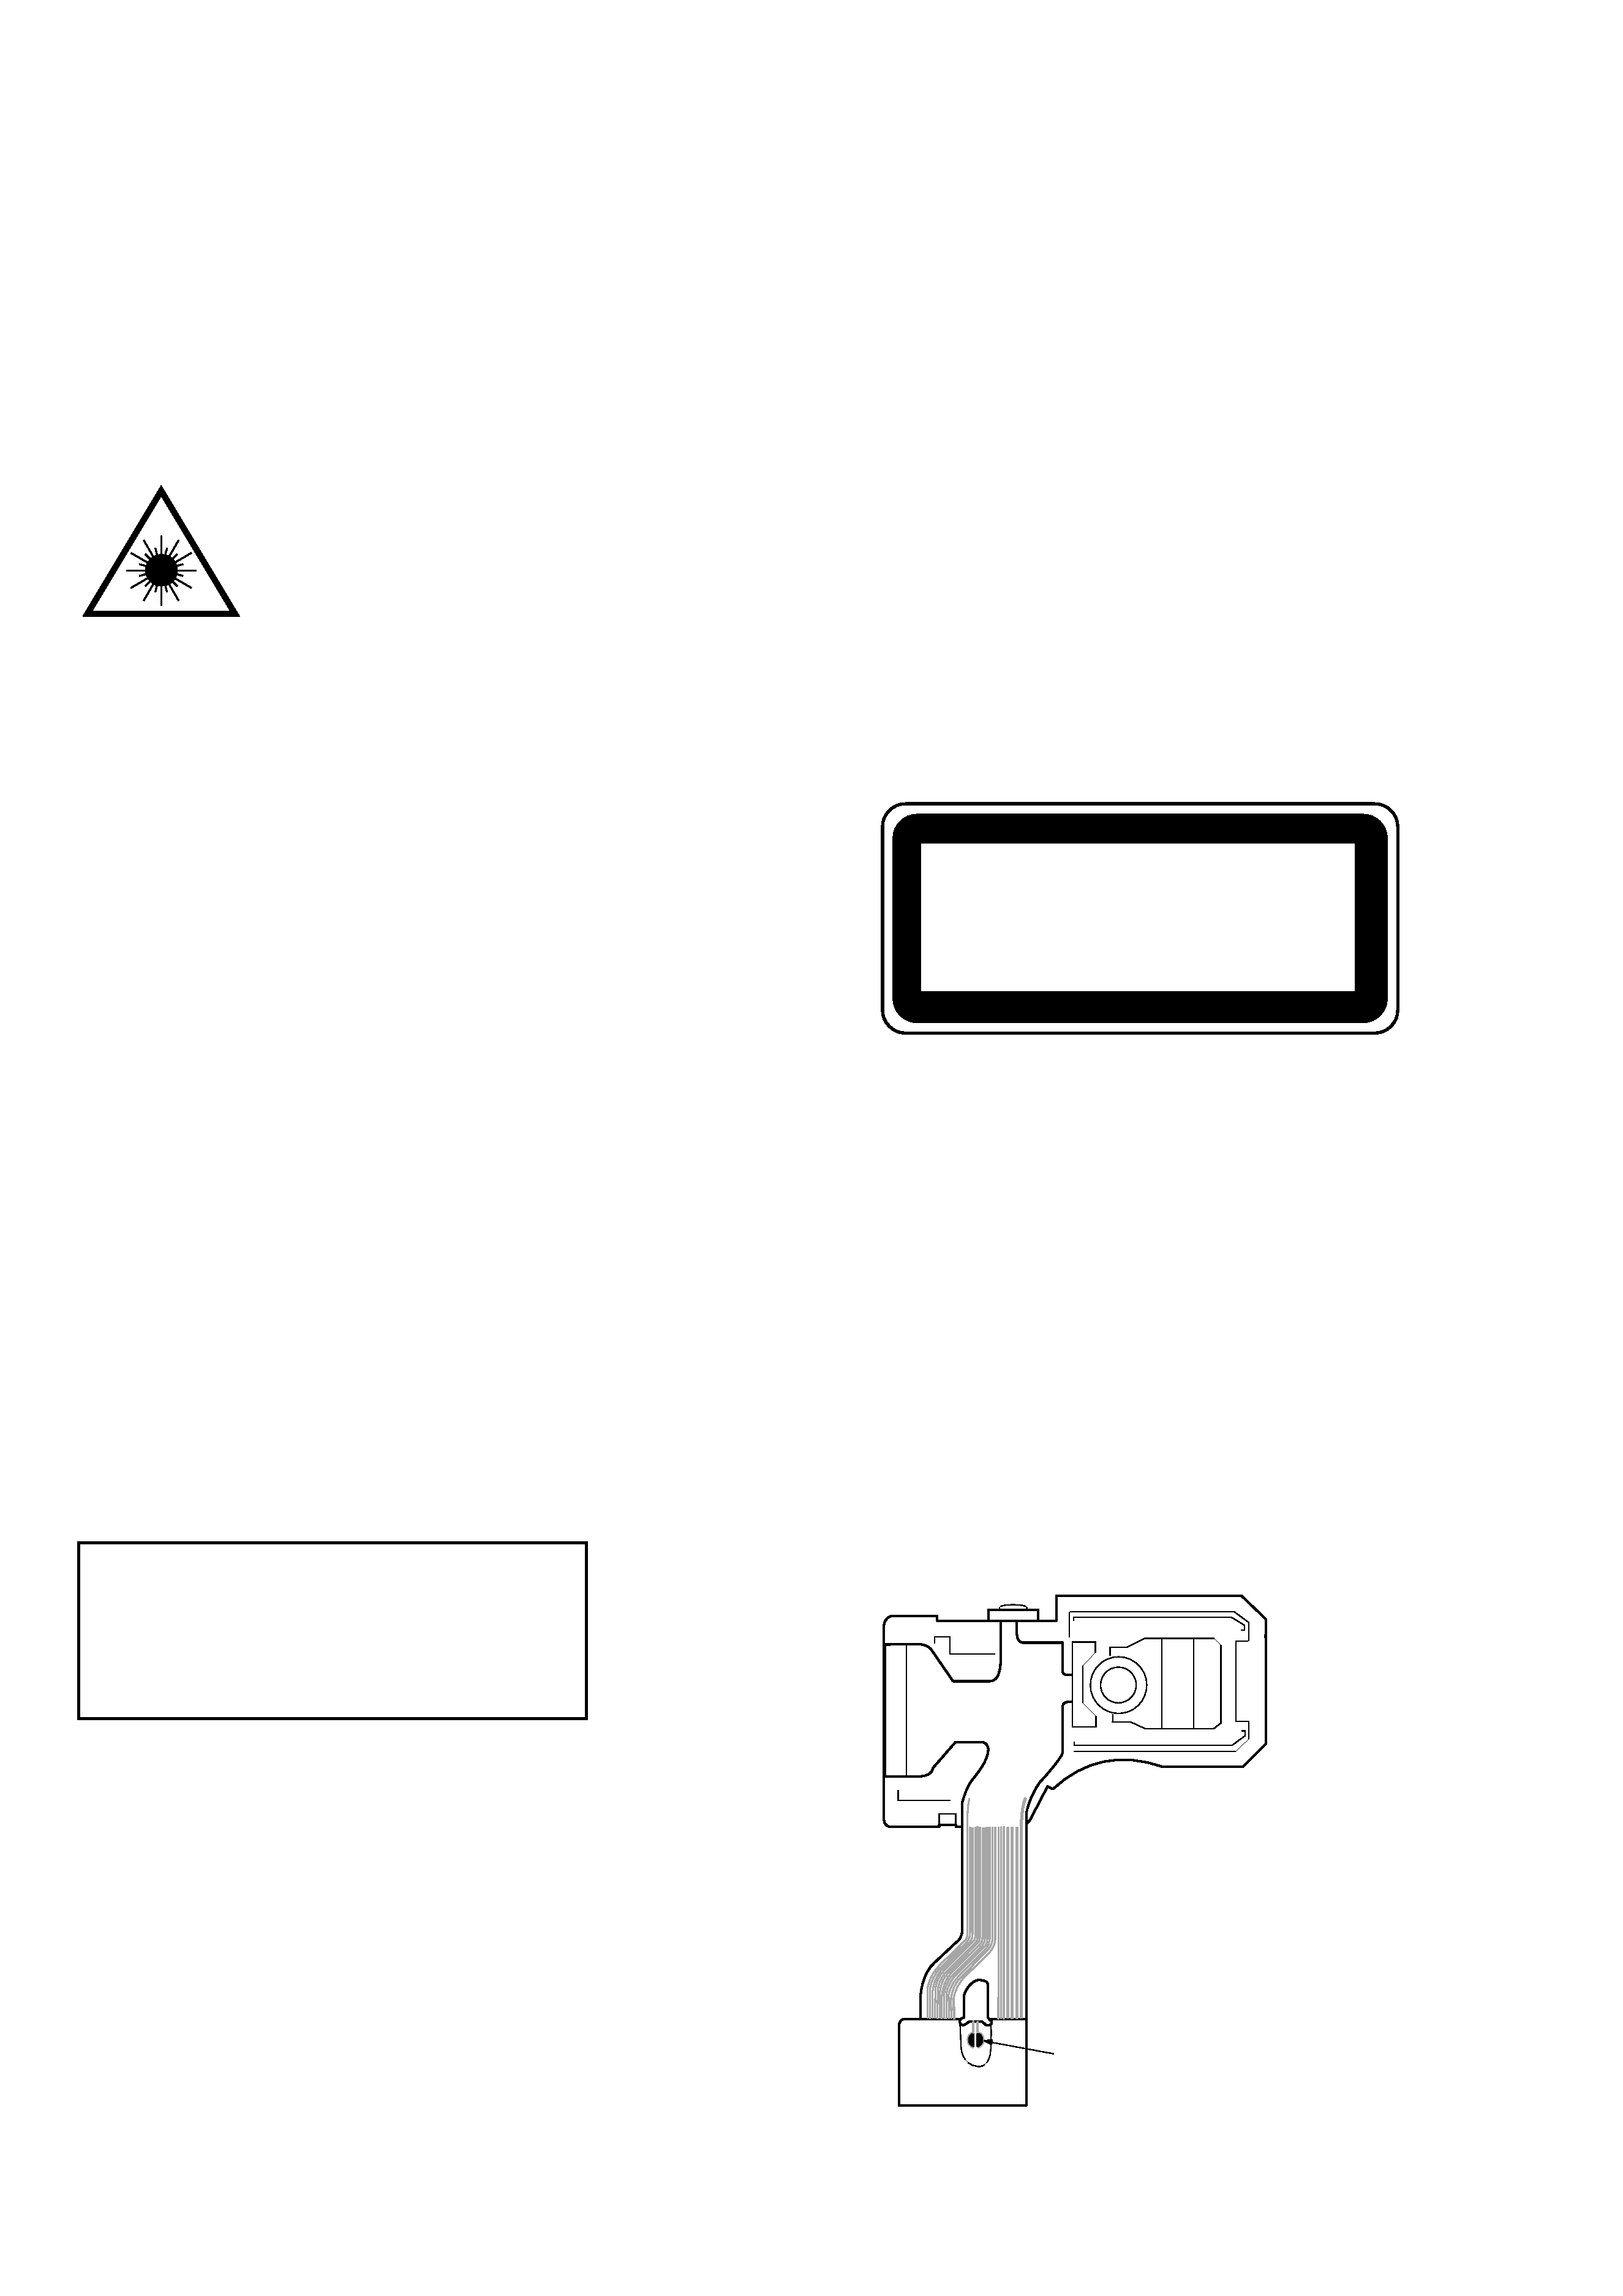
Precaution to replace Optical block
(KMS-330A)
Body or clothes electrostatic potential could
ruin laser diode in the optical block. Be sure
ground body and workbench, and use care the
clothes do not touch the diode.
1) After the connection, remove solder shown in
right figure.
PICK-UP Assy PWB
Solder

4
DISASSEMBLY INSTRUCTIONS
a
a
a
a
a
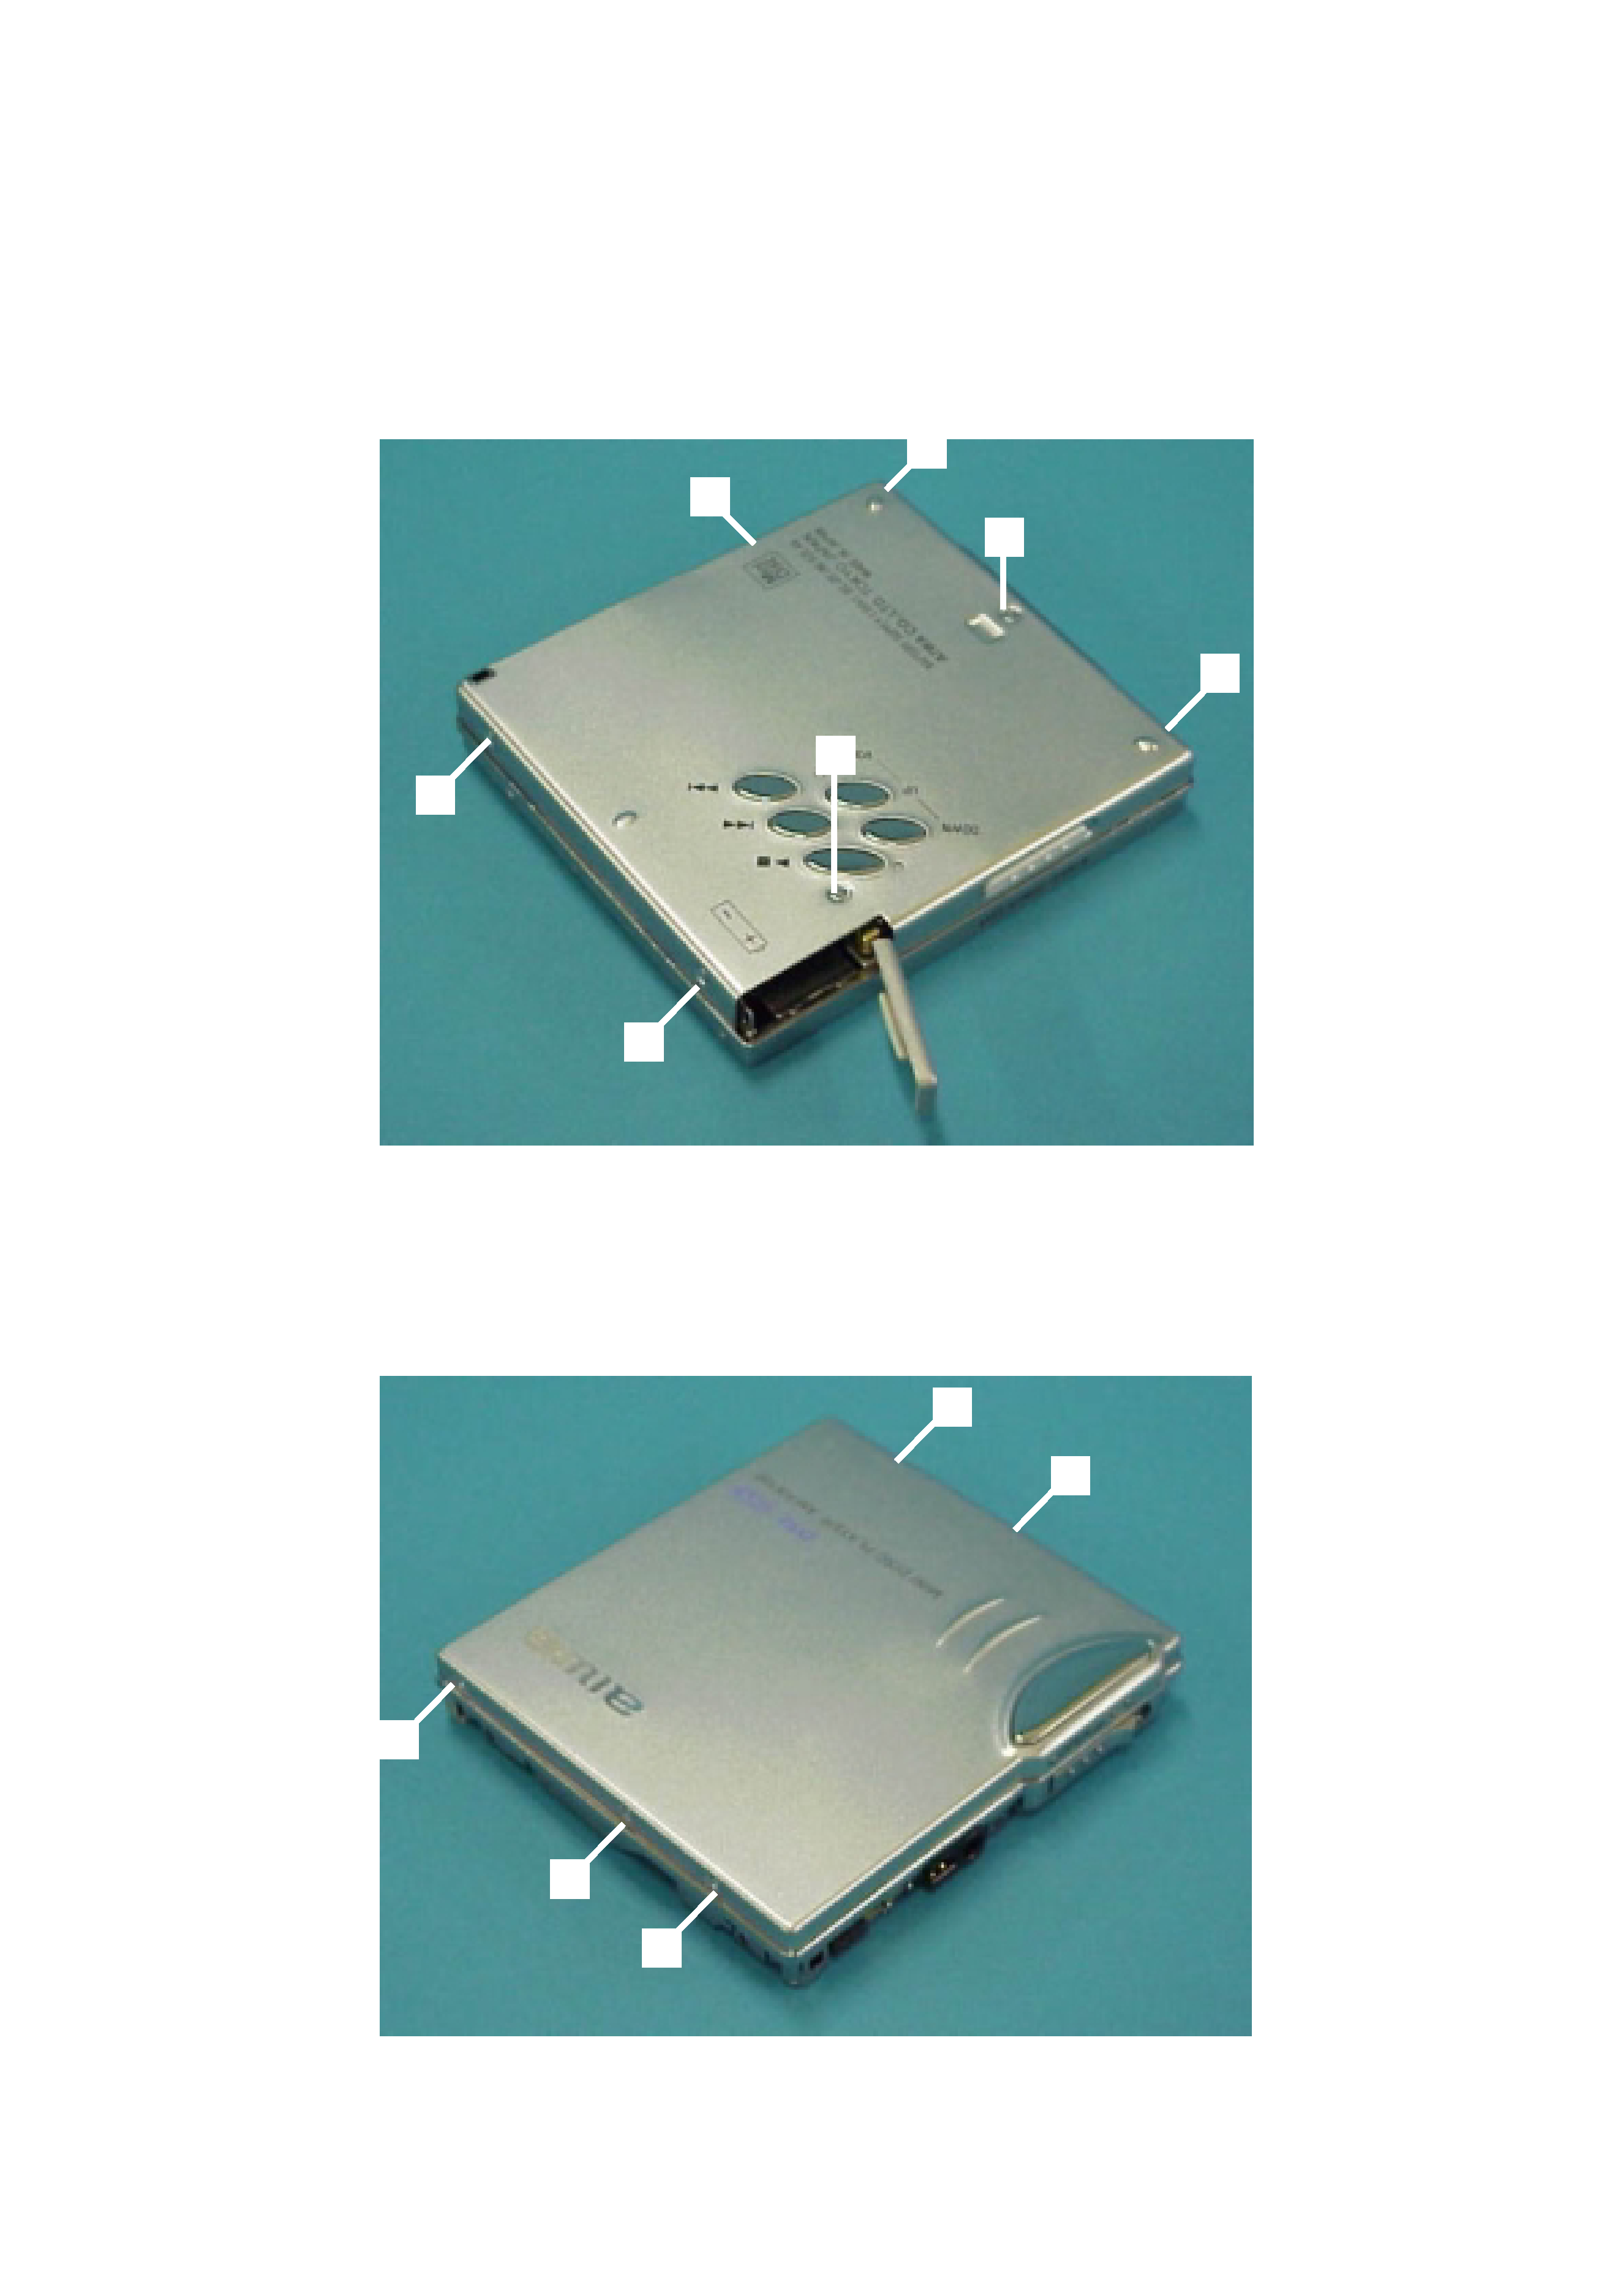
Removing only the PANEL, BOT can make the service position.
1. How to remove PANEL, BOT
(1) Remove the 5 screws a1-a5 (1.4-1.8) and the 2 screws b1,b2 (1.4-1.4).
(2) Take out PANEL, BOT.
* When assembling, put the PANEL, BOT from HP JACK side with care for strap hole and HOLD SW. Install the screws from 1 to 5 as shown in
the diagram.
2. How to remove PANEL, TOP
(1) Remove the 5 screws (a).
(2) Remove PANEL, TOP.
b2
a2
a1
a5
a4
a3
b1

5
b
c
BOSS
BOSS
c
c
a
a
a
PICK UP
SHORT LAND
HINGE, BATT
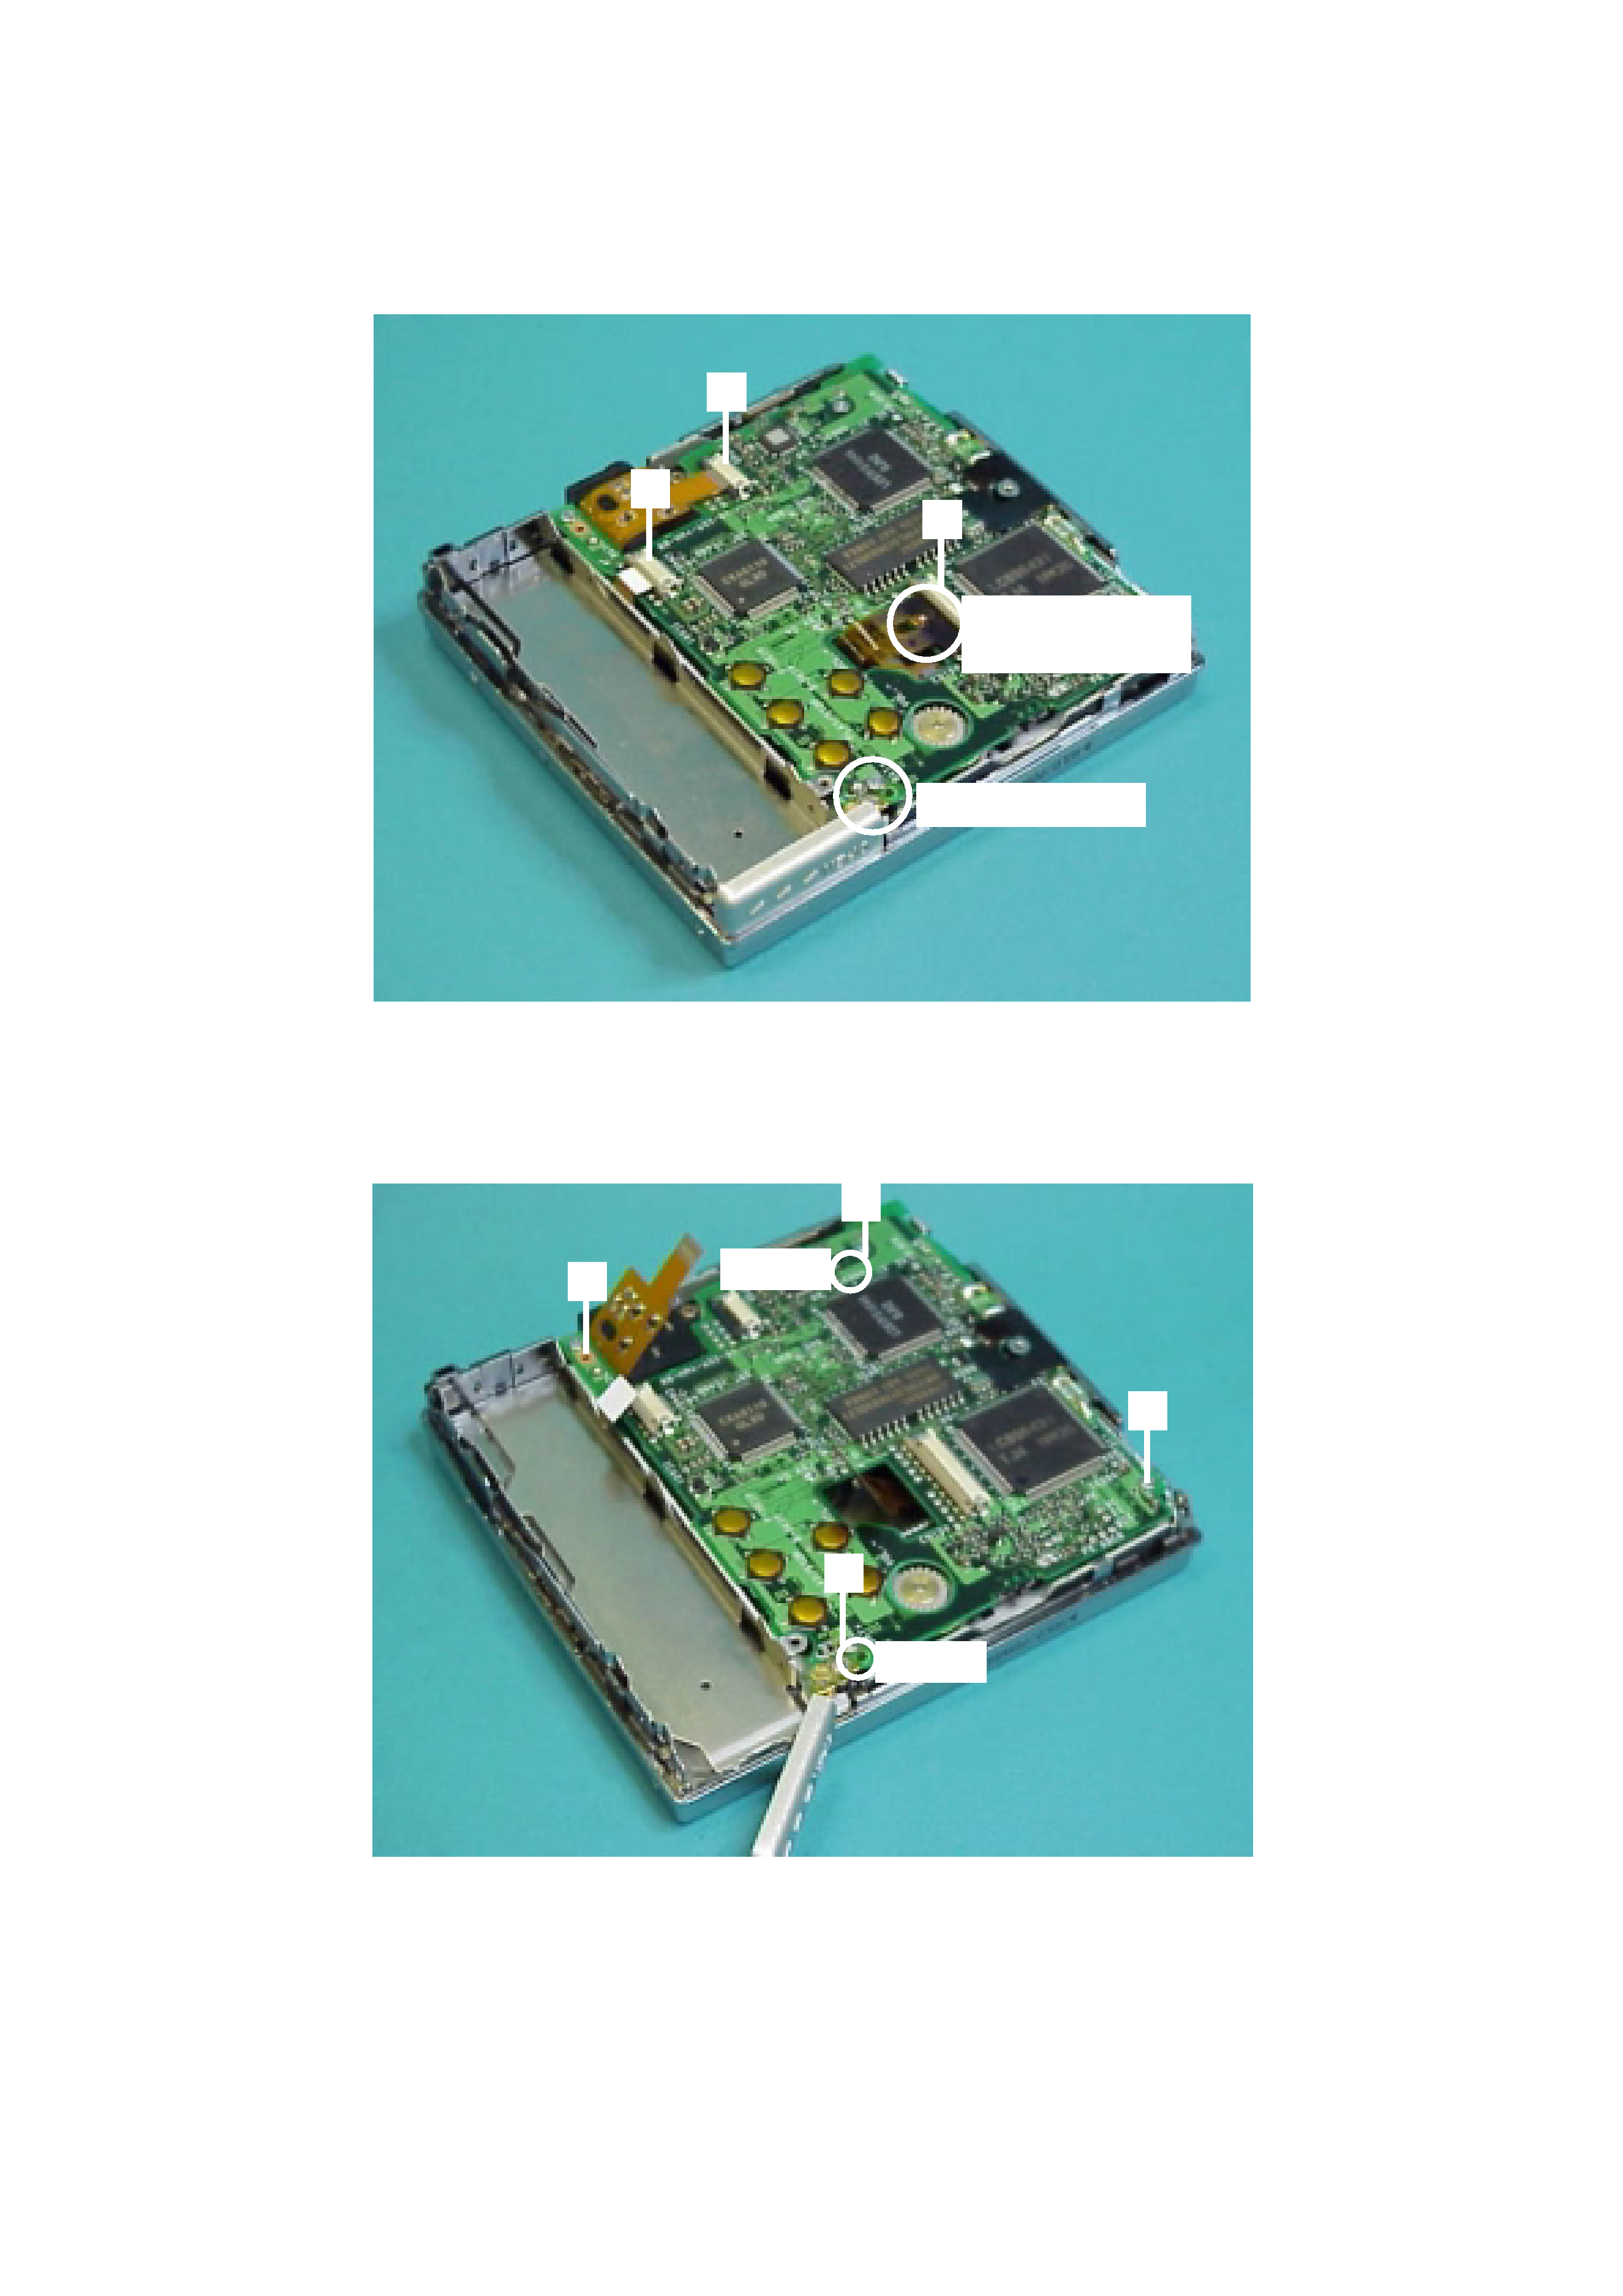
3. How to remove HLDR, BATT/PWB, MAIN
(1) Short the PICKUP Shortland.
(2) Remove the solders of HINGE, BATT and disconnect the 3 connectors (a).
(3) Remove the screw at b, 3 screws at c and then take out PWB, MAIN.
* Check that the 2 BOSS are inside the circuit board when assembling. Tighten the screw at b first.
